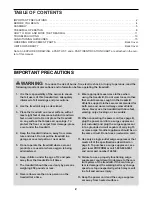
background image

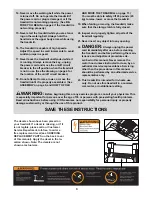
The decals shown have been placed on
your treadmill. If a decal is missing, or if it
is not legible, please call our Customer
Service Department, toll-free, to order a
free replacement decal (see ORDERING
REPLACEMENT PARTS on the back cover
of this manual). Apply the decal in the lo-
cation shown. Note: The decals are not
shown at actual size.

14. Never move the walking belt while the power

is turned off. Do not operate the treadmill if
the power cord or plug is damaged, or if the
treadmill is not working properly. (See BE-
FORE YOU BEGIN on page 4 if the treadmill is
not working properly.)   

15. Never start the treadmill while you are stand-

ing on the walking belt. Always hold the
handrails or the upper body arms while using
the treadmill.

16. The treadmill is capable of high speeds.

Adjust the speed in small increments to avoid
sudden jumps in speed. 

17. Never leave the treadmill unattended while it

is running. Always remove the key, unplug
the power cord and move the on/off circuit
breaker to the off position when the treadmill
is not in use. (See the drawing on page 4 for
the location of the on/off circuit breaker.)  

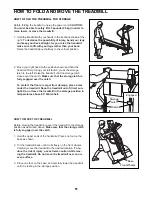
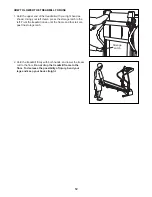
18. Do not attempt to raise, lower, or move the

treadmill until it is properly assembled. (See
ASSEMBLY on page 5, and HOW TO FOLD

AND MOVE THE TREADMILL on page 11.)
You must be able to safely lift 45 pounds (20
kg) to raise, lower, or move the treadmill.

19. When folding or moving the treadmill, make

sure that the storage latch is fully closed.

20. Inspect and properly tighten all parts of the

treadmill regularly.

21. Never insert any object into any opening.

22.

DANGER:

Always unplug the power

cord immediately after use, before cleaning
the treadmill, and before performing the main-
tenance and adjustment procedures de-
scribed in this manual. Never remove the
motor hood unless instructed to do so by an
authorized service representative. Servicing
other than the procedures in this manual
should be performed by an authorized service
representative only.

23. This treadmill is intended for in-home use

only. Do not use this treadmill in a commer-
cial, rental, or institutional setting.

WARNING:

Before beginning this or any exercise program, consult your physician. This

is especially important for persons over the age of 35 or persons with pre-existing health problems.
Read all instructions before using. ICON assumes no responsibility for personal injury or property
damage sustained by or through the use of this product.

SAVE THESE INSTRUCTIONS

3

Summary of Contents for CrossWalk GTS

Page 1: ...m new products prizes fitness tips and much more QUESTIONS If you have questions or if there are missing parts we will guar antee complete satisfaction through direct assistance from our factory TO AV...

Page 2: ...or less 8 Never allow more than one person on the treadmill at a time 9 Wear appropriate exercise clothes when using the treadmill Do not wear loose clothes that could become caught in the treadmill...

Page 3: ...ttempt to raise lower or move the treadmill until it is properly assembled See ASSEMBLY on page 5 and HOW TO FOLD AND MOVE THE TREADMILL on page 11 You must be able to safely lift 45 pounds 20 kg to r...

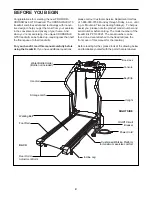
Page 4: ...800 999 3756 Monday through Friday 6 a m until 6 p m Mountain Time excluding holidays To help us assist you please note the product model number and serial number before calling The model number of t...

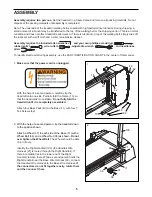
Page 5: ...this manual 75 11 103 38 36 37 11 21 99 40 40 40 62 62 1 2 2 With the help of a second person tip the treadmill down to the position shown Attach a Wheel 37 to each side of the Base 11 with a Wheel Bo...

Page 6: ...ndrail cannot be fully seated remove the outer Plastic Shim and then insert the Right Handrail Attach the Right Handrail 103 to the Base 11 with three 1 Bolts 8 and three 1 4 Star Washers 9 Do not tig...

Page 7: ...wing Insert the excess Wire Harness down through the opening in the Console Base see the inset drawing in step 6 above Securely tighten the plastic tie on top of the Console Base to prevent the Wire H...

Page 8: ...provides a path of least resistance for electric current to reduce the risk of elec tric shock This product is equipped with a cord having an equipment grounding conductor and a grounding plug Plug t...

Page 9: ...n is pressed the walking belt will begin to move Hold the handrails and begin walking As you exercise change the speed of the walking belt as desired by pressing the Speed buttons Each time a button i...

Page 10: ...tance in either miles or kilometers The letters MPH or KPH in the Speed display will show which unit of measurement is selected To change the unit of measurement hold down the Stop but ton insert the...

Page 11: ...ke sure that the storage latch is fully engaged over the catch To protect the floor or carpet from damage place a mat under the treadmill Keep the treadmill out of direct sun light Do not leave the tr...

Page 12: ...the storage latch to the left Pivot the treadmill down until the frame and foot rail are past the storage latch 2 Hold the treadmill firmly with both hands and lower the tread mill to the floor Do not...

Page 13: ...ss the switch back in PROBLEM The power turns off during use SOLUTION a Check the on off circuit breaker located on the treadmill frame near the power cord see the draw ing above If the on off circuit...

Page 14: ...of a turn Be careful not to overtighten the walking belt Plug in the power cord insert the key and run the treadmill for a few minutes Repeat until the walking belt is centered b If the walking belt...

Page 15: ...eases the demand on the heart to pump blood to the muscles and on the lungs to oxygenate the blood For aerobic exercise adjust the speed and incline of the treadmill until your heart rate is near the...

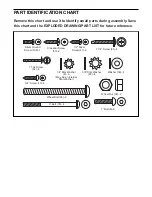
Page 16: ...crew 109 1 1 2 Silver Screw 47 2 1 Bolt 8 6 3 Bolt 78 4 3 8 Star Washer 29 4 1 4 Star Washer 9 6 May be an internal Star Washer Wheel Bolt 36 2 Remove this chart and use it to identify small parts dur...

Page 17: ...vot Bolt 59 1 Latch Decal 60 1 Motor Belly Pan 61 2 Cable Tie Clamp 62 4 1 Tek Screw 63 3 Releasable Tie 64 1 Choke 65 2 Belt Guide 66 6 Plastic Fastener 67 1 Walking Belt 68 1 Walking Platform 69 1 B...

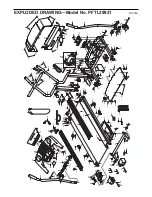
Page 18: ...83 39 83 39 66 7 48 16 38 38 75 13 4 73 80 13 66 3 52 82 79 77 52 3 17 17 6 31 32 79 48 86 87 90 91 92 98 95 111 97 96 93 89 88 57 61 49 49 101 29 29 13 47 42 25 81 81 70 70 108 106 107 104 104 34 57...

Page 19: ...d by or attributable to freight damage abuse mis use improper or abnormal usage or repairs not provided by an ICON authorized service center prod ucts used for commercial or rental purposes or product...

Reviews: