


18
15
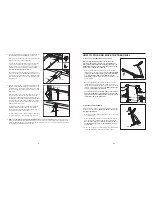
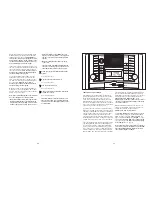
Follow your progress with the matrix and the
display.
See step 5 on page 12.
Measure your heart rate if desired.
See step 6 on page 13.
Turn on the fan if desired.
See step 7 on page 13.
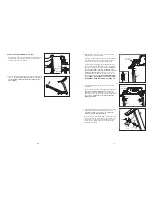
When you are finished exercising, remove the
key from the console.
When the program ends,
make sure that the in-
cline of the treadmill is at the lowest setting.
Next, remove the key from the console and put it in
a safe place.
Note: If the display remains lit
after the key is removed, the console is in the
“demo” mode. See page 24 and turn off the
demo mode.
When you are finished using the treadmill,
switch the on/off switch to the off position and
unplug the power cord.
7
6
5
4
HOW TO USE THE FITNESS TEST PROGRAM
The fitness test program measures your approximate
VO
2
max, or aerobic capacity. VO
2
max is a measure
of your ability to intake and utilize oxygen to generate
energy for endurance activities such as running and
cycling. In technical terms, VO
2
max is the maximum
volume of oxygen, in milliliters, that your body can use
in one minute, per kilogram of body weight. A high VO
2
max indicates a high level of cardiorespiratory fitness.
Note: To learn more about VO
2
max, refer to a rep-
utable book or consult your physician.
For the most accurate results, use the fitness test pro-
gram when you are not feeling tired, when you have not
eaten for at least two hours, and when you have not ex-
ercised for at least 24 hours. Follow the steps below to
use the program.
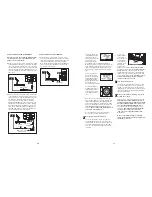
Put on the chest pulse sensor.
You must wear the chest pulse sensor to use
the fitness test program.
Insert the key into the console.
See HOW TO TURN ON THE POWER on page 12.
Select the fitness test program.
To select the fitness test program, press the Pulse
Control button repeatedly until the word “FIt” ap-
pears in the priority display.
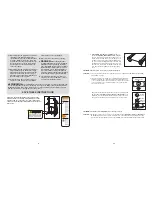
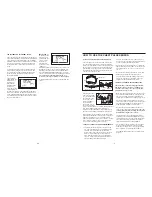
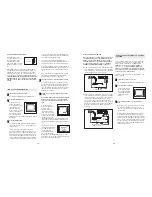
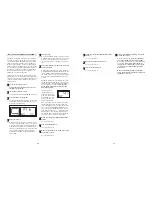
Enter your gender.
When the fitness test program is selected, the let-
ters “GEn” (gender) and “M” (male) or “F” (female)
will appear in the display (see the drawing above).
Press the increase and decrease buttons above
the Pulse Control button to enter your gender, and
then press the Start button. Note: Pressing the
Start button at this time will not start the fitness
test program.
Enter your age.
Next, the word “AGE” and the current age setting
will appear in the display. If you have not entered
your age, press the increase and decrease but-
tons above the Pulse Control button to enter your
age.
Press the Start button or the Speed + button to
start the program.
A moment after the button is pressed, the tread-
mill will automatically adjust to the first speed and
incline settings of the program. Begin walking on
the treadmill. Note: For the most accurate results,
do not hold the handrails during the fitness test
program.
During the program, the speed and incline of the
treadmill will periodically change. The speed set-
ting or the incline setting will flash in the display to
alert you before each change.
Important: The
Speed and Incline buttons will not function
during the program.
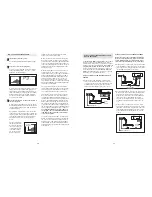
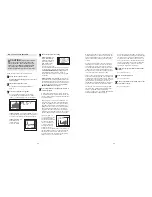
The program is de-
signed to last for nine
minutes. When the pro-
gram ends, the walking
belt will slow to a stop
and your VO
2
max will
appear in the display.
Note: If your pulse is not detected for several sec-
onds during the program (the letters “PLS” will
flash in the display), or if your heart rate exceeds
85% of your age-predicted maximum heart rate
for several seconds during the program, the pro-
gram may stop and “Vo2 – – –” may appear in the
display. If this occurs, try the program again on
another day. Make sure that you are wearing the
chest pulse sensor as described on page 9.
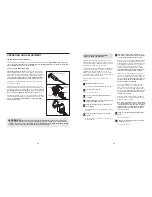
Follow your progress with the matrix and the
display.
See step 5 on page 12.
Turn on the fan if desired.
See step 7 on page 13.
When you are finished exercising, remove the
key from the console.
See step 8 on page 15.
9
8
7
6
5
4
3
2
1


