

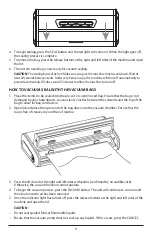

4. To begin sealing, press the SEAL button and the red light will come on. When the light goes off,
the sealing process is complete.
5. To remove the bag, press the release buttons at the right and left sides of the machine and open
the lid.
6. The custom sized bag is now ready for vacuum sealing.
CAUTION:
The sealing bar will be hot! Make sure you give the machine time to cool down. Wait at
least 20 seconds between seals. Under very heavy usage, the machine will shut off automatically to
prevent overheating. If it does, wait 25 minutes to allow the machine to cool off.
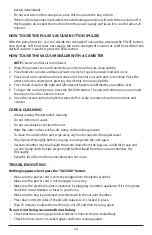
HOW TO VACUUM SEAL WITH THE VACUUM BAGS
1. Place the item(s) to be sealed into the pre-cut or custom sized bag. Ensure that the bag is not
damaged by any sharp objects. Leave at least 2 inches between the contents and the top of the
bag to allow for bag contraction.
2. Open lid and place the open end of the bag down into the vacuum chamber. Ensure that the
bag is free of creases, dry and free of residue.
3. Press the lid closed at the right and left sides with palms (confirmed by an audible click).
Otherwise, the vacuum function cannot operate.
4. To begin the vacuum process, press the VACUUM button. The unit will continue to vacuum and
then seal once the air has been removed.
5. Once the indicator light has turned off, press the release buttons at the right and left sides of the
machine and open the lid.
CAUTION :
• Do not seal spoiled food or flammable liquids.
• Ensure that the vacuum pump does not suck up any liquids. If this occurs, press the CANCEL
9
Summary of Contents for HPRV100
Page 1: ...HPRV100 USER MANUAL VACUUM SEALER...
Page 2: ...Hydrofarm com 2...