PRISM+ PG240 User Manual Download Page 13

13

Section 9: 

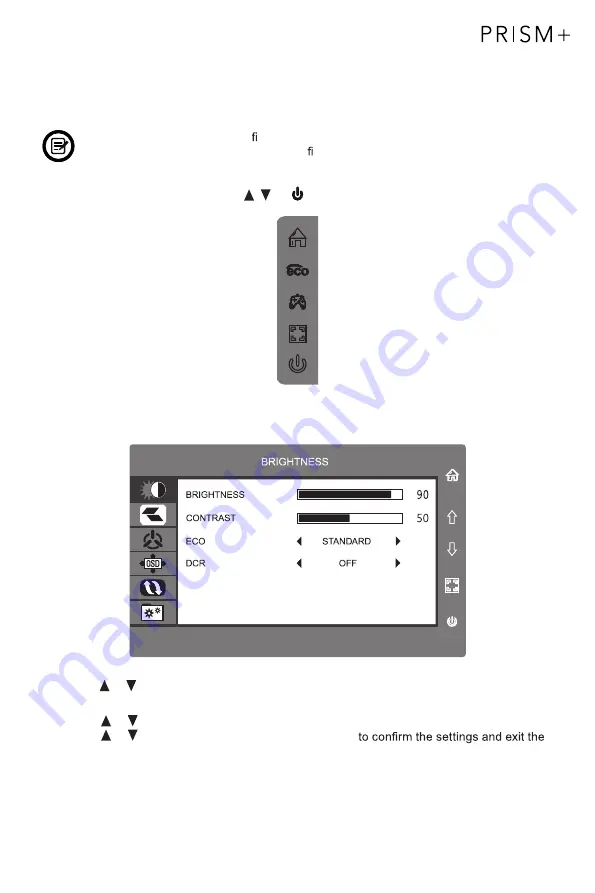
The On-Screen Display (OSD) Menu may be used to adjust your monitor’s settings and 

appears on screen after turning on the monitor and pressing the 

M

 button.

When using the monitor for the  rst time, settings will automatically adjust to optimal 

settings according to your computer’s con guration and parts etc.

1.   Press any one of the buttons (

M

,  ,  , E,  ) to activate the navigator screen.  

2.   Press 

M

 to enter the OSD screen.

3.   Press   or   to browse functions.
-   Highlight the desired function and then press 

M

 to enter the sub-menu.

-   Press   or    to browse sub-menus then press 

M

 to highlight the desired function.

-   Press   or    to highlight an option and then press 

M

current screen.

4.   Press 

E

 to exit the current screen.

On-Screen Display (OSD)

Summary of Contents for PG240

Page 1: ...PG240 User Manual...

Page 2: ......

Page 3: ...7 Section 5 Mount Installation 9 Section 6 Connectivity Options 10 6 1 Connecting Your Earphones 10 6 2 DP Connectivity 10 6 3 Connecting the Power Cable 11 6 4 HDMI Connectivity 11 Section 7 Basic Op...

Page 4: ...ortable heaters heating vents or any device that produce heat as it may cause a fire 5 Do not spray cleaner or any kind of liquid directly onto the monitor s screen or any part of the monitor 6 Do not...

Page 5: ...5 Section 2 Box Contents Monitor x 1 Stand Stem x 1 Stand Base x 1 Power Adapter x 1 DC 12V 4A Screws 12mm x 3 DP Cable x 1 User Manual x 1 Screws 23mm x 5 PG240 User Manual...

Page 6: ...end to the monitor s DP port 8 9 Power Connector Insert the power cable to supply power to the monitor 1 M Menu Button Press to display the OSD menu or enter sub menus 2 Down Button Press to navigate...

Page 7: ...before attaching the stand 1 Open the packaging gently take out the foam and monitor 2 Remove the upper foam keep the monitor laying on the nether foam 3 Take out the stand stem and stand base and fa...

Page 8: ...8 4 Insert the stem to the slot of back cover then lock with 4pcs of 23mm screws Screws are in the accessory bag 5 Gently lift the monitor up and enjoy using it...

Page 9: ...he upper foam keep the monitor laying on nether foam 3 Take out 4pcs of Spacer Screw 25mm VESA Connector in the accessory bag and lock them in back cover with a straight screwdriver 4 Follow the direc...

Page 10: ...eceive DP signals from the computer use the DP cable to connect the monitor to the computer DP Cable Included Earphones Not included Plug in your earphones to receive audio signals from your monitor I...

Page 11: ...power cable to the power connector and then plug the other end into a wall outlet 6 4 HDMI Connectivity For the monitor to receive HDMI signals from the computer use an HDMI cable to connect the monit...

Page 12: ...his feature is off by default To use this feature please note that you must have hardware with FreeSync capability a DP or HDMI cable and the latest graphic drivers To use this feature connect your co...

Page 13: ...s according to your computer s con guration and parts etc 1 Press any one of the buttons M E to activate the navigator screen 2 Press M to enter the OSD screen 3 Press or to browse functions Highlight...

Page 14: ...0 0 100 Set OSD language 0 100 Adjust the OSD horizontal posi on 0 100 Adjust the OSD vertical position 0 60 0 100 H POSITION V POSITION Adiust horizontal position of the picture of source Adiust pict...

Page 15: ...1 HDMI 2 DP OFF Normal Flicker High Middle Low Off Display the input signal LED EFFECT OVER DRIVER Low blue ray FreeSync 0 100 0 100 Adjust audio volume Set blue light filtering level Turn the FreeSy...

Page 16: ...your game choose the corresponding game icon These game icons are primarily designed to optimize your aim during shooting games though they can be used for other scenarios Press Game FPS and RTS modes...

Page 17: ...olution DP1 2 1920x1080 165Hz HDMI2 0 1920x1080 120Hz Backlight E LED Typical Brightness 300cd m2 Default Color Temp 6500 Contrast Ratio 1000 1 Static Response Time GTG 1ms Refresh Rate 165Hz Ports DP...

Page 18: ......

Page 19: ...108 007 12901 PG240 2020 11 13 V01 SF2EG feihong PRISM 120g 140x210mm...

Reviews: