14
EN
Congratulations!
You have purchased a Princess product. Our aim
is to provide quality products with a tasteful
design and at an affordable price. We hope
that you will enjoy this product for many years.
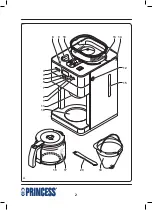
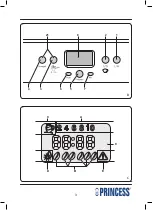
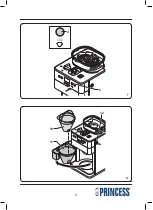
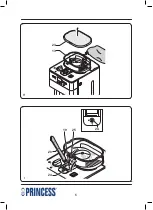
Description (fig. A - C)
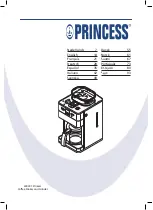
Your 249401 Princess coffee maker has been
designed for making coffee with coffee beans
or ground coffee. The appliance is suitable for
indoor use only. The appliance is suitable for
domestic use only.
1. On/off button / On/off indicator
(coffee maker)
2. On/off button / On/off indicator
(grinding function)
3. Coffee quantity selector
4. Coffee strength selector
5. PROGRAM button
6. HOUR button
7. MINUTE button
8. Display
9. Ground coffee fineness selector
10. Coffee filter holder
11. Filter holder assembly
12. Release button (filter holder assembly)
13. Coffee bean compartment
14. Water reservoir
15. Water level indicator
16. Coffee pot
17. Coffee level indicator
18. Heating plate
19. Grinding compartment
20. Brush / screwdriver
21. Descale button
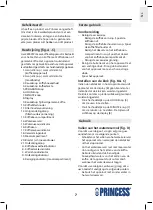
A. Coffee quantity indicator
B. Coffee strength indicator
C. Keep-warm indicator
D. Descaling indicator
E. Cleaning indicator (grinding compartment)
Initial use
Preparation
Clean the accessories:
•
- Clean the coffee pot in soapy water.
Rinse the coffee pot.
- Clean the coffee filter holder in soapy
water. Rinse the coffee filter holder.
- Clean the lid of the coffee bean
compartment in soapy water. Rinse the
lid of the coffee bean compartment.
- Thoroughly dry the accessories.
Clean the outside of the appliance with a
•
damp cloth. Dry the outside of the appliance
with a clean, dry cloth.
Rinse the appliance.
•
Setting the clock (fig. B & C)
If the mains plug is inserted into the wall
socket, the display (8) will light to indicate that
the clock can be set. The clock can be adjusted
at any time later on.
Repeatedly press the HOUR button (6) to
•
set the hours.
Repeatedly press the MINUTE button (7) to
•
set the minutes. The time is shown on the
display (8).
Use
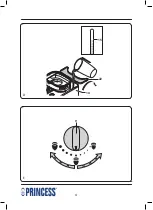
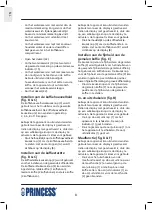
Filling the water reservoir (fig. D)
Before you proceed, we need you to pay
attention to the following notes:
- Before filling the water reservoir, switch off
the appliance and remove the mains plug
from the wall socket.
- Do not fill the water reservoir with more
water than required for making the coffee.
Only use the amount of water required for
making the coffee. The appliance
automatically stops when the water
reservoir is empty.
Before you proceed, we would like you to
focus your attention on the following notes:
- Do not use the appliance without water in
the water reservoir.
- Do not exceed the maximum mark when
you fill the water reservoir. Make sure that
the water level is always above the minimum
mark during use.
- Only use cold water to fill the water
reservoir.
- Do not use carbonated water or other
liquids to fill the water reservoir.
- Do not pour water in the coffee bean
compartment.
Summary of Contents for 249401
Page 2: ...2 2 8 9 13 14 19 12 15 11 4 3 6 5 7 2 1 18 16 17 20 10 A...
Page 3: ...3 8 C A E B D 8 2 21 1 5 6 3 4 7 C B...
Page 4: ...4 9 15 22 14 E D...
Page 5: ...5 12 10 11 2 2 G F...
Page 6: ...6 24 25 20 24 19 23 13 I H...
Page 85: ...85 EL 8 3 4 8 D C 8 3 4 8 D C on off 1 14 D 8 3 x 1 mm2...
Page 86: ...86 EL...
Page 87: ...87 AR...
Page 88: ...88 AR 8 4 3 C 8 8 3 4 C 8 1 14 8 2 1 3...
Page 94: ...94...
Page 95: ...95...
Page 96: ...Princess 2011 08 11 V4...

