1
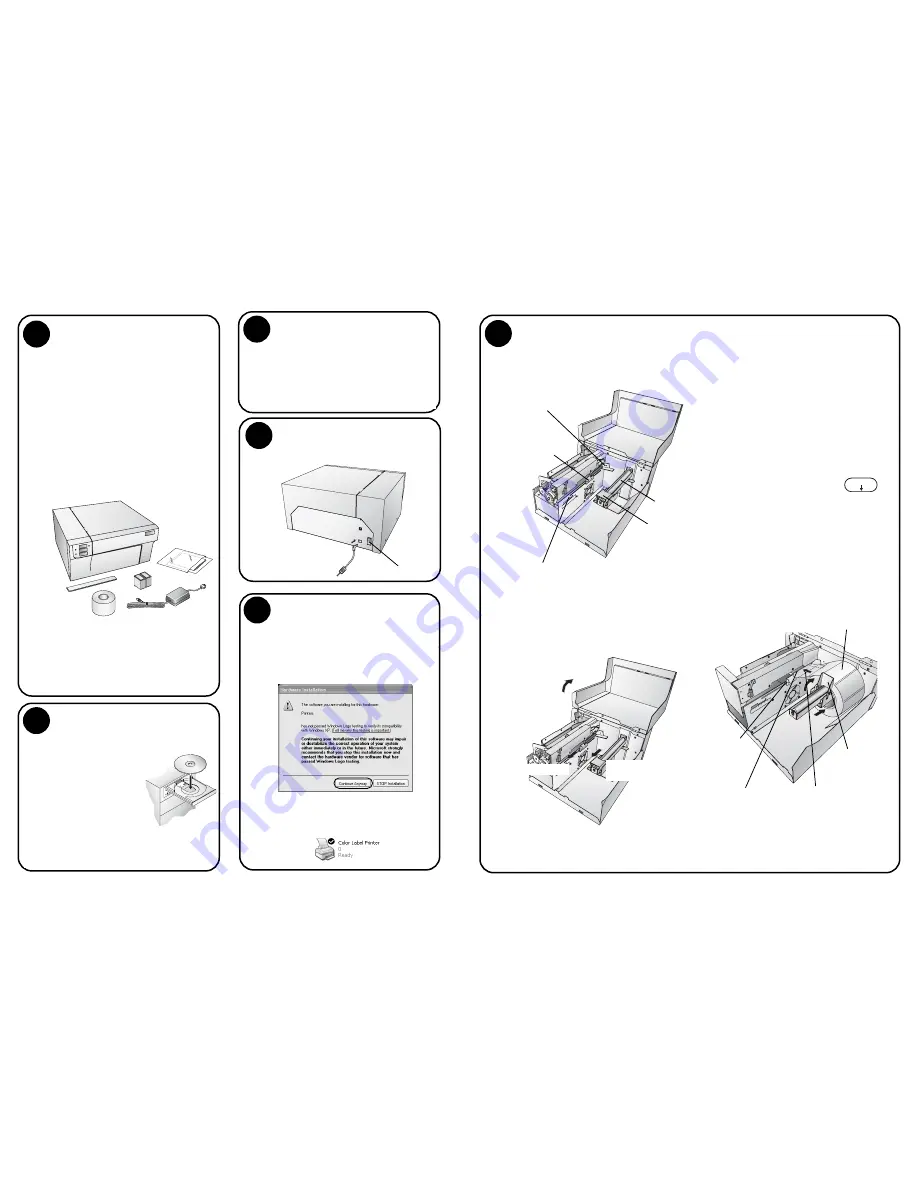
Unpack Your Printer
•
Printer
•
Separate Power Cord
•
Power Adapter
•
Software Installer CD
•
Color Ink Cartridge, Reorder # 53335
•
Dye-Based Black Ink Cartridge,
Reorder # 53336
•
Starter roll of label stock 6" x 4" High-Gloss
•
Tear Bar Guard (This is a white plastic
shield attached to the Tear Bar for
shipping and can be simply pulled from
the tear bar to reveal the serrated edge.
This guard is recommended for use when
using pre-perforated label material.)
•
Warranty Statement and Registration Card
•
This manual and other printed information
Note
For optimal printing speed you must have
a PC with the following minimum
specifications:
•
Pentium IV Processor
•
512 MB of RAM
•
5 GB of Free Hard Drive Space
5
Install Label Material
2
Quick Start Installer
The installer should prompt you to install label
material. It is recommended for the first install
that you use the starter label roll that ships with
your printer.
1. Open the Top Cover.
2. Lower the Roll Guide and pull it outward to
make room for your label stock.
3. Pull the Movable Throat Guide outward to
make room for the label stock.
4. Remove any shipping tape from your label
stock roll to ensure that it can unroll freely,
making certain that no adhesive portion is
exposed. It is important to note that any
exposed adhesive surface can attach itself the
the inner workings of the print mechanism
and cause a media jam.
5. Place your roll of label stock on the Roll Arm
and push it inward until it touches the stop.
6. Flip up the Roll Guide and slide it inward
until it touches the label stock. (The Roll
Guide will automatically pull back slightly
to the correct position)
7. Place the leading edge of label
stock under the "label stock"
symbols on the Throat Guides. The label
stock should be placed far enough into the
throat of the printer to correctly position the
Movable Throat Guide but not yet into the
printer itself. The label stock should be
biased against the Fixed Throat Guide.
8. Slide the Movable Throat Guide inward until
it
almost
touches the label stock. There must
be slightly more space between the Throat
Guides than the width of the label stock.
If the label stock is pinched by the guides,
poor print quality or even feeding problems
could result.
9. Feed the label stock further into the printer
until it senses the label and automatically
feeds it through the printer.
Roll Arm
Movable Throat Guide
Sensor Position Adjust
Roll Guide
Fixed Throat Guide
2. Lower the Roll Guide
and Pull it Outward.
1. Open Cover.
3. Pull Throat Guide Out.
5. Place label stock
on Roll Arm.
6. Slide Roll Guide
assembly inward.
8. Slide Throat
Guide inward,
until it
almost
touches the
label stock.
1. Insert the Installation CD into your
computer. In a few moments the installer
program should
launch automatically.
If not, perform the
following steps:
a. Double click
My
Computer
Icon,
then double click
the icon of the
appropriate CD drive containing the
software installer disc.
b. Double click INSTALL.exe then click
the Quick Start Install Button.
Apply Power
3
Turn on the Power Switch.
Power Switch
Plug in the USB Cable
After a few moments Windows will detect
the printer and attempt to install the printer
driver. Follow the on-screen prompts to
install the driver. You will be prompted with
a dialog box like the one shown here:
Click "Continue Anyway".
Once installed the "Color Label Printer" icon
will appear in the printers folder.
Connecting the USB Cable
4
9. Feed the label stock further
into the printer until it senses the
label and automatically feeds it
through the printer.
7. Place the leading edge of
the label stock just past the
Throat Guides.
Label Stock
2
Quick Start Installer
(continued)
2. In the installer application click the Quick
Start Install Button. The QuickStart Install
will guide you step-by-step through the
installation process. As you complete each
step, click Next. Steps 3-7 are shown below
as well as on the monitor. You may follow
either to complete the setup.


