22 Using the CD Color Printer Pro with Windows
To do this, refer to the following steps:
1. Verify that a CD tray is installed in the printer. Also, verify
that the printer is powered ON and that it is connected to
your computer. (Do not use a cardboard CD template for
best accuracy).
2. Click on the
Centering Test Print
button of the
Image Placement box within the Calibration
window. The printer will begin printing the
calibration test print.
3. When the print is complete, rotate the CD 180
o
in the CD
Tray and repeat step 2 using the same CD.
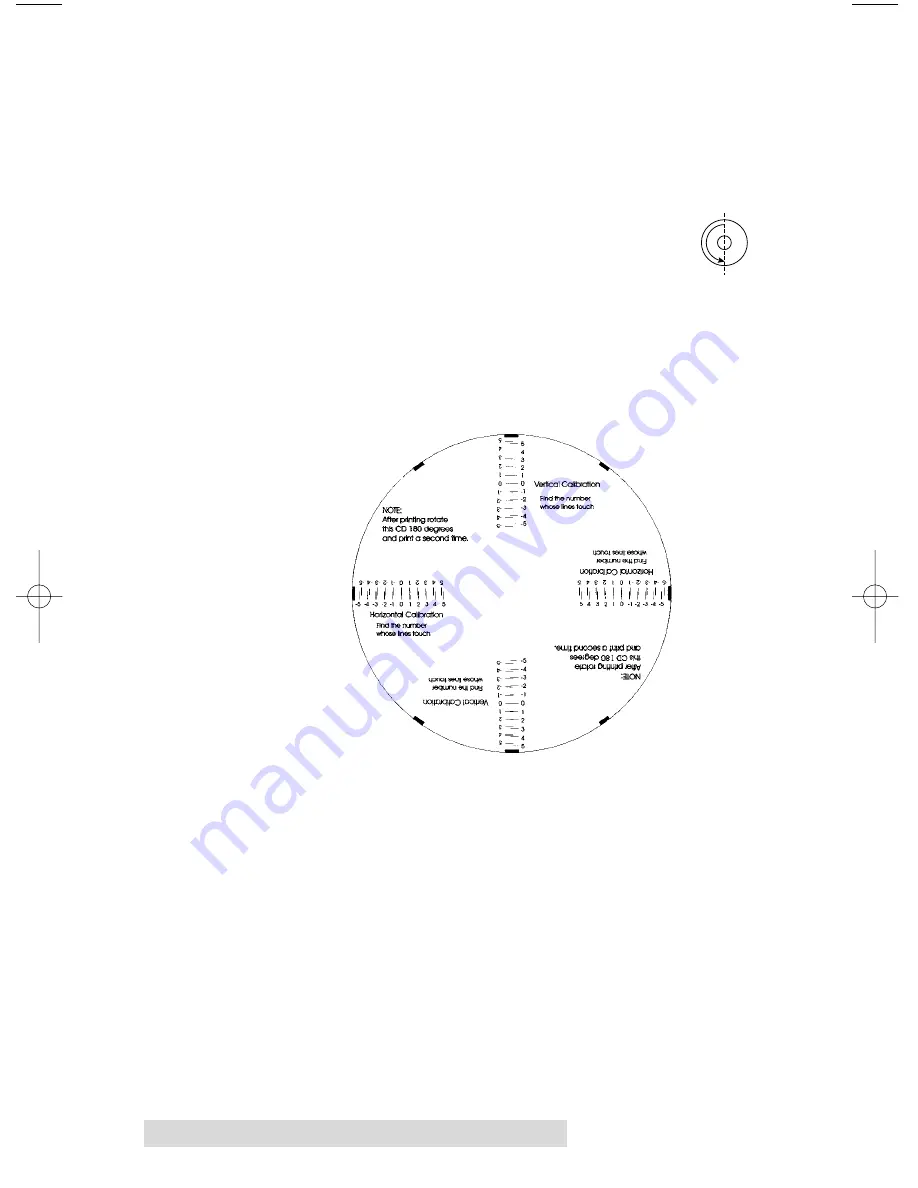
4. When the second run of the print is compete, you should
have a test print that looks like the following:
5. Along the Vertical axis of the printed CD template, find the
number whose lines touch. For example, in the above
illustration, the number would be 0. Enter that number into
the Vertical box of the Calibration window. Repeat this
same step for the Horizontal axis. In the above illustration
this number would be 0.
6. Select the
OK
button. The numbers you entered will be
sent and stored inside the printer’s memory. Your images
should now reflect any changes you made. Note that the
numbers always are shown as 0,0 initially and these values
sent are added to or subracted from the currently stored
offsets.
510119.qxd 1/23/2004 9:12 AM Page 22
Summary of Contents for CD Color Printer Pro
Page 1: ...012204 510119 06 User s Manual 2001 All rights reserved CD Color Printer Pro...
Page 8: ...viii...
Page 41: ......
Page 42: ......
Page 43: ......
Page 44: ...Printed in the United States of America P N 510119...


