background image

Maintenance and Troubleshooting

53

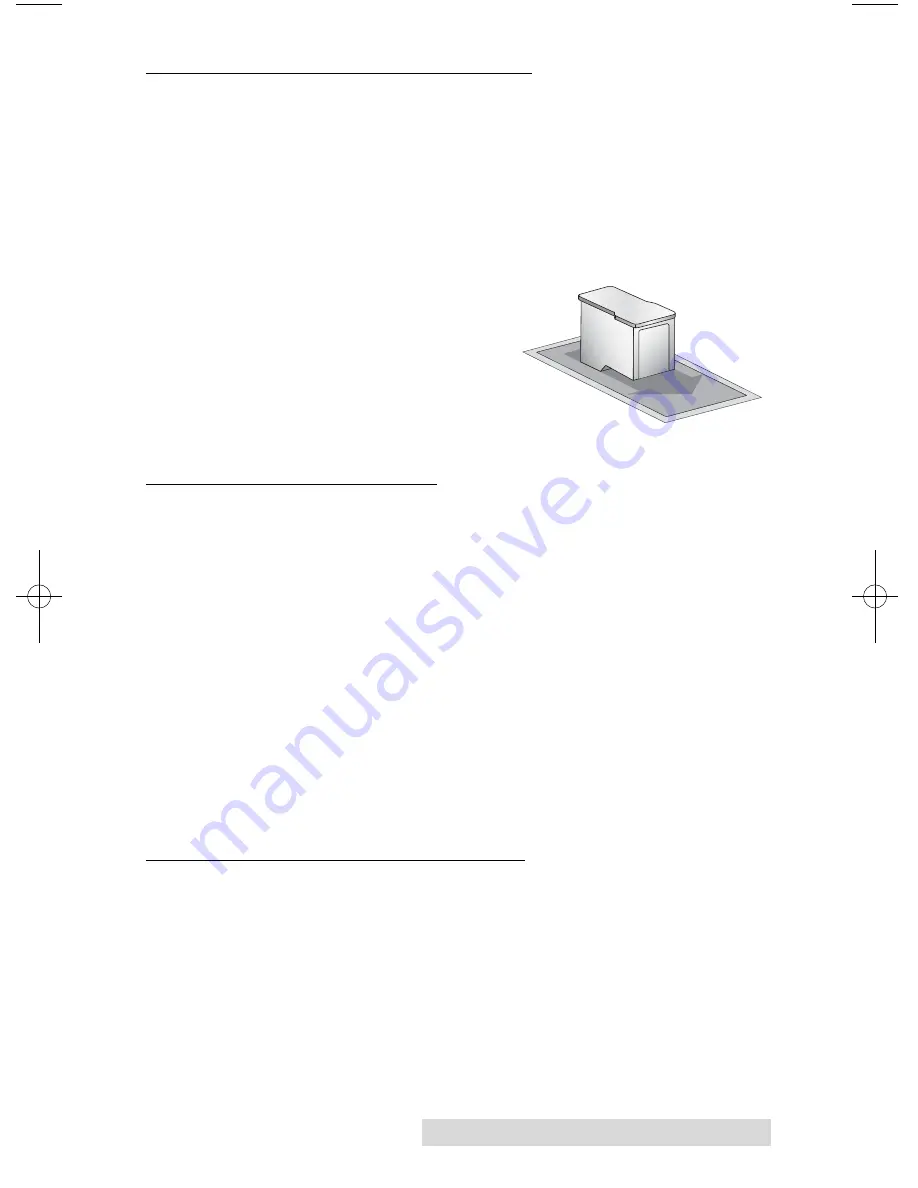
D. CLEANING THE INK CARTRIDGES

It may be necessary to clean the ink cartridge nozzles if you

notice reduced print quality, or if you suspect an cartridge noz-

zle has become slightly dried out or clogged.  If you are having

print quality problems, follow the steps below:
1.  Remove the print cartridges.
2.  Moisten a lint-free cloth with water.
3.  Hold the cloth against the

nozzles for three seconds.

This will “wick” some 

additional ink onto the

damp cloth.

4.  Wipe in the direction shown.
5.  Repeat the process.

E. CLEARING A MEDIA JAM

If a disc should become jammed inside the printing area of the

Publisher, with the lid closed press the Cartridge Button. This

will eject the Printer Tray. Then open the lid. The Cartridge

Carrier will move to the center position automatically. WAIT

FOR THE CARTRIDGE CARRIER TO STOP MOVING! Then

carefully move the cartridge carrier assembly to the left to gain

access to the printer tray.
The cover must be closed for this operation to complete.

However, in order to access the buttons you must open the

cover. To get around this problem simulate closing the cover by

activating the cover lock sensor. You may do this by putting an

object such as a folded piece of paper in the slot where the lock

would normally be located.

F.

TRANSPORTING THE PUBLISHER

To prevent damage to the Publishers robotic arm during 

shipment, it is important to properly secure it.
To prepare for transport, remove the ink cartridges and disc

holders, close the front cover and then do the following:
1.  With the front cover closed, switch off power to the unit.
2.  Press and hold the Cartridge Button.

510951.qxd  11/24/2009  2:26 PM  Page 53

Summary of Contents for Bravo XR Series

Page 1: ...SER S MANUAL For Macintosh and PC 2009 All rights reserved 112409 510951 For the most recent version of this manual please visit http www primera com manuals html Bravo XR Series Disc Publishing Syste...

Page 2: ...l not occur in a particular installation If this equipment does cause harmful interference to radio or television reception which can be determined by turning the equipment off and on the user is enco...

Page 3: ...tep 1 Add Data 19 Step 2 Add Print 20 Step 3 Start Project Summary Settings 21 B3 Robot Options 24 B4 Publisher Status 25 B5 Backup Project PC Disc Publisher Only 26 B6 Rip Audio PC Disc Publisher Onl...

Page 4: ...ith the icon and the document will jump to that page If you want to return to the Table of Contents move the icon to the top of the page and click on the arrow marked TOC Navigating through the Index...

Page 5: ...and on the Mac in the applications directory NOTE ON TERMS AND CONVENTIONS From this point forward the following terms and conventions will apply The Bravo XRP Disc Publisher will be abbreviated simpl...

Page 6: ...your Publisher inspect the carton to ensure that no damage has occurred during shipping Make sure that all supplied accessories are included with your unit The following items should be included Opti...

Page 7: ...ecorder is automatically loaded and unloaded by the Publisher s Robotic Disc Transporter The Recorder Tray Button manually opens or closes the Recorder Tray In normal operation the in out movement of...

Page 8: ...cement When the front cover is closed pressing the Ink Cartridge button will open or close the Printer Tray Must override cover lock sensor to simulate cover closed condition The Input Output Bins are...

Page 9: ...least 10 GB Available USB 2 0 Port This looks the same as a USB 1 0 port Make sure you have a USB 2 0 port for optimal performance If your PC does not have these minimum system requirements system per...

Page 10: ...r Trays then automatically shut If a disc does not record properly meaning that all or part of that disc is not recordable the Robotic Disc Transporter picks it out of the CD Tray and sends it to the...

Page 11: ...ording greatly increases the throughput of your Publisher 8 Print time varies according to which print mode has been selected Section 3 A or 3 D In most cases print time takes no more than 2 minutes A...

Page 12: ...launch follow these steps Double click the My Computer Icon then double click the icon of the appropriate CD drive containing the Software Installer disc Double click Setup exe 2 In the Installer App...

Page 13: ...irtually any brand of inkjet printable surface CD DVD media However different brands of discs have different printable coatings Because of this you may need to adjust the printer driver settings to ac...

Page 14: ...t cover of the Publisher The Publisher will automatically position the cartridge carrier and Robotic Disc Transporter to the center position allowing for easy access to the bins Load the Input Bin the...

Page 15: ...it If you are using Windows XP select Install the software automatically and click Next or if you are using Windows Vista click Locate and install driver software You will see a notice like the one sh...

Page 16: ...ith your beige USB 2 0 Cable The printer driver will automatically install To verify the driver installed or reinstall go to the Mac System Preferences Apple System Preferences Click the Print and Fax...

Page 17: ...move each ink cartridge from its packaging Slowly remove the tape covering the cartridge s print head DO NOT TOUCH THE COPPER AREA Insert the ink cartridges into the carrier copper end first and snap...

Page 18: ...t 1 Add Data 2 Add a Print File 3 Set the number of copies and adjust options Summary The instructions below explain how to do the most common project A Copy Project A Copy Project can be used to copy...

Page 19: ...lect a label button When you have selected print label file click the next arrow There are several ways to select a print file See the explainations below for more information For any job type you cho...

Page 20: ...tings are dependent upon the specific discs you are using Each disc media brand or type has a different sized non printable outer margin or inner diameter It also has a different printable surface For...

Page 21: ...ti cally be selected for you Click the Go button to start the job B USING PTPUBLISHER PTPublisher allows you to record and print CDs DVDs and BDRs Blu ray using a variety of project types described be...

Page 22: ...allows you to create an audio CD using WAV MP3 AIFF or WMA files Note this procedure is not for copying already created and mastered original audio CDs If you have already created a master audio CD i...

Page 23: ...e or create an image and then use it in the project The master disc is read from the specified drive to the hard drive of your computer The master is stored in the Global Image format gi in a user spe...

Page 24: ...the disc 3 Once the print file is selected a preview will be displayed 4 At this point you may choose to move on to the next step by clicking the next arrow However there are print quality and print...

Page 25: ...image Add text and any other design features 3 Save your label by going to the File menu Save as 4 Close SureThing or Disc Cover 5 You will be asked if you would like to use the label you just created...

Page 26: ...saved project file does not include the data to be burned or the print file to be printed If these files are moved or deleted the project file will need to be edited to reflect these changes Schedule...

Page 27: ...hich effectively adds another file system to the disc UDF1 02 with a Joliet bridge is the default Most of the differences between file system types relate to file name length and character restriction...

Page 28: ...oth the right and left bins Finished media will be placed in Kiosk bin Kiosk Mode still requires the same type of media in both the right and left bins See Section 2D for instructions on setting up th...

Page 29: ...gress is displayed on the progress bar along with the total size of the burn and the current amount burned Printer Robot Status shows the current status of the printer if it is printing or the robot i...

Page 30: ...ottom of the screen will turn red To resolve this issue you may choose to span the data over several CDs or DVDs or change the media to a different type with more data capacity If you choose to check...

Page 31: ...the bin 3 Once you have selected the data click the next arrow to add a print file There is a print template that has been designed for backup projects It is recommended that this template be used Ch...

Page 32: ...into a backup project You will be prompted to save your project Do not move projects once you have saved them Always choose only one copy even if your project will be spanned across multiple discs On...

Page 33: ...from the sub menu Here you can view all scheduled projects edit the project or change the frequency or time of the automatic backup Note All backup runs are full backups PTPublisher does not do incre...

Page 34: ...Protect dongle or in the PTPublisher software help file To protect DVDs you must first insert the PTProtect USB Dongle 100 250 500 1000 or 5000 protections into a USB port on the same computer that th...

Page 35: ...se the 120mm DiscTemplate from the window that appears 2 Open the background panel by clicking the arrow on the background button Add your own background to the label by choosing Select Backgound 3A B...

Page 36: ...aphics or symbols to the label These graphics will appear on top of the background image You can size them appropriately by dragging the corner of the selected graphic 6 When you have completed design...

Page 37: ...e top tool bar On the image above the Gallery button is the highlighted center color wheel button on the left side of the top tool bar 3 Choose Backgrounds from the drop down box Click the design that...

Page 38: ...ll categories Selection Resize or move text images or shapes with this tool Text Create a standard text box Circular Text Create circular text that follows the contour of the outside or inside of your...

Page 39: ...Fill and Shadow Add shadow change thickness or color of geometric objects Image Add transparency or a gradient to images clipart or backgrounds Text Change line spacing character spacing fonts size or...

Page 40: ...er will fit most printing needs Please refer to the following steps to change or verify your printer driver options 1 Click the Start button For XP Professional click on Printers and Faxes For XP Home...

Page 41: ...etting affects the quality speed and ink usage of the print Color matching is also tied to this setting Start with the default setting for fastest printing and the least amount of ink consumption If t...

Page 42: ...roduction is very essential Images printed in this mode will look lighter than those printed in Photo mode Skin tones especially will look more natural in this mode NOTE Exact color matching of the pr...

Page 43: ...d to do so before your first print from the new cartridge Center The Print Image NOTE Your printer comes from the factory pre calibrated to print the image in the center of the CD You can use this adj...

Page 44: ...ct the OK button Your images should now be centered when printed on a disc After your selections have been made close out of the printer setup window You are now ready to go to an application program...

Page 45: ...k Cartridges select either the New Cartridge Installed button or the Old Cartridge Installed button accordingly Clean Purge Select Clean Purge button to send a simple test pattern to the printer Be su...

Page 46: ...DVANCED PRINTER DRIVER SETTINGS MAC Access the advanced printer driver setting from any printing program on the Mac Go to file print Select Publisher Settings from the copies and pages drop down menu...

Page 47: ...and the least ink consumption If the quality needs improvement move to the next highest setting Color Matching Graphic mode is best used for graphical images where accurate color reproduction is not a...

Page 48: ...Hockey Rink Disc Business Card Disc and 80mm CD Outer Margin The Outer Margin refers to where the printing will cut off around the outer edge of your disc The size of the printable surface can vary f...

Page 49: ...ence some drying of ink in the tiny nozzles that make up the print head Clicking the Clean Cartridge button will cause the Publisher to pick a disc and place in into the printer tray The Publisher wil...

Page 50: ...ges for Color Black printing It is important to perform this calibration every time you change a cartridge If you forget to perform this calibration you will be prompted to do so before your first pri...

Page 51: ...alignment is 2 and the horizontal alignment is 0 Enter this in the alignment dialog box 5 4 3 2 1 0 1 2 3 4 5 5 4 3 2 1 0 1 2 3 4 5 Horizontal Calibration Find and enter the number whose lines tough m...

Page 52: ...tical Calibration is set to a larger value or more positive value the image will move down on the disc G USING OTHER GRAPHICS PROGRAMS While SureThing or Disc Cover will handle most labeling needs oth...

Page 53: ...he Publisher is initializing alternately with one another You will see this pattern when the Publisher is first turned on Wait until the lights stop blinking before opening software or starting jobs f...

Page 54: ...mmended because they may damage the paint and plastic materials from which the parts are manufactured Always disconnect your Publisher s power cords before cleaning Resume operation only after the sur...

Page 55: ...C The calibration utility allows you to change factory calibrated robotic settings and perform robotics tests Improper use of this utility could result in a non functioning unit Please read all instru...

Page 56: ...rinter Properties button A screen similar to the one below will appear 4 Click the Calibrate Printer button A window similar to the one below will appear 5 Click the tabs at the top of the window to n...

Page 57: ...Then open the lid The Cartridge Carrier will move to the center position automatically WAIT FOR THE CARTRIDGE CARRIER TO STOP MOVING Then carefully move the cartridge carrier assembly to the left to g...

Page 58: ...the unit with tape and close the cover G TECHNICAL SUPPORT If you have difficulties in operating your Publisher the procedures in this manual and the software User s Guide should in most cases solve t...

Page 59: ...Intel Celeron Processor or higher 1GB RAM or higher 10GB or more free hard drive space available USB 2 0 port Minimum MAC System G5 or Intel CPU running OS X version 10 5 or higher 512 MB RAM Free har...

Page 60: ...ear Panel 4 Controls Front Panel 3 Copy Project 14 17 Data Project 18 Disc Cover 14 32 Disc Output Location 42 File System 23 Gallery 34 Global Image 14 17 19 Identifying the Parts 3 Image Project 19...

Page 61: ...ecording Type 23 Reject Area 4 6 Resolution 55 Rip Audio 29 Robot Options 24 Robot Status Panel 51 Save Project 22 Schedule Project 22 Set Time and Date to Mastering Time 24 Span Discs 26 Specificatio...

Page 62: ......

Page 63: ......

Page 64: ...Printed in the United States of America P N 510951...

Reviews: