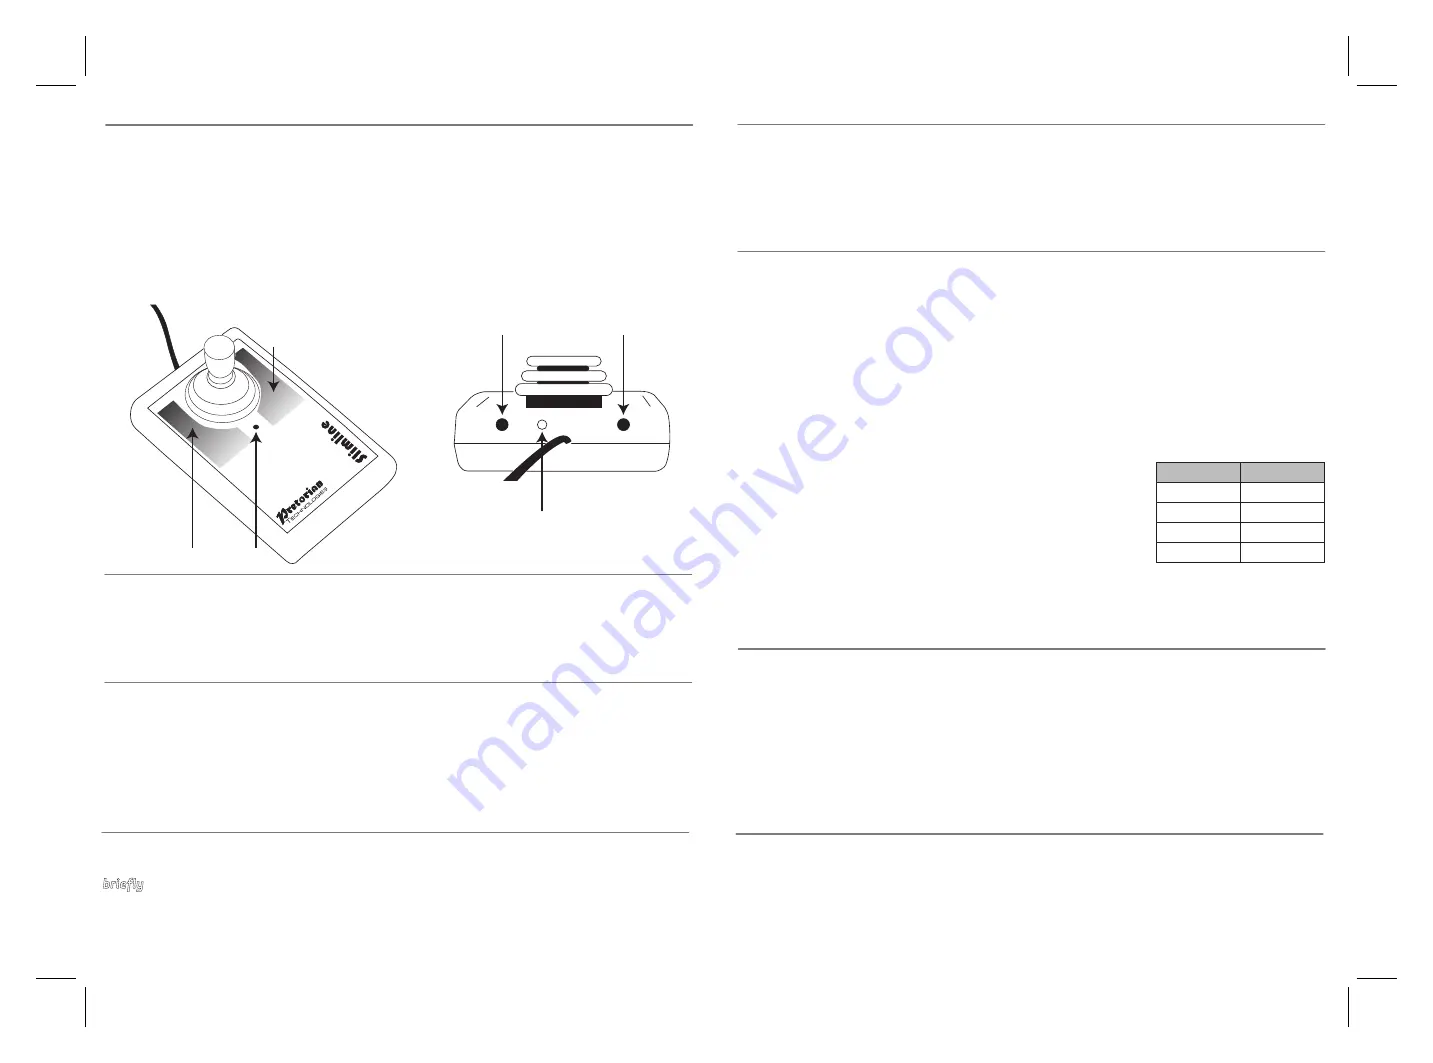
The
Slimline Joystick
is compatible with all computers with a USB interface including Personal
Computers (PCs), Apple Macintosh (Macs) and Chromebooks. It will also work with larger tablet
devices which have full-sized USB ports. This product will also work with PS/2 ports which are
available on some PCs but requires an adaptor plug (available on request). USB is the
recommended connection method.
Compatibility
For USB connection, simply plug your
Slimline Joystick
into any available USB port on your computer.
You can do this whether or not the computer is powered on. Your computer will automatically configure
itself and is ready for use within a few seconds.
If you are using a PS/2 interface via the adaptor plug, you must ensure the computer is fully turned off
before first installation, not just in standby.
Regardless of the method of connection,
Slimline Joystick
never requires any driver files to be installed.
Installation
Slimline Joystick
has four speed settings to optimise the speed of the cursor according to
individual user’s needs. To change the speed, press the Feature button [5] on the rear of the unit
briefly
. Each time it is pressed, the unit will emit between one and four beeps to indicate the speed,
with four beeps being the fastest.
The speed setting is retained in memory and is automatically recalled whenever the unit is plugged
in or the computer powered on.
Speed Setting
There are a number of additional settings that allow you to configure your
Slimline Joystick
to your
exact needs. These are accessed via Learn Mode and are also stored in internal non-volatile memory
to be automatically recalled whenever you use the unit, even if you swap computers.
Learn Mode
Features
• Very small footprint.
• Height of palm rest from desk 18mm.
• USB connection- compatible with PC, Mac, Chromebook and tablet devices that
support external mice. PS/2 Connection via adapter available on request.
• Does not require any driver software to be loaded onto host computer- ideal for
managed computer systems often used in schools.
• Speed settings and button functions retained if the unit is unplugged or
powered down.
• Ships with T-bar handle and large diameter sponge ball.
• Dimensions 145 x 90 x 80mm.
1
2
3
4
5
6
To make changes to these settings, you must first go into Learn Mode. Press and hold the Feature
button [5] until you hear a warbling beep. The unit is now in Learn Mode and will accept changes to
the settings, as follows:
Left touch button setting
The left touch button [1] may be set to left click, right click, drag or double click. While in Learn
Mode, touch the left button and the unit will emit between one and four beeps to indicate its setting,
according to Table 1. Press the left touch button until you hear the relevant number of beeps for the
setting you would like.
Note that the switch socket adjacent to the left button [6] adopts the same function as the left
touch button.
Right touch button setting
The right touch button [2] may also be set to left click, right click,
drag or double click. While in Learn Mode, touch the right button and
the unit will emit between one and four beeps to indicate its setting,
according to Table 1. Press the right touch button until you hear the
relevant number of beeps for the setting you would like.
Note that the switch socket adjacent to the right button [4] adopts
the same function as the right touch button.
Entering Learn Mode
Setting
No. Beeps
Left Click
1
Double Click
2
Drag Lock
3
Right Click
4
Table 1- Button/Switch Settings
Slimline Joystick
is fitted with a buzzer which gives an audible indication of operations such as drag
lock and unlock, double click, entering Learn Mode etc. When
Slimline Joystick
is used in a
classroom setting, where there may be many units in close proximity, it may be beneficial to turn off
the buzzer. To achieve this, press the Feature button [5] briefly while in Learn Mode. Two long beeps
are heard with the second of a lower note than the first, indicating that the buzzer is now disabled
(although it will still operate while in Learn Mode). Repeating the above operation will re-enable the
buzzer, indicated by two long beeps with the second note being higher than the first.
Buzzer On/Off
When all the above settings have been changed to meet your requirements, exit Learn Mode by
pressing and holding the Feature button [5]. A warbling beep is emitted (whether the buzzer is on or
off) and any changes to the settings become effective. They are also stored in the non-volatile
memory for subsequent recall.
Note that the unit automatically leaves Learn Mode, and any changes are discarded, if the settings
remain unchanged for more than a minute.
Exiting Learn Mode


