background image


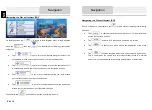
(

Note: Please insert TF card properly into the device before running the car DVR 

Operation) 


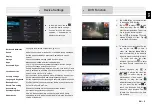
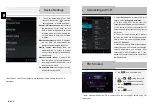
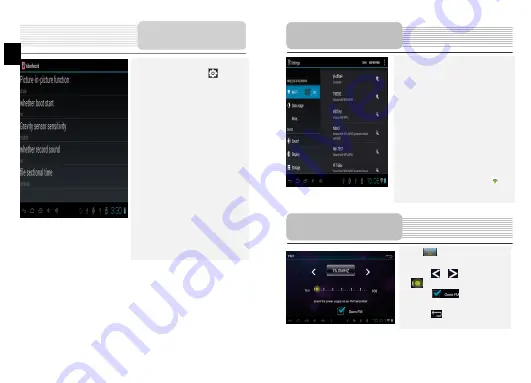
7.   To set the parameters of car DVR 

function, tap the icon        to enter the 
setting options  interface as follows: 

Picture- in-Picture function:

 tap to prompt 

the dialog box, select open, the car 
DVR window will appears on other 
interface when recording, double tap 
on the window to enter the recording 
interface. 

Whether boot start:

 select YES, and then 

the car DVR will automatically run 
background after booting the device. 

Gravity sensor sensitivity:

 there are 

high/middle/low for options to protect 
current video being overwritten when 
crush occurs 

Whether record sound:

 if select YES, 

then the sound will be recorded when 
recording the video; if select NO, it will 
record only the image.     

File selection time:

 tap to select the time 

interval for saving the file.   


Device Settings 

EN
 

EN – 6 


1. Tap 


icon on home menu. 

2. Tap 

on 


or drag the cursor 

to tune FM frequency down/up. 

3. Tap 

on


to enable the FM 

function. 

4. Tap 

on 

 to exit.


Note: Please make sure GPS is connected to the car charger before using FM 

Transmitter


1. Select

 Settings

 icon to access the list of 

options. Select 

Wireless & networks

.  

2. To turn on/off Wi-Fi, simply slide your 
finger rightward/leftward on the control bar. 
3. The device will scan for available Wi-Fi 
networks and display them at the bottom of 
the screen.   
4. Tap on the network you want to connect 
to. Then tap inside the Wireless password 
field to make the virtual keyboard appear. 
Enter thX` 

Connect

.  

5. Your device will now attempt to establish a 
connection to the Wi-Fi access point with the 
network parameters you entered. After 
connecting to a Wi-Fi network, the   icon 
appears on the status bar on the right side of 
the Home screen. 


FM Function 


Connecting to Wi-Fi 

Summary of Contents for GeoVision 5850HDDVR

Page 1: ...vice The lightning flash with arrowhead symbol within an equilateral triangle is intended to alert the user to the presence of un insulated dangerous voltage within the product s enclosure that may be...

Page 2: ...onnect to earphone or headset 5 microSD Slot Insert micro SD memory card for data access or memory expansion 6 mini USB Port Connect to USB Cable for data access or battery charging View of Main Unit...

Page 3: ...ction Connecting to External USB Device Charging Insert the USB connector into the appropriate USB port Insert the other USB connector into the USB port on PC to start charging Device Connections Conn...

Page 4: ...teries should be fully charged before initial use It is not necessary to start charging the device before the battery is fully discharged Cautions on Battery Charging EN EN 4 1 Press and hold Power Bu...

Page 5: ...tting Set up Time Zone Date Time Accessibility Enable your installed services and adjust related settings Developer options Set options for application development About device View the device system...

Page 6: ...tion time tap to select the time interval for saving the file Device Settings EN EN 6 1 Tap icon on home menu 2 Tap on or drag the cursor to tune FM frequency down up 3 Tap on to enable the FM functio...

Page 7: ...r available profiles Tap any item in the list for a short voice sample Tap to confirm your selection and proceed to the next page Initialization and Software Activation Set your preferred time format...

Page 8: ...avoiding parts of the route simulating navigation or adding the destination to your Favourites Tap to customize the way the navigation software works watch the Tutorial simulate demo routes or to run...

Page 9: ...ect the city town that is offered in the input field Tap to correct your entry Tap to browse the list of city town names matching your input Select a city town from the list Navigation Navigating to A...

Page 10: ...et a list of accommodation near the destination around your current position or your last known position You can also tap and search for a place by entering its name Navigation EN 10 EN Navigating to...

Page 11: ...ecommended route There are screen buttons and data fields on the screen to help you navigate During navigation the screen shows route information At the top of the screen you see your heading and the...

Page 12: ...r run the Demo to watch sample route simulations to see how navigation works More Screen EN 12 EN In the Navigation menu tap then tap The Settings menu provides you with the following options scroll t...

Page 13: ...ters set during the initial setup process Delete all saved data and reset all settings to their factory defaults Settings Take steps described in the tables below to solve simple problems before conta...

Page 14: ...B Audio formats supported WMA MP3 WAV M4A OGG AAC Earphone jack 3 5mm Operating Temperature 10 C 50 C Operating humidity 10 to 90 non condensing Disclaimer As the Prestigio products are constantly upd...

Reviews: