15
PRESTIGIO AVANTI 1592W
ENG
2. When working at your desk, connect your notebook to an external monitor and disable the internal display Fn+ F4.
3. Do not disable the suspend time-outs.
4. If you are using AC power and have no external monitor attached, change to suspend mode when not in use.
Opening and Closing the Display Panel
To open the display, push the LCD latch inwardly and lift up the lid. Then tilt it to a comfortable viewing position.
To close the display cover, fold it down gently until the LCD latches click into place.
Warning: To avoid damaging the display, do not slam it when closing. Do not place any object on
top of the computer when the display is closed.
Audio Subsystem
Your computer’s audio subsystem is Sound Blaster Pro-compatible.
Adjusting the Volume Manually
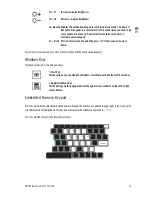
To increase the volume, press Fn+ F5.
To decrease the volume, press Fn+F6.
Adjusting the Audio Volume in Windows
1. Click the speaker symbol in the task tray in Windows.
2. Drag the volume control bar up or down to adjust the volume.
3. To temporarily silence the speaker without changing the volume setting, click Mute.
Voice Recording
A built-in microphone allows you to record sound. You will need to use audio processing software to enable the built-
in microphone. For example, you may use Microsoft Sound Recorder.
Modem
Your computer comes with a 56K V.92 internal fax/modem and a phone jack (RJ-11), which is located on the left side of
your computer.
Use a telephone cable to connect the computer to the telephone wall outlet.
Connecting the Modem
1. Plug one end of the phone line into the modem port located on the rear side of the computer. (For EMI compliance,
you need to clip the included EMI CORE to the phone line.)
2. Plug the other end of the line into the analog phone wall outlet.
Depending on where your computer is used, you may need to change settings in the modem. Correct setting will allow
you to maintain a stable connection in a country where its telecommunication system may be different to others.
To change the modem setting, do the following:
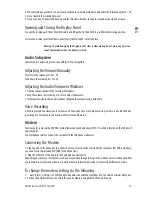
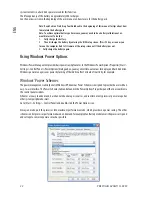
1. Go to [Start > Settings > Control Panel] and double-click on Modem Settings icon. You will see a similar dialog box.
2. Click on the pull-down menu and select the country where it is applicable. Click on OK to exit.
Summary of Contents for Avanti 1592W
Page 1: ...Avanti 1592W...
Page 48: ...5 PRESTIGIO AVANTI 1592W BG...
Page 53: ...10 PRESTIGIO AVANTI 1592W BG 1 2 F 4...
Page 54: ...11 PRESTIGIO AVANTI 1592W BG 3 LAN DDR WLAN F 4 4 AC 1 DCFout DCFin 2 3 AC 3 I O...
Page 69: ...26 PRESTIGIO AVANTI 1592W BG DRAM mini PCI LAN LAN F 2 5F Serial ATA 9 5 mm IBM 1 2 3 4...
Page 70: ...27 PRESTIGIO AVANTI 1592W BG 5 6 7 4 HDD 8 4F F 9 HDD B 10 2F...
Page 72: ...29 PRESTIGIO AVANTI 1592W BG 5 F 30 F 6 DIMM 30 7 8 9F SO DIMM...
Page 74: ...31 PRESTIGIO AVANTI 1592W BG 4 9F mini PCI Windows CDFROM Setup exe F BIOS...
Page 85: ...42 PRESTIGIO AVANTI 1592W BG...
Page 132: ...5 PRESTIGIO AVANTI 1592W RU Wireless LAN Wireless LAN 802 11...
Page 137: ...10 PRESTIGIO AVANTI 1592W RU 1 2...
Page 138: ...11 PRESTIGIO AVANTI 1592W RU 3 DDR 4 1 DC out DC out DC in 2 3 3...
Page 139: ...12 PRESTIGIO AVANTI 1592W RU WLAN NumLock CapsLock Scroll lock Fn F1 Fn F3 Fn F4...
Page 147: ...20 PRESTIGIO AVANTI 1592W RU 12 1 2 1 6 16 2 3 4 3 5 0 32 F 60 140F Fn F3 1 2...
Page 153: ...26 PRESTIGIO AVANTI 1592W RU DRAM wireless LAN mini PCI 9 5 mm 2 5 Serial ATA IBM 1 2 3 2 A 4...
Page 154: ...27 PRESTIGIO AVANTI 1592W RU 5 1 B 6 7 4 C 8 4 C 9 B 10 A...
Page 156: ...29 PRESTIGIO AVANTI 1592W RU 5 30 6 30 7 8 9 D DRAM DIMM...
Page 158: ...31 PRESTIGIO AVANTI 1592W RU 4 9 D mini PCI Wireless LAN Setup exe...


