background image

128-9321

Page  7/8    

Page 7

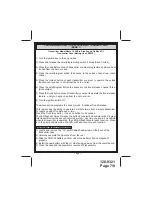
PROGRAMMING NEW OR REPLACEMENT TRANSMITTERS 

(BANK 1)

Transmitter Model Name, 143BP Is Also Found On Back Of 

Transmitter Case (Battery Use CR2032) 

1) Turn the ignition key to the on position.

2)  Press and release the valet/programming switch 3 times (Siren Chirps)

3)  Press the Lock Button of each transmitter you want programmed until you hear 

a chirp from the horn or siren.

4)  Press the valet/program button to advance to the unlock channel two, (siren 

chirps)

5)  Press the Unlock button of each transmitter you want to operate the unlock 

function until you hear a chirp from the horn or siren.

6)  Press the valet/program button to advance to the trunk release channel three, 

(siren chirps).

7)  Press the trunk button of each transmitter you want to operate the trunk release 

feature.  until you hear a chirp from the horn or siren.

8) Turn the ignition switch off.

The above action programs the Lock, Unlock, & optional Trunk Release, 

This remote has the ability to operate 2 similar alarms from a single transmitter.  

To toggle on and off vehicle one or two,,,

Press the Trunk/Key the Lock button for 5 seconds.  

The LED flashes 2 times. Release the buttons, to select 2nd vehicle mode.Program 

this transmitter into the second vehicle's system.  Any time you are in 2nd vehicle 

when the transmitter is operated, the LED will flash twice for each function.  When 

in in the prime vehicle mode, the LED will flash once for each function.

Transmitter Battery Replacement:

1)  Locate and remove the "00" point Philips head screw on the back of the 

transmitter case.

2) Carefully separate the front case from the rear.

3)  Slide the CR2032 battery out from under the battery clip and dispose of 

properly.

4) Install the new battery with the (+) side facing up away from the circuit board.

5) Close the case and reassemble in reverse of disassembly.

Summary of Contents for APS-25E

Page 1: ... user s authority to operate the equipment NOTE The manufacturer is not responsible for any radio or TV interference caused by unauthorized modifications to this equipment Such modifications could void the user s authority to operate the equipment Table Of Contents Introduction Features and Options Page 2 Arming The System Page 3 4 Protection While Armed Page 4 Disarming Your System Page 4 Intrusi...

Page 2: ...eceiver capable of accepting 4 transmitters Code Learning Remote Panic in all modes Protected Valet 7 Function LED Arm Disarm Zones 1 2 3 Valet Arming Intrusion Alert with Memory Audible Arm Disarm Defective Zone Tamper Confirmation Instant Siren Activation Starter Disable True Last Door Arming hardwire only Defective Zone By Pass Hardwire or Voltage Sense Selectable Active or Passive Arming Selec...

Page 3: ... not need to disarm the system to make the correction ARMING THE SYSTEM PASSIVE 1 Turn off the engine exit the vehicle close and lock all doors hood and trunk 2 The dash mounted LED will begin to flash rapidly indicating that the system is automatically passive arming As an added convenience the automatic passive arming will not begin until all doors and trunk lid are closed allowing passengers to...

Page 4: ...ver the system is armed the vehicle s starter will be bypassed If a thief should choose to ignore the siren the vehicle can not be started DISARMING THE SYSTEM 1 As you approach the vehicle press and release the Unlock button on the keychain transmitter 2 The siren will chirp 2 times and the vehicle s parking lamps will flash two times 3a ACTIVE The dash mounted LED will turn off and remain off un...

Page 5: ...vehicle and turn the ignition key to the on position 2 Press and hold the LED valet push button switch for 5 seconds until the LED turns on solid The LED will remain on as long as the system is in the valet mode 3 To return to normal operation with the ignition switch on press and release the LED valet push button switch one time The LED will turn off indicating the unit has been returned to the n...

Page 6: ...e the remote panic switch 1 Press and hold the arming button on the keychain transmitter for 3 seconds or more The alarm will immediately sound 2 To stop the alarm press and release the Trunk Key button on the keychain transmitter If the button is not pressed the alarm will automatically stop after 30 seconds TRUNK RELEASE This security system has an additional feature that can be wired to a numbe...

Page 7: ...chirp from the horn or siren 8 Turn the ignition switch off The above action programs the Lock Unlock optional Trunk Release This remote has the ability to operate 2 similar alarms from a single transmitter To toggle on and off vehicle one or two Press the Trunk Key button the Lock button for 5 seconds The LED flashes 2 times Release the buttons to select 2nd vehicle mode Program this transmitter ...

Page 8: ...USE INTRUSION ZONE 1 SIREN CHIRP INDICATORS 1 CHIRP ARM 2 CHIRPS DISARM 3 CHIRPS ARM ZONE ACTIVE 4 CHIRPS DISARM INTRUSION PARKING LAMPS Optional 1 FLASH ARM 2 FLASH DISARM 3 FLASH DISARM INTRUSION Where applicable These chirps are optional and may be disengaged To purchase replacement transmitters or to get additional product information go to www prestigecarsecurity com Optional Channel 2 Device...

Reviews: