4.0
Getting Started with UC-Surface
4.1
Anatomy of the UC-Surface Screen
StudioLive
™
RML-Series
Owner’s Manual
14
Channel and Mix Settings
In the Fat Channel view, you can open the channel options to edit the channel name
and choose an input source, the channel type and icon, and stereo linking.
Channel types and icons provide a host of great benefits to your workflow. When
you select a channel type, it will name your channel, display the icon type, and tag
the channel type for contextual filtering of other channel options. For example,
when choosing a Fat Channel preset, if the selected channel is assigned to “guitar,”
the presets displayed will be filtered to only show you presets tagged for guitar,
making it easier to find the preset you need. Choosing a channel type will also
create automatic Filter Groups for quicker navigation and enhanced mixing
workflows. Learn more about Filter Groups in the section describing the Mix
selection area or in the user manual and video guides in your My PreSonus account.
For mixes, opening the settings give you access to the options for Stereo
Linking mixers, changing a mix between an Aux and a Subgroup, naming the
mix, and setting the output Delay for the four mixes with delay available.
4.1.4
Presets Button
This button brings up the Presets menu when working with the Fat Channel,
graphic EQ, or FX bus and calls up the Complete Scenes menu when working in
the Scenes/Mute Groups. For details on working with presets and scenes, please
refer to the user manual and video guides in your My PreSonus account.
4.1.5
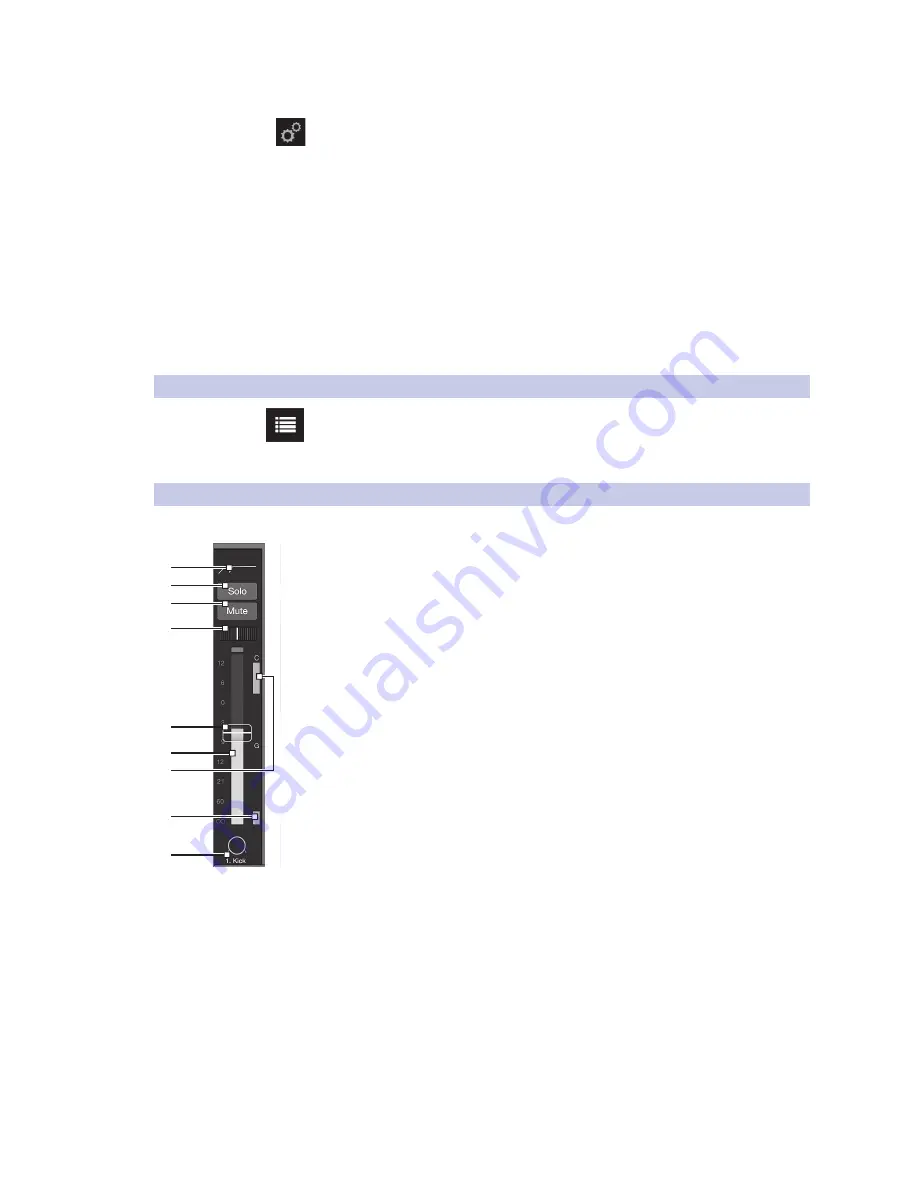
Channel Strip Area
This area displays the input channels and fader levels for the selected mix.
1. EQ micro view. Selects the associated channel and brings up the
Fat Channel.
2. Solo
3. Mute
4. Pan
5. Channel fader. Controls the channel level for the selected mix.
6. Input meter
7. Compressor gain-reduction meter
8. Gate gain-reduction meter
9. Channel number, name, and type icon. Selects the associated channel and
brings up the Fat Channel.
1
2
3
4
6
5
9
8
7


