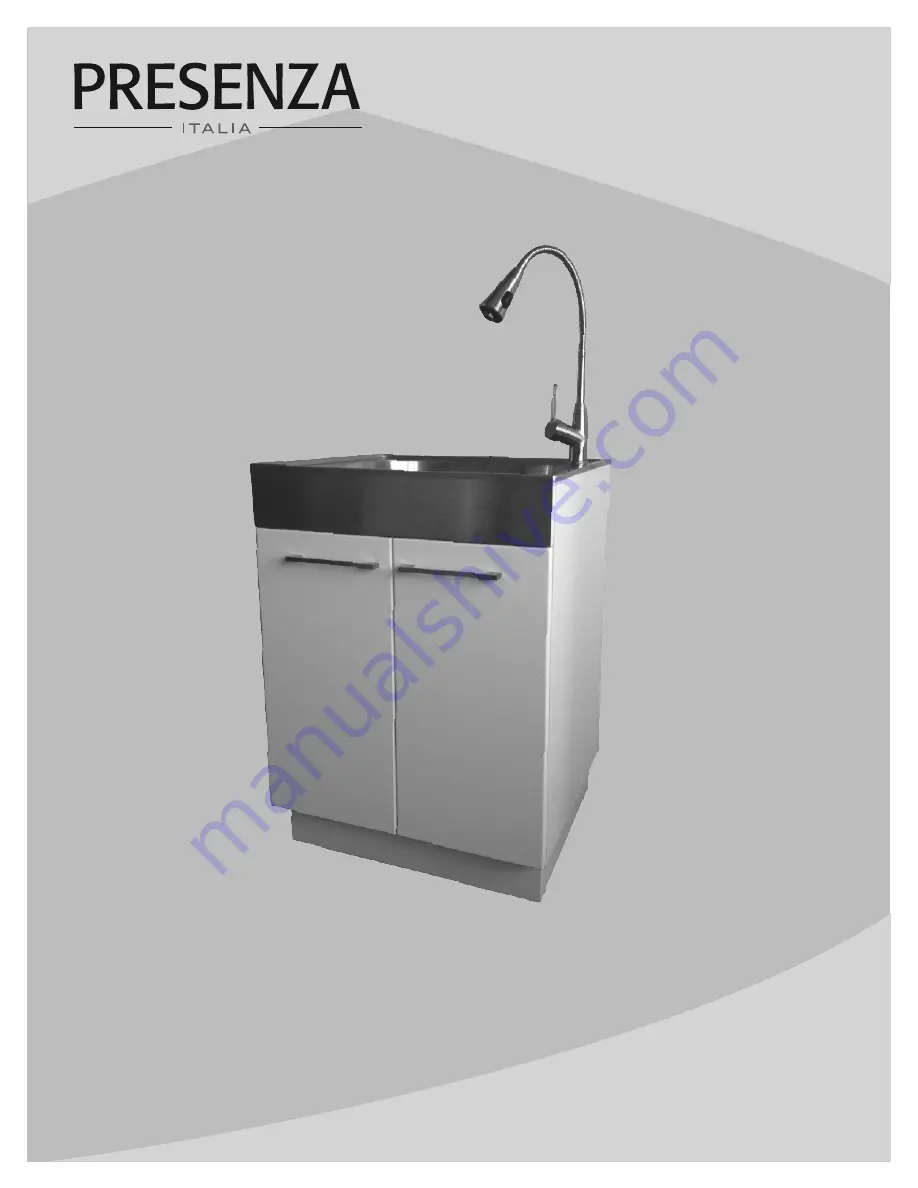
UTILITY CABINET WITH FAUCET AND STAINLESS STEEL SINK
GABINETE CON GRIFO Y FREGADERO EN ACERO INOXIDABLE
INSTALLATION GUIDE AND USER MANUAL
GUÍA DE INSTALACIÓN Y MANUAL OPERATIVO
Model No. QL037
Page 1: ...UTILITY CABINET WITH FAUCET AND STAINLESS STEEL SINK GABINETE CON GRIFO Y FREGADERO EN ACERO INOXIDABLE INSTALLATION GUIDE AND USER MANUAL GU A DE INSTALACI N Y MANUAL OPERATIVO Model No QL037...
Page 2: ...ed surface side with extreme care and caulked very carefully to form a watertight barrier DANGER Always wear safety goggles and gloves in order to avoid personal injury MANUFACTURER S REQUIRED MINNESO...
Page 3: ...onvenience caused by loss of use of this product costs incurred for labour or materials removal and installation of replacement units or any other incidental or consequential damages Costs relating to...
Page 4: ...ATERIALS REQUIRED NOT SUPPLIED Adjustable wrench Needle nose pliers Phillips screwdriver Utility knife Pipe wrench Sealant Carpenter s level Hacksaw Safety gloves Safety goggles PARTS REQUIRED NOT SUP...
Page 5: ...e ENGLISH Pre Installation continued PACKAGE CONTENTS A B C F G H J L K D E Part Description Quantity A Cabinet 1 B Sink 1 C Faucet 1 D Strainer Basket 1 E Strainer Assembly 1 F Door Handles 2 G Cabin...
Page 6: ...arefully through the hole in the sink B A second person may be required to hold the body in place until the faucet installation is complete 4 From underneath slide the washer gasket and retaining ring...
Page 7: ...sealant to the underside of the strainer flange Sealant 2 Insert the strainer body into the sink 3 Assemble the rubber gasket friction washer and locknut onto the strainer body from under the sink 4...
Page 8: ...sink 1 Unpack the unit and place the sink B on a blanket or cardboard to protect the surface 2 Turn the cabinet A upside down onto the protective surface 3 Gently attach the cabinet base G onto its p...
Page 9: ...ustment screw adjusts the door left or right 2 Horizontal adjustment of the screws adjust the door forward and backward 3 Vertical adjustment of the screws adjust the door up and down MOUNTING THE SIN...
Page 10: ...ter supply to the faucet 2 Take off the plastic water indicator by hand then use the Allen key to remove the screw and pull out the handle body The top lever of the cartridge will be exposed 3 Unscrew...
Page 11: ...n the sink which will cause corrosion Never leave steel or cast iron pans in your sink for extended periods of time as this can cause corrosion Do not allow your cabinet surface to come into contact w...
Page 12: ...and French Monday Friday from 8 30am 5pm EST Identify the required part s and have the part number s ready A D G H J E F B C Part Description Code Quantity A Door Handles QHL144 2 B Door Handle Screw...
Page 13: ...echos por la parte superior externa con extremo cuidado y calafatear cuidadosamente para formar una barrera impermeable PRECAUCI N Use guantes y gafas de seguridad en todo momento para evitar lesiones...
Page 14: ...laci n de unidades de remplazo ni ning n otro da o incidental o consecuente Los costos relacionados con la reparaci n o el reemplazo son la responsabilidad del usuario Nuestra obligaci n se limita a l...
Page 15: ...einstalaci n HERRAMIENTAS MATERIALES REQUERIDOS NO SUMINISTRADOS Llaves Alicates Desarmador en cruz Cuchillo de uso general Llave de tubos Sellador de silicona Nivel de carpintero Sierra de mano Guant...
Page 16: ...F G H J L K D E Pieza Descripci n Cantidad A Armario 1 B Fregadero 1 C Grifo 1 D Colador 1 E Conjunto de colador 1 F Manijas de las puertas 2 G Base del armario 1 H Tornillos de las manijas 4 J Tornil...
Page 17: ...el cuerpo del grifo a trav s del orificio del lavabo B Puede necesitar la ayuda de otra persona para sujetar el cuerpo en su lugar hasta que haya completado la instalaci n del grifo 4 Desde la parte i...
Page 18: ...na 2 Inserte el cuerpo del escurridor en el fregadero 3 Monte el empaque de caucho la arandela de fricci n y la contratuerca en el cuerpo del escurridor por debajo del fregadero 4 Apriete la contratue...
Page 19: ...del embalaje antes de quedar satisfecho del nuevo fregadero 1 Desempaque la unidad y coloque el fregadero B sobre una cobija o cart n para proteger la superficie 2 Coloque el armario A de cabeza sobre...
Page 20: ...la izquierda y a la derecha 2 Si ajusta los tornillos horizontalmente la puerta se ajustar hacia adelante y hacia atr s 3 Si ajusta verticalmente los tornillos la puerta se ajustar hacia arriba y haci...
Page 21: ...ntinuar cierre el suministro de agua al grifo 2 Retire el pl stico del indicador de temperatura del agua con la mano luego con la llave Allen remueva el tornillo y tire del cuerpo de la manija La pala...
Page 22: ...rro fundido en el fregadero por per odos prolongados ya que esto puede provocar corrosi n No permita que la superficie del mueble entre en contacto con productos como la acetona quitaesmalte el esmalt...
Page 23: ...8 30 am 5 pm hora del este de lunes a viernes Identifique la s parte s requerida s y tenga el n mero s de pieza a la mano A D G H J E F B C Pieza Descripci n C digo Cantidad A Manijas de las puertas Q...
Page 24: ...rent Qu bec H4S 2C3 1 877 333 0098 cs conglomkb com Service available in English and French Monday Friday from 8 30am 5pm EST servicio disponible en ingl s y franc s de lunes a viernes de 8 30 am a 5...