background image


To Assemble 

WARNING:  To avoid damage to the product or serious personal injury:   


Do not activate or plug the product into an electrical outlet until the product is 

completely assembled. 


The Blades of the product are very sharp; handle with care. 


1.


Ensure the product is unplugged from the electrical outlet. 

2.


Place the Motor Housing on a flat, stable surface. 

3.


Wash and dry the Pitcher. 

4.


Ensure the Plastic Ring is attached around the Spin Base. 

5.


Insert the Blades and Spin Base into the bottom of the Pitcher and turn clockwise 

(follow the arrows inscribed on the bottom of the Spin Base) until the plastic 

latches of the Pitcher bottom and the Spin Base lock into place. 

6.


Place the Pitcher onto the Motor Housing ensure the Motor Drive Coupling and the 

fittings located on top of the Motor Housing are aligned. 

7.


Twist the Pitcher counterclockwise until the plastic latches of the Pitcher and the 

Motor Housing lock into place. 
NOTE:  Ensure the arrow below the Pitcher handle is aligned with the arrow 

below the plastic latch of the Motor Housing. 

8.


Place the Plastic Lid on top of the Pitcher and secure it into position. 
NOTE:  The Pitcher handle has a slide release mechanism to hold the Plastic Lid 

to the Pitcher.  Make sure the Plastic Lid is always securely in place on top of the 

Pitcher before operating the product. 


1.


Plastic Lid with Feeding Hole 

2.


Pitcher 

3.


Plastic Ring 

4.


Blades and Spin Base 

5.


Motor Drive Coupling 

6.


Motor Housing 

7.


6-Speed Panel Control 


Summary of Contents for PB347

Page 1: ......

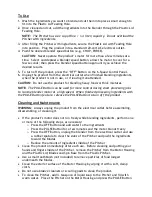
Page 2: ...d Do not operate the product if the power cord is cut damaged or if the wires are exposed Keep the power cord and product away from heated surfaces including stovetops Do not immerse in or expose the base power cord or plug to water or other liquids Do not attempt to open any part of the base To disconnect the product from an electrical outlet pull directly on the plug do not pull on the power cor...

Page 3: ...ng Correctly attach the blade assembly to the pitcher correctly before putting the Pitcher onto the Base To reduce the risk of injury never place cutter assembly blades on the base without pitcher properly attached When blending hot liquids remove center piece of two piece cover After operating continuously for three minutes wait at least one minute before operating the product again to help preve...

Page 4: ...tom and the Spin Base lock into place 6 Place the Pitcher onto the Motor Housing ensure the Motor Drive Coupling and the fittings located on top of the Motor Housing are aligned 7 Twist the Pitcher counterclockwise until the plastic latches of the Pitcher and the Motor Housing lock into place NOTE Ensure the arrow below the Pitcher handle is aligned with the arrow below the plastic latch of the Mo...

Page 5: ...r motor at a high speed When finished processing ingredients with the PULSE Button feature release the PULSE Button to turn off the product Cleaning and Maintenance WARNING Always unplug the product from the electrical outlet before assembling disassembling or cleaning it If the product s motor does not run freely while blending ingredients perform one or more of the following steps as necessary o...

Page 6: ...duct or refund your money at our option at the place of purchase upon presentation of sales receipt or other proof of purchase This warranty extends only to the original retail purchaser and excludes any damage to the product resulting from accident or misuse The product is not warranted when used in a commercial or business environment The above warranty is complete and exclusive The warrantor ex...

Page 7: ...ón de objetos calientes No sumerja el cordón o la base en agua No intente abrir ni desarmar la base de la licuadora Para desconectar tome del enchufe y desconecte no tire del cordón para desconectar Cuide de no forzar el cordón para evitar que se dañe Si usa extensión asegure que la extensión sea de igual o mayor clasificación eléctrica que la licuadora Mantenga las manos y utensilios al licuar De...

Page 8: ...adora ininterrumpidamente no más de 3 minutos y déjela descansar antes de seguir usando No encienda la licuadora con la jarra vacía Este producto no es para uso comercial ni para uso a la intemperie Este producto tiene un cordón de corta longitud para evitar que se anude se enrede o sea tropezado por accidente WARNING Este producto esta equipado con un enchufe polarizado una espiga es mas ancha qu...

Page 9: ...a jarra y la base giratoria cierren fijamente 6 Coloque la jarra en la base del motor asegure que el acoplador del motor y el embrague de la base del motor se junten perfectamente 7 Gire la jarra hacia la izquierda hasta que la jarra cierre con la base del motor NOTA Asegure la flecha bajo el asa de la jarra quede alineada con la flecha bajo el cierre plástico en la base del motor 8 Tape la jarra ...

Page 10: ...ientes que se preparan con rapidez en alta velocidad Mantenga momentáneamente oprimido el botón pulse y libérelo para parar la licuadora Mantenimiento y Limpieza NOTA Asegure que la máquina esté apagada y desconectada antes de remover partes y antes de limpiar 1 La limpieza es conveniente después de cada uso Quite la jarra Remueva la tapa y las cuchillas antes de meter sus manos para lavar la jarr...

Reviews: