www.mounts.com | North America 800.368.9700 | Interna1-714-632-7100
2620 Palisades Drive,Corona, CA 92882 USA
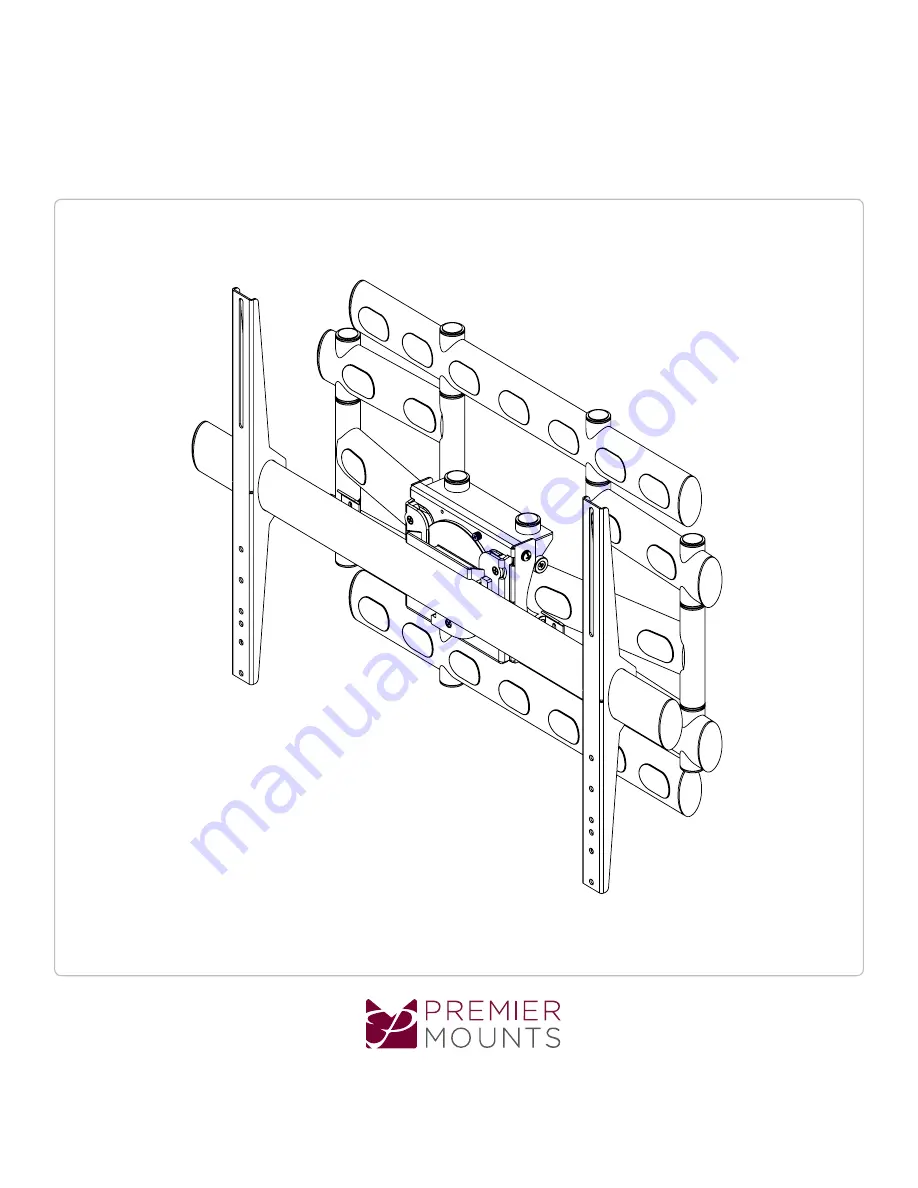
Installation Guide
AM500-U
Page 1: ...www mounts com North America 800 368 9700 International 1 714 632 7100 2620 Palisades Drive Corona CA 92882 USA Installation Guide AM500 U...
Page 2: ...her Qty 4 2 5 mm Allen Key Qty 1 5 32 Allen Key Qty 1 6mm Allen Key Qty 1 M5 x 6 mm Set Screws Qty 2 M8 x 10 mm Set Screws Qty 4 Pencil Protective Eyewear Electronic Stud Finder 6mm or 1 4 Drill Bit 3...
Page 3: ...ity of the mount 2 Use a pencil to mark each of the wall studs Wood Stud Installation 1 Place the template over the wall 2 Level the template 3 Tape the template to the wall 4 Mark four 4 mounting loc...
Page 4: ...r 1 Remove the template 2 Place the wall mount over the pilot holes 3 Insert one 1 lag bolt and one 1 washer into each pilot hole Tighten all lag bolts using a socket wrench and 1 2 or 13mm socket 1 P...
Page 5: ...inned Anchors Tighten all lag bolts using a socket wrench and 1 2 or 13mm socket 1 Slide the brackets into the Cross Bar 2 Secure the brackets with two 2 M6 x 12 mm screws removed on steps 10 Locate t...
Page 6: ...Set Screws Griplate Universal Washer Universal Spacers Optional Align the brackets to the display mounting holes Use four 4 M8 screws four 4 Griplate Universal Washer Use Universal Spacers if necessar...
Page 7: ...Guide AM500 U Remove the 6mm safety knob screw and set it aside Two or Three person is recommended for this step Lift the cross bar and place it into the receiver Page 7 14 15 16 Rotational Bracket Y...
Page 8: ...ved from step 15 Remove the plastic caps Page 8 17 19 18 20 The screws on the receiver head of the mount can be adjusted to add or subtract the tension of the rotation Power and signal cables can run...
Page 9: ...www mounts com North America 800 368 9700 International 1 714 632 7100 Installation Guide AM500 U Page 9 21 22 Use 6mm Allen Key for tilt adjustments Use 2 5mm for leveling adjustments...
Page 10: ...improper installation modification use or misuse of its products NOTWITHSTANDING ANYTHING TO THE CONTRARY IN THIS WARRANTY THIS WARRANTY IS LIMITED TO FIVE YEARS FROM THE DATE OF PURCHASE IN THE EVEN...