PD6700 Field-Mount Loop-Powered Process Meter
Instruction Manual
12
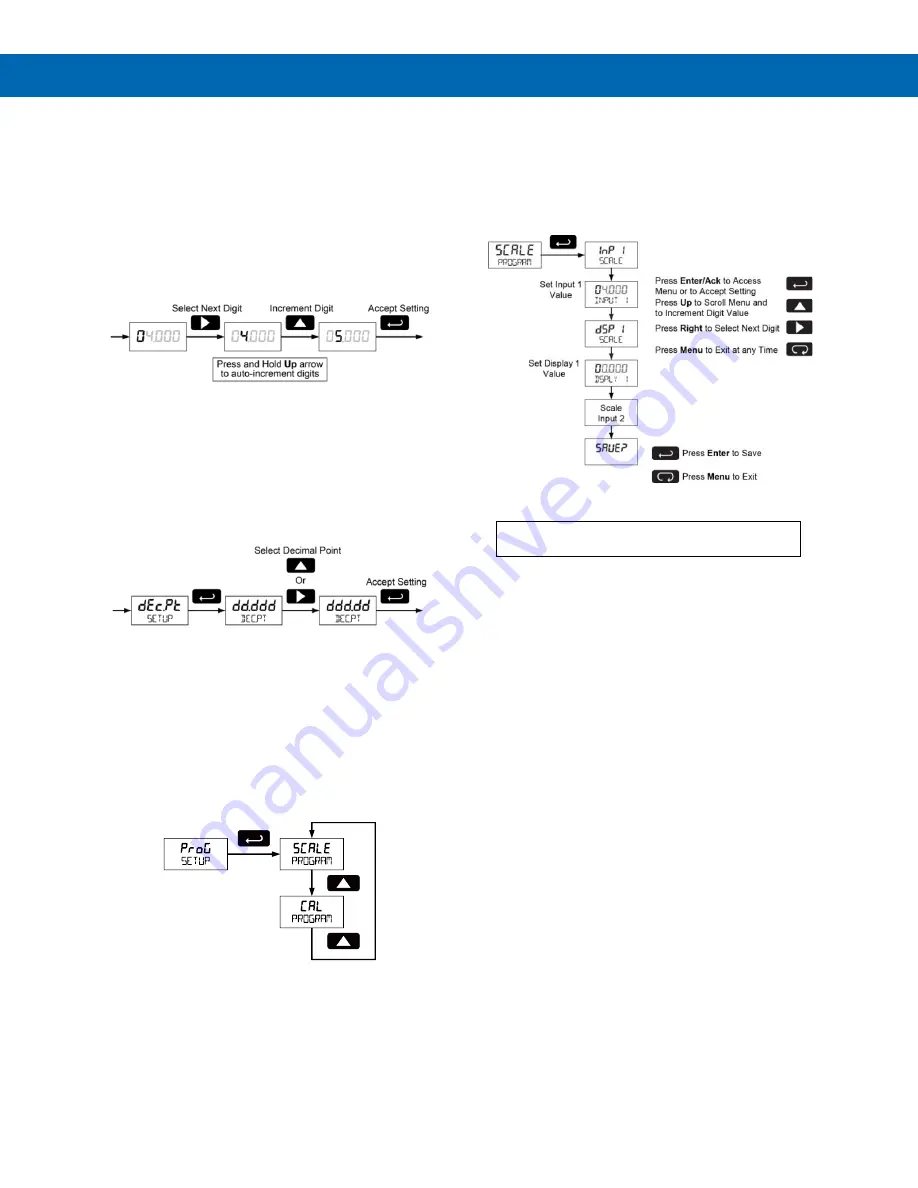
Setting Numeric Values
The numeric values are set using the
Right
and
Up
arrow buttons. Press
Right
arrow to select next digit
and
Up
arrow to increment digit.
The digit being changed blinks.
Press the
Enter
button, at any time, to accept a
setting or
MENU
button to exit without saving
changes.
The decimal point is set using the
Right
or
Up
arrow
button in the
Setup-decimal point
menu.
Setting the Decimal Point (
Dec.Pt
)
Decimal point may be set with up to four decimal
places or with no decimal point.
Pressing the
Right
arrow moves the decimal point
one place to the right until no decimal point is
displayed. Pressing the
Up
arrow moves the decimal
point one place to the left.
Programming the Meter (
Prog
)
The meter may either be scaled (
SCALe
) without
applying an input or calibrated (
Cal
) by applying an
input. The meter comes factory calibrated to NIST
standards, so for initial setup, it is recommended to
use the (
SCALe
) function. The Program menu contains
the Scale (
SCALe
) and the Calibrate (
Cal
) menus.
Process inputs may be scaled or calibrated to any
display within the range of the meter.
Note: The Scale and Calibrate functions are exclusive
of each other. The meter uses the last function
programmed. Only one of these methods can be
employed at a time. The Scale and Calibrate
functions can use up to 32 points (default is 2). The
number of points should be set in the Advanced
Features menu under the Multi-Point Linearization
menu selection prior to scaling and calibration
of the meter, see Advanced Features Menu, page 15.
Scaling the Meter (
SCale
)
The 4-20 mA input can be scaled to display the
process in engineering units.
A signal source is not needed to scale the meter;
simply program the inputs and corresponding display
values.
For instructions on how to program numeric
values see


