background image

18

Repeating audio tracks

When you are playing audio tracks, you can repeat all audio 

tracks or just repeat a portion of the track.

Repeating partial audio tracks

To repeat parts of audio tracks, do the following:

1.

From the Audio mode, press 

OK to display the audio menu.

2.

Using the arrow keys, select A-

B Repeat to set the starting 

point of the section to be 

repeated. Press OK to confirm. 

3.

Select A-B Repeat again to set 

the ending point of the 

section to be repeated. Press 

OK to confirm.

The selected section of the audio track immediately starts 

playing repeatedly. To cancel the repeat playback, select A-B 

Repeat again.

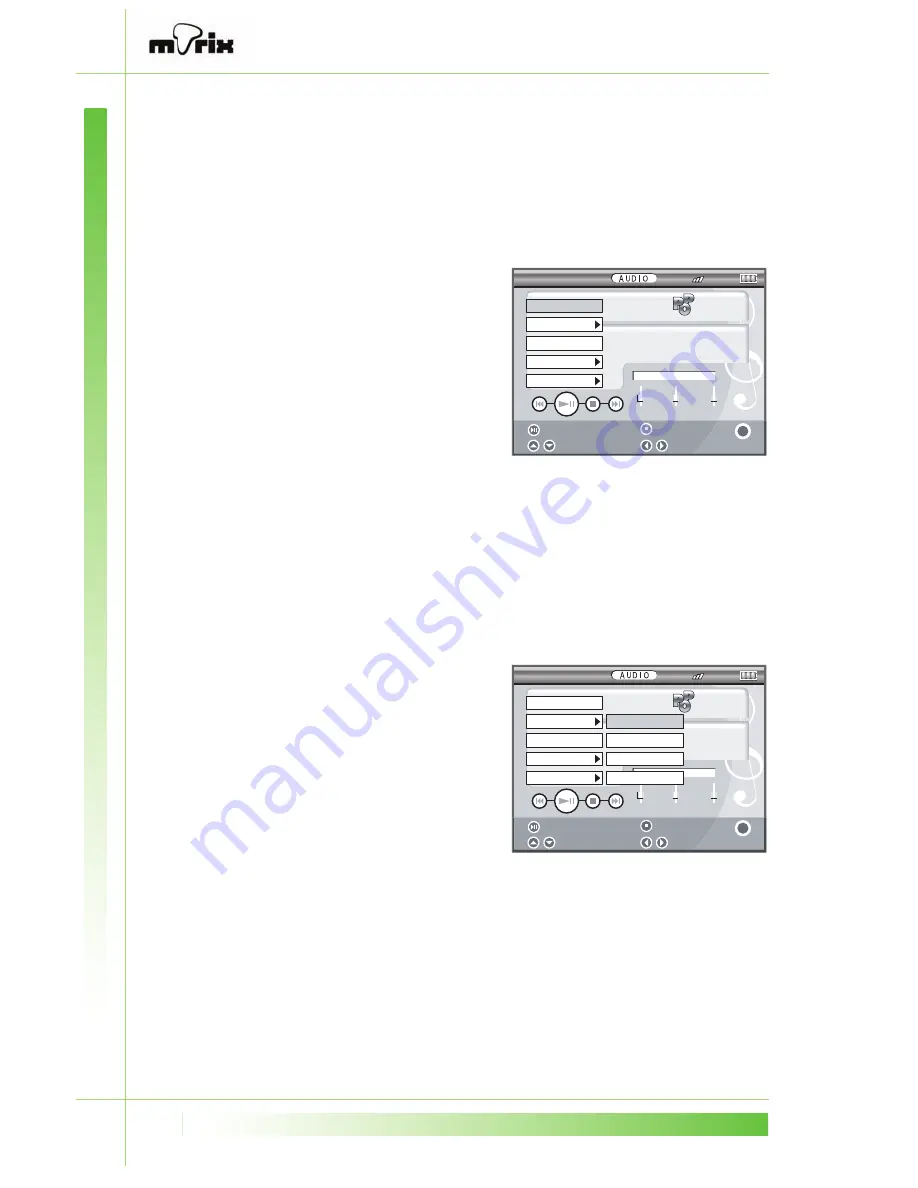
Repeating complete audio tracks

To play back complete audio tracks repeatedly, do the 

following:

1.

From the Audio mode, press 

OK to display the audio menu.

2.

Using the arrow keys, select 

Repeat to set the repeat 

options.

3.

Select one of the following 

options to select the type of 

repeated playback and press 

OK to confirm:

„

None: repeat playback is disabled.

„

One: current audio file is played back repeatedly.

„

All: all audio files are played back repeatedly.

„

Random: audio files are repeated in random order.

20:43

57%

44.1 0.1
kbps khz

0 0 : 0 0

B A S S

T R E B L E

3 D

(Elvis Costello).mp3

A - B   R e p e a t

R e p e a t

D e l e t e

F i l e   I n f o

S e t t i n g

Select

Volume

Play/Pause

Menu

OK

Stop

20:43

57%

44.1 0.1
kbps khz

0 0 : 0 0

B A S S

T R E B L E

3 D

(Elvis Costello).mp3

A - B   R e p e a t

R e p e a t

N o n e

D e l e t e

R a n d o m

F i l e   I n f o

O n e

S e t t i n g

A l l

Volume

Select

Play/Pause

Menu

OK

Stop

Summary of Contents for Multimedia Player

Page 1: ...mTrix Multimedia Player User manual ...

Page 2: ...otected by copyright All rights are reserved No part of this manual may be reproduced by any means mechanical electronic or otherwise in any form without prior written permission of PQI Copyright 2005 All rights reserved Trademarks PQI the PQI logo and the trademark are the registered trademarks of Power Quotient International Co Inc and its affiliates in the United States and other countries Wind...

Page 3: ...e memory card 7 Inserting the battery 8 Using the power adapter 9 Connecting to a PC 10 Connecting earphones 11 Attaching the strap 11 Turning on the mTrix 12 Resetting the player 12 USING THE MTRIX Watching movies 13 Viewing file information 15 Deleting movie files 15 Enabling repeat playback 16 Listening to music 17 Repeating audio tracks 18 Repeating partial audio tracks 18 Repeating complete a...

Page 4: ...de show settings 25 Changing display mode 26 Configuring the settings 27 Setting the equalizer 27 System information 28 Setting the language 28 Setting the date and time 29 Updating the system 29 Selecting a sound effect 30 Configuring the power settings 30 Formatting the memory card 31 Using the file manager 31 Setting factory defaults 32 APPENDIX Specifications 33 Troubleshooting 35 Regulatory i...

Page 5: ...also displays your favorite pictures on the 2 inch TFT LCD screen Portable and easy to operate this miniature media player also features additional storage space with its SD MMC compatibility Features Portable MPEG4 video player to watch your favorite movies MP3 audio player with repeat and equalizer options for high quality sound Digital photo viewer with slide show feature to view digital images...

Page 6: ...yer Power adapter Earphones USB cable Battery pack Pouch Software CD containing USB driver mTrixConverter for converting file formats user manual Quick start guide Product components This section provides details about the mTrix Multimedia Player s hardware components Take a moment to familiarize yourself with the mTrix ports buttons and other components before you start using the product ...

Page 7: ...p eyelet Attach neck strap here for easy carrying 3 Stop button Press to stop playback 4 Up arrow button Press to scroll up through menus or file lists 5 Down arrow button Press to scroll down through menus or file lists 6 Volume increase button Press to increase volume 1 2 3 4 5 6 7 8 9 10 11 12 13 14 ...

Page 8: ...utton Press to play or pause a movie music or image 11 ESC button Press to exit from a menu mode or playback 12 5 way button Use the arrow keys and OK button to navigate through menu items and files Refer to About the 5 way button on page 6 for more information 13 Power button Press and hold to turn power on or off 14 LCD on off detector Closing the cover will press the detector and turn off the L...

Page 9: ...uch as a paper clip to reset the mTrix if it fails to respond or locks up 2 Earphones jack Connect the supplied earphones here Component Description 1 Power jack Connect the power adapter here to power the mTrix and charge the battery 2 Memory card slot Insert an SD MMC card here 1 2 1 2 ...

Page 10: ...to navigate through the menus menu options files and folders on the screen Press OK to select an item from the main menu or to display the on screen menu in Video Audio and Photo modes Use the up and down arrow buttons to scroll through the menu items and options Press the right arrow button to display options or a submenu for a menu item Press the left arrow button to exit from a submenu or retur...

Page 11: ... SD or an MMC card This enables you to transfer media files to the mTrix Multimedia Player and increases its storage space Follow these steps while inserting the memory card 1 Pull back the memory card cover to reveal the memory card slot 2 Insert the memory card into the slot with the metal contacts facing up The illustration shows how to insert an SD card 3 Close the memory card compartment by p...

Page 12: ...rt the battery 1 Remove the battery cover on the back of the mTrix by press ing the notch in A and lifting the cover up B 2 Insert the battery into the battery compartment ensuring that the metal contacts on the battery and the slot are aligned with each other 3 Replace the battery cover by snapping it into place A B ...

Page 13: ...using the AC to DC power adapter provided in your package Connect the power connector to the power connector at the back of the player and connect the other end of the power adapter into a power outlet The power indicator LED turns red while charging Reset ...

Page 14: ... you would for any other disk or folder Create folders for different types of media and copy the corresponding media files to the folder for viewing later on the LCD screen If the media files on your PC are of a format that is not compatible with the mTrix use the mTrixConverter utility on the software CD to convert video and image files After you finish transferring the necessary files click the ...

Page 15: ...rt earphones into the earphones jack as shown Attaching the strap To easily carry the mTrix while traveling use the neck strap Attach the strap to the player as follows 1 String the smaller end of the strap through the strap eye let 2 Loop the larger end of the strap through the smaller end and pull tight ...

Page 16: ... perform a hardware reset Use a small pointed object such as a paper clip to press the reset button at the back The player shuts down and restarts All your music and data files stored in the device hard disk or on the memory card will remain intact after a hardware reset Refer to Left view on page 5 for the location of the reset button Note The LCD screen turns itself off automatically when it has...

Page 17: ...ideo Audio and Photo modes If an external memory card is not present the mTrix displays the contents of the internal Flash memory Watching movies To watch your favorite movies using the mTrix Multimedia Player do the following 1 Turn on the mTrix Multime dia Player and select the Video mode using the arrow keys Press OK to confirm your selection 2 The screen shows a list of the video files on the ...

Page 18: ...o enable repeat playback of the video files Select Repeat Off to disable repeat playback Select Setting to display controls for adjusting the brightness and contrast Use the up and down arrow keys to switch between brightness and contrast Use the left and right arrow keys to adjust the values Select Speed to play the video at faster speeds in reverse and forward direction Choose an option from X4 ...

Page 19: ...to display the video menu 2 Using the arrow keys select Delete One Yes to delete the current file and press OK to confirm 3 Select Delete All Yes to delete all video files from the memory card and press OK to confirm Select Play Menu 20 40 57 DEI10 ASF DEI10 ASF 18 73 MB Time 00 01 13 320 240 0 240 Res X Kbps Res Y 2135000 KHz File Info Delete Repeat 20 47 DEMO ASF Resolution X 320 Resolution Y 24...

Page 20: ...e video menu 2 Using the arrow keys select Repeat On to enable repeated playback and press OK to confirm Note The repeat playback can also be set during playback See Watching movies on page 13 Select Play Menu 20 40 57 DEI10 ASF DEI10 ASF 18 73 MB Time 00 01 13 320 240 0 240 Res X Kbps Res Y 2135000 KHz File Info Delete Off On Repeat ...

Page 21: ...ou can also set the player to display a list of audio files See Mode on page 20 3 Press the left or right arrow buttons to adjust the volume 4 Control the audio playback in the following manner Press Play Pause to start playback of the selected file During playback press the up or down arrow buttons to skip to the previous or next audio file Press Stop to stop playback or Play Pause to pause playb...

Page 22: ...ng complete audio tracks To play back complete audio tracks repeatedly do the following 1 From the Audio mode press OK to display the audio menu 2 Using the arrow keys select Repeat to set the repeat options 3 Select one of the following options to select the type of repeated playback and press OK to confirm None repeat playback is disabled One current audio file is played back repeatedly All all ...

Page 23: ...u 2 Using the arrow keys select Delete One Yes to delete the current file and press OK to confirm 3 Select Delete All Yes to delete all audio files from the memory card and press OK to confirm 20 43 57 44 1 0 1 kbps khz 0 0 0 0 B A S S T R E B L E 3 D Elvis Costello mp3 A B Repeat Repeat Delete Setting Select Volume Play Pause Menu OK Stop File Info 20 44 57 99She Elvis Costello mp3 Title 08 She E...

Page 24: ... on the memory card Press OK to confirm Time To set the type time duration displayed for each audio track do the following 1 From the Audio mode press OK to display the audio menu 2 Using the arrow keys select Setting Time Normal to display the current time of playback of the song Press OK to confirm 3 Select Setting Time Remain to display the remaining time duration for the song Press OK to confi...

Page 25: ... the arrow keys select Setting Sound Effect to adjust the audio quality Press OK to confirm 3 Use the up and down arrow keys to switch between Bass Treble and 3D Use the left and right arrow keys to adjust the parameters Volume 20 45 57 44 1 0 1 kbps khz 0 0 0 0 B A S S T R E B L E 3 D Elvis Costello mp3 Select Play Pause Menu OK Stop Time Equalizer Sound Effect JAZZ ROCK A B Repeat Repeat Delete ...

Page 26: ... a list of images on the memory card 3 Press Stop to switch between thumbnail and list view for the image files Alternatively use the menu to do this as described in Changing display mode on page 26 4 Press the up or down arrow keys to scroll through the files and select a file for viewing 20 46 500M_1 JPG 1 7 Select Play Thumbnail List Switch 500M_1 JPG 2633KB 400M_04 JPG 2041KB 400M_06 JPG 1978K...

Page 27: ...90 degrees Alternatively you can also use the menu to rotate the image as described in the next step Press OK to show the photo menu and select one of the following options using the arrow buttons Select Rotate 90 to rotate the current image by 90 in the clockwise direction Select Rotate 90 to rotate the current image by 90 in the counter clockwise direction Select Slide Show to start an automatic...

Page 28: ...hoto menu 2 Using the arrow keys select Delete One Yes to delete the current file and press OK to confirm 3 Select Delete All Yes to delete all image files from the memory card and press OK to confirm Select Play Thumbnail List Switch Menu OK 20 47 500M_1 JPG 1 7 500M_1 JPG 2633KB 400M_04 JPG 400M_06 JPG 1978KB 300M_7 JPG 617KB File Info Delete Display Mode Setting PHOTO 20 47 500M_1 JPG Width 300...

Page 29: ...andom order or Sequence to display them in sequential order Select a time interval between 2 and 8 seconds to specify the duration for displaying each slide For the Loop option select Yes to enable continuous playback of the slide show or No to play the slide show only once Select Play Thumbnail List Switch Menu OK 20 47 500M_1 JPG 1 7 500M_1 JPG 2633KB 400M_04 JPG 400M_06 JPG 1978KB 300M_7 JPG 61...

Page 30: ...row keys select Display Mode Thumbnail to display thumbnails of the images and press OK to confirm 3 Select Display Mode List to display a list of the images and press OK to confirm Select Play Thumbnail List Switch Menu OK 20 47 500M_1 JPG 1 7 500M_1 JPG 2633KB 400M_04 JPG 400M_06 JPG 1978KB 300M_7 JPG 617KB File Info Delete Display Mode Thumbnail Setting List PHOTO ...

Page 31: ...ngs The following sections describe the various setting menus Setting the equalizer To select a preset equalizer for different types of audio tracks do the following 1 Using the arrow buttons select Equalizer and press OK to display the options 2 Use the up and down arrows to select a preset from the following and press OK to confirm NORMAL POP JAZZ ROCK Select 20 51 OK Enter SETTING Equalizer Sys...

Page 32: ... version and date 2 Press ESC to exit from the menu Setting the language To set the language for the on screen menus do the following 1 Using the arrow buttons select Language and press OK to display the options 2 Use the up and down arrows to select a language from the options and press OK to confirm Various languages are available including English Chinese Japanese French German and Spanish 20 4...

Page 33: ...sing the arrow buttons select System Update and press OK to confirm 2 Use the left and right arrows to select Yes and press OK to confirm the system update WARNING If the firmware upgrade is terminated before it is com pleted the player may be severely damaged Be sure to keep the player connected to the AC adapter while upgrad ing the firmware of the player Select 20 50 OK Enter SETTING Date Time ...

Page 34: ...ower and press OK to display the options 2 Use the up and down arrow buttons to select an option from the following Use the left or right arrow buttons to change the options Contrast adjusts the contrast of the LCD screen Brightness adjusts the brightness of the LCD screen Power Saving specifies the power saving scheme Choose from Battery and DC Screen Saving Mode specifies the time after which th...

Page 35: ...e file manager The file manager enables you to view all the media files on the memory card To use the file manager do the following 1 Using the arrow buttons select File Manager and press OK to display the file man ager A list of all files on the mem ory card is displayed 2 Use the up and down arrow buttons to select a file from the list Press OK to play the media file Depending on the file type V...

Page 36: ...ing the arrow buttons select Default and press OK to confirm 2 Use the left and right arrows to select Yes and press OK to confirm that you restore all default settings Select 20 53 OK Enter SETTING Equalizer System Info Language Date Time System Update Sound Effect Power Card Format File Manager Default NO YES ...

Page 37: ...jack DC power jack SD MMC combination slot USB port compatible with USB 2 0 1 1 PC utility mTrix file format converting appli cation USB driver Battery Rechargeable Li ion battery 3 7V 1050mA Playing time Maximum 4 hours for video 6 hours for audio with LCD off Charging mTrix with adapter 1 5 hours mTrix with USB cable 4 5 hours DC power adapter 5V 2A ...

Page 38: ...tempera ture 0 60 C Video decoding ASF ISO MPEG 4 Video V1 AVI MOV Motion JPEG Audio decoding MP3 CBR VBR WMA WAV Sound effect 3D sound enhance ment bass treble Equalizer Normal pop rock jazz Image decoding JPEG format slide show thumbnails rotate zoom and pan supported PIMS Calendar clock Language English Traditional Chinese Simplified Chinese Japanese Korean French German Spanish Italian Portugu...

Page 39: ...C file If a multimedia file cannot be viewed use the bundled con verting application to transfer the file into a compatible type 4 After disconnect ing the mTrix from my computer I lost data Always disconnect the mTrix from your Windows based computer with the following steps 1 Locate the Safely Remove Hardware icon in the sys tem tray bottom right cor ner of the screen 2 Click and select the opti...

Page 40: ... can radiate radio frequency energy and if not installed and used in accordance with the instructions may cause harmful interference to radio communications However there is no guarantee that interference will not occur in a particular installation If this equipment does cause harmful interference to radio or television reception which can be determined by turning the equipment off and on the user...

Page 41: ...N 61000 3 3 Electromagnetic compatibility EMC Part 3 Limits Section 3 Limitation of voltage fluctuations and flicker in low voltage supply systems for equipment with rated current up to and including 16 A NOTE EN 55022 emissions requirements provide for two classifications Class A is for typical commercial areas Class B is for typical domestic areas To determine which classification applies to you...

Page 42: ...product components will void the warranty Warranty procedure To request servicing or repair assistance from PQI please do the following Contact the PQI customer service department using the contact information provided in this manual Please have the product receipt or serial number ready when you contact the PQI customer service department This will be considered as the proof of your purchase and ...

Page 43: ...se damage caused by neglect of instructions described in this manual or damage caused by misuse or malfunction through simultaneous use of this product and the connected equipment If the part number on the rear panel of the mTrix Multimedia Player has been scratched off damaged removed or altered in any manner the product s warranty may be considered as void ...

Page 44: ... fall on the frame unplug it and have it checked by qualified personnel before operating it again or contact PQI customer support for advice The LCD screen of the mTrix is made of breakable glass and should be treated with care Avoid touching it as it is very delicate and can be easily scratched Avoid applying pressure to the surface of the LCD screen as this may cause non uniform images Use a sof...

Page 45: ... Hong Kong Branch PQI H K Co Ltd Flat F 4 F Yeung Yiu Chung No 8 Industrial Building 20 Wang Hoi Road Kowloon Bay Kowloon H K Tel 852 2707 4118 E mail sales pqi com hk China Branch PQI Suzhou Co Ltd No 100 Tong Yuan Rd Suzhou Industrial Park 215021 China Tel 86 512 6288 2999 Web http www pqi com cn Netherlands Branch PQI EUROPE B V Helftheuvelweg 11 5222 AV Den Bosch The Netherlands Tel 31 73 627 ...

Reviews: