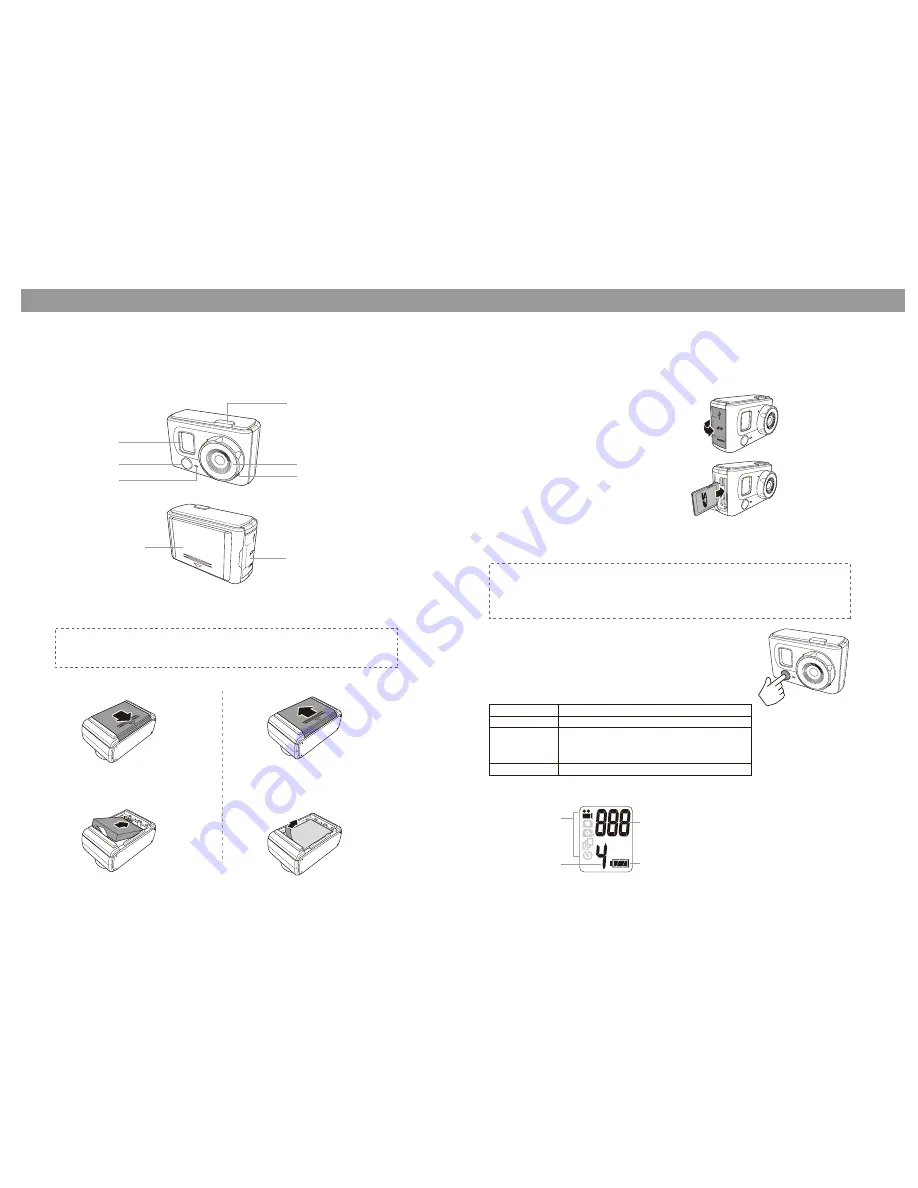
Inserting the SD Card
1. Open the SD card and connectors cover.
2. Insert the SD card with the metal contacts
facing the back of the video camera.
3. Push the SD card into the slot until it
clicks into place.
4. Close the SD card and connectors cover.
An SD card is required to capture photos and videos. The video
camera supports SDHC cards up to 32GB.
Turning On
The LCD Screen
Press the Menu button to turn on the video camera.
To turn off the video camera
Press and hold the Menu button for 2 seconds.
To remove the SD card
Push the SD card to eject it from the slot.
Warning
- Do not remove the SD card while data is being recorded. Doing so may corrupt
the saved data and damage the card.
- Turn off the video camera before removing the SD card.
Inserting the Battery
1. Push down the battery compartment
cover to open it.
2. Align the battery contacts and
then insert the battery into the
compartment.
To remove the battery
1. Open the battery compartment.
2. Pull the ribbon to remove the battery.
3. Close the battery compartment cover.
Warning
Use only the supplied battery or a similar battery recommended by the
manufacturer or your dealer.
LED Indicator
Color
Description
Green
Video camera is turned on
Green Blinking - Video recording is in progress
- Self-timer is activated
- Continuous or triple shooting is activated
Red
Battery is charging
Number of captured videos or
photos
Capture mode
indicator
Battery status
Current resolution
setting
User manual- “PQI
Air” Cam
LCD screen
POWER/
MODE button
LED indicator
SHUTTER/SELECT button
Lens
Microphone
SD card and connectors compartment
Battery compartment
P1
PQI Air Cam
Summary of Contents for Air Cam
Page 2: ...PQI Air Cam P2 ...
Page 3: ...PQI Air Cam P3 ...
Page 4: ...PQI Air Cam P4 ...
Page 5: ...PQI Air Cam P5 ...
Page 6: ...PQI Air Cam P6 ...
Page 7: ...PQI Air Cam P7 ...


