Stage5 Installation Guide
10
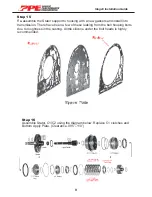
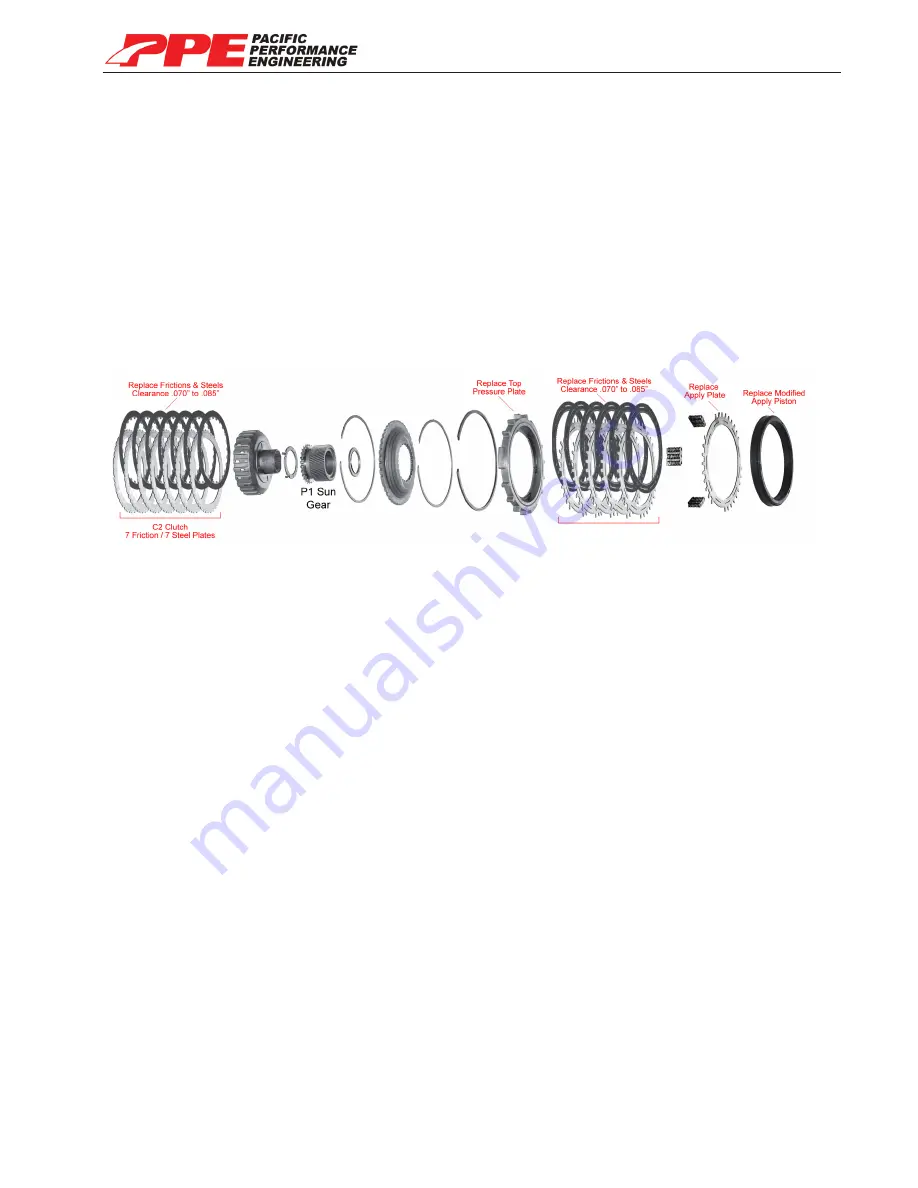
Step 17
Install the stepped Apply Plate flat side up. Make sure the bearing is on top of
the C-1 hub. Install the C-2 hub and start the clutch ordering with a Friction
against Apply Plate. Alternate Kolene® Steel and Frictions (8 Frictions and 8
Steels), ending with a Steel Plate on top. Install a bronze washer on the C2 hub.
Install the P1 Plate, Sun Gear and Snap Ring. Clearance should be from .070” to
.085”.
With rotating module in Converter housing you may air check the C-1 and the
C-2 with a rubber tipped blow gun. 3/8” hole should be at the 7 o’clock position
for the C1, C2 needs to be at the 5 o’clock position.
Step 18
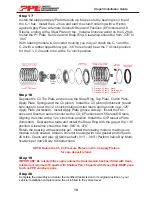
Depress the C3 Top Plate and remove the Snap Ring, Top Plate, Clutch Pack,
Apply Plate, Springs and the C3 piston. Install the C3 piston (furnished), (bleed
hole nees to be at the 12 o’clock position) install return springs onto new .125”
Apply Plate (furnished). Install Apply Plate groove side up. Install the Fric
-
tions and Steels in same manner as the C4; 6 Frictions and 5 Kolene® Steels.
Aligning the slots with a 12 o’clock hole position. Install the C3 Pressure Plate
(furnished). Depress the plate and install the Snap Ring with the gap at the 1:30
position. Clearance should be from .065” to .075”.
Retain the bearing with assembly gel. Install the rotating module, making sure
module is fully seated. Install Converter housing with new gasket and torque to
45 ft.lbs. Check end play @ turbine shaft (.011” - .060”) Perform Valve Boy Modi
-
fications per Valve Body Kit instructions.
NOTE: Retain the C1, C3 Pressure Plates and C3, C4 Apply Pistons
for core deposit refund.
Step 19
IMPORTANT: Do not start the engine unless the transmission has been filled with trans-
mission oil, minimum 16 quartz with Shallow Pan. 18 quartz with Heavy Duty DEEP pans.
Such as PPE aluminum pans.
Step 20
Complete the assembly and return the modified transmission to its original position on your
vehicle. Installation complete once the oil is filled to the correct level.
5 Frictions 4 Steels - Stock
6 Frictions 5 Steels - Preceding Kit
7 Frictions 6 Steels - Current Kit
Summary of Contents for Stage 4
Page 13: ...Stage5 Installation Guide 13...

