


Once the K-DSP board is positioned and correctly plugged on
top of the control board, as in FIGURE 14, it is possible to screw it
back on the two brass spacers support standoff as on FIGURE 15,
using the two screws previously removed from the control board.
Please play attention not to tight too much those screws to
avoid brass spacers support standoff breakage.
Now it is possible to close the amplifier with its cover, screw it
back in position, as it is possible to screw back in position the two
side support steel bars.
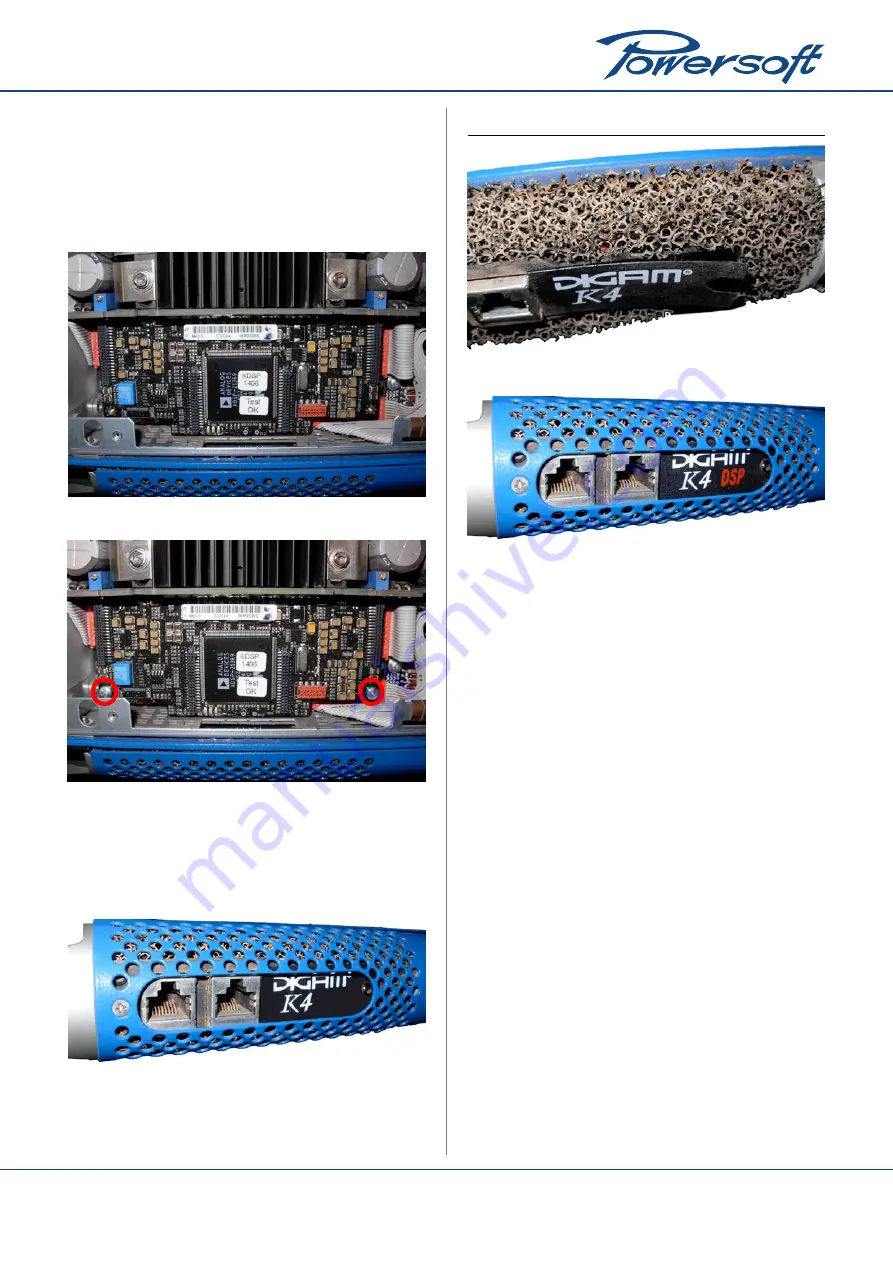
Once the amplifier is closed it is possible to change the front
label from K to KDSP by removing the screw that close the left
front dust filter cover, as on FIGURE 16.
Once opened it’s possible to remove the old label by pulling it
out, as on FIGURE 17, and replace it with the new one certifying
the upgrade to a KDSP amplifier as on FIGURE 18.
5 FIRMWARE UPDATE
Once the KDSP board has been installed it is possible to
perform the amplifier firmware update to disclose the full DSP
functionality.
Turn off amplifier -> insert firmware smartcard (electric
contacts facing down)->while keeping pressed the first and
second buttons on the left of the front panel turn on the amplifier
and wait about 3 to 6 seconds.
Soon after the fan test (full throttle blow), after 5 seconds that
the yellow leds on the panel will be blinking, it is possible to release
the two front panel buttons, KFRONT firmware update will start
automatically.
Please note that during KFRONT update the yellow leds will
continue to blink for about another minute. During this period
the LCD display will remain blank because the KFRONT is under
update and is unable to write on the LCD display.
IMPORTANT NOTE
f
I
f the KDSP is installed correctly: KDSP update will begin
after KFRONT update will be completed, showing “Updating
KDSP” with a progress bar. After a few minutes, the KDSP
update will be completed.
f
I
f the KDSP is NOT installed correctly: a warning message
(“START ERROR” or “KDSP board not present”) is displayed,
requiring a button press confirmation to proceed.
After KDSP update, the KCNTRL update will begin, showing
“Updating KCNTRL” with a progress bar. After a few minutes, the
KCNTRL update will be completed.
FIGURE 14: DSP board correctly positioned
FIGURE 15: DSP board correctly positioned and screwed
FIGURE 16:
Screw to be removed to open dust filter
FIGURE 17: Pull out the old K label
FIGURE 18: Stick the new KDSP label
3


