


© 2018 Powermat Technologies Ltd. All rights reserved.
9
2
Top unit installation
Clean table
surface and make sure it is completely dry.
Before starting, make sure the Charging Spot is connected to power.
Download the Charging Spot 4.0 Installer from Google Play / iTunes
to your Android / iPhone device from the link sent to your
email address. The email also includes a user
name and password for authentication purposes.
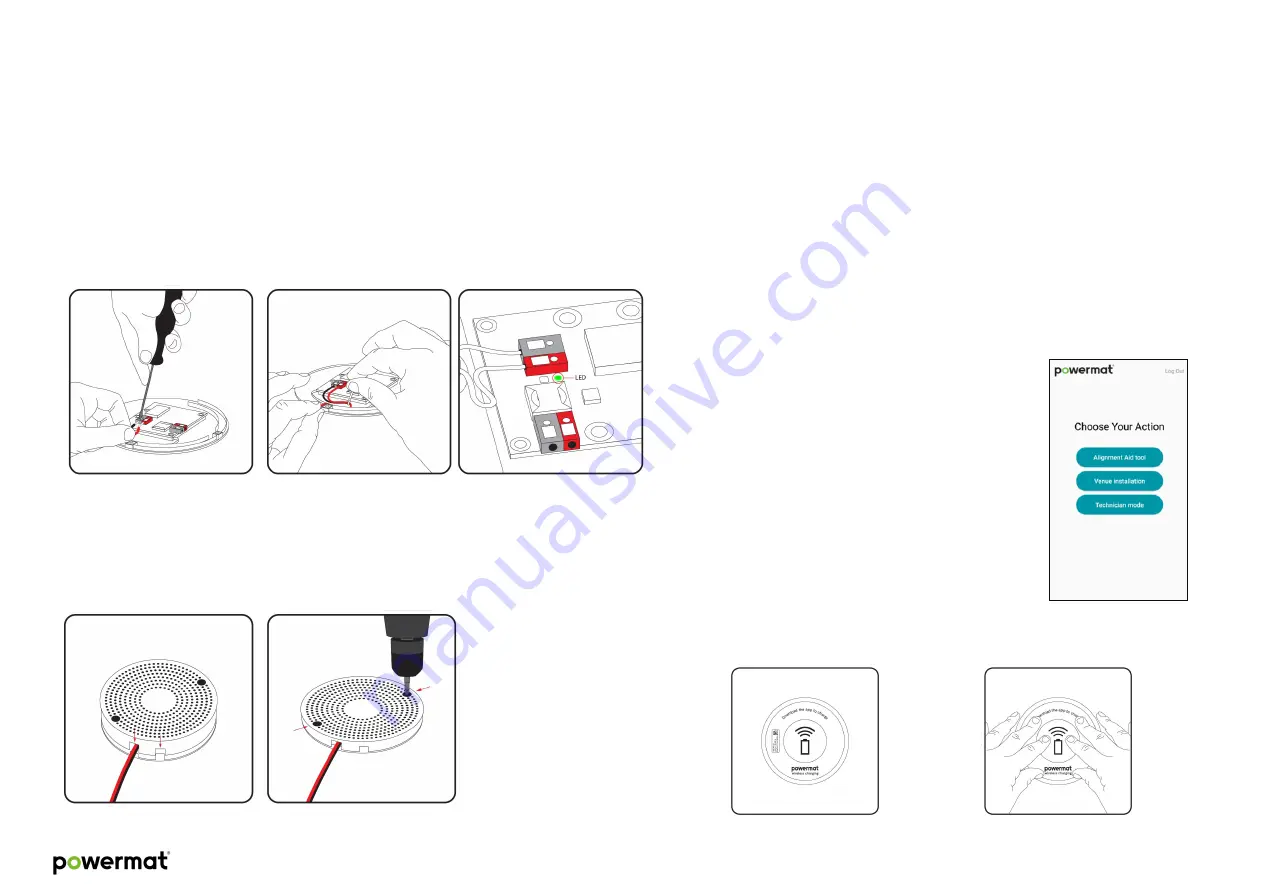
Aligning top unit with installer app:
Place top unit on table
Open installer App
Set volume on your device to max.
Click on ‘Alignment Tool’
App will scan for your Charging Spot ID
printed on the sticker (see Figure 11)
Once correct ID is detected, click continue
to start alignment flow. Follow the app instructions
Connect unit to power:
Connect the DC cable
from the power supply to the Charging Spot. Use a flat-
head screw driver to press down the connectors and insert the wires.
Recommended: Use a cable tie to secure the power connection, to avoid users
from pulling the cable (Figure 7).
Once unit is wired safely, connect the power supply to the AC
wall outlet.
A solid white LED indicator will turn on, located on the bottom chassis,
indicating unit is connected and powered.
Connect bottom cover:
Place & secure bottom cover
to bottom chassis. Take notice to orientation.
Figure 7: Securing wire with cable tie
Figure 6: Power connector
Figure 8: LED indicator
Figure 9: Place cover
Figure 10: Secure cover
Figure 12:TxID
Figure 13: Move top unit according to app instructions
Figure 11: Installer app