PowerBox Systems PowerBox  Competition SRS Instruction Manual Download Page 7

-07-

- Graphic indicator of battery charge state:

  This display is set to match the capacity you previously entered for the 

batteries connected to the backer. Assuming that the battery is of good 
quality, this means: if the bar only reaches the half-way point, then the 
battery is still half-full.

- Operating time:

 This figure shows the elapsed time since the last RESET. It is 

important always to carry out a RESET after each battery charge 
process.

- Output voltage:

  This value displays the backer’s exact output voltage. The voltage fed 

to the servos and receiver is the exact value displayed here.

Note:

The residual capacity of the two batteries as displayed on the screen is 
likely to drift apart as the packs are discharged; this is due to minor 
differences in the rate of discharge of the batteries through the 

PowerBox

. This by no means indicates a fault in the 

PowerBox

; in fact

it proves that the system features genuine redundancy. Here at 

PowerBox Systems

 we take great trouble to compensate for manu- 

facturing tolerances between the two regulators, but it is never possible 
to produce a system which is completely devoid of tolerances. The only 
method of discharging two batteries at 100% identical rates is to use a 
system fitted with only one regulator. However, such systems cannot be 
claimed to offer redundancy!

3.4. After the charge process

The 

PowerBox

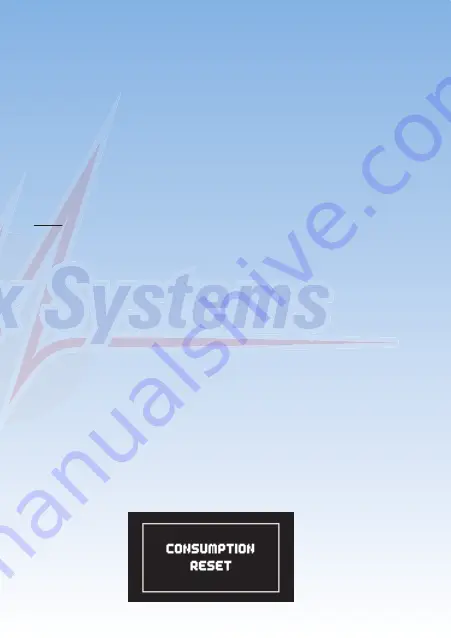
 must be reset after each charge process, otherwise it is 

impossible for the unit to display reliable values for energy consumption 
and operating times. This is the reset procedure:
With the system switched on, locate both buttons I and II on the 

SensorSwitch

 and press them simultaneously; hold them pressed in 

until the following screen display appears:


Summary of Contents for PowerBox Competition SRS

Page 1: ......

Page 2: ...ial signal This reduces the physical connection between the receiver and the PowerBox to a single cable It is also straightforwardly possible to connect a second receiver which takes over the entire c...

Page 3: ...in the Competition version Synchronised servo output for totally synchronous servo response Flight recorder records Lost Frames and fail safe periods for all receivers connected to the backer Variabl...

Page 4: ...d controls Left socket fot Spektrum telemetry Right SensorSwitch socket Socket for USB Interface and telemetry MSB und HoTT SET Button Power on status LEDs Switch buttons for Battery 1 and 2 Door sequ...

Page 5: ...between battery and backer The markings are printed clearly on the case cover Connect the SensorSwitch to the appropriate red socket Note that the ribbon cable must run upwards In models subject to p...

Page 6: ...ay is always correct for the type of battery you have selected This means that the bar will extend right to the top of the box if the connected battery is fully charged assuming that you have set the...

Page 7: ...the rate of discharge of the batteries through the PowerBox This by no means indicates a fault in the PowerBox in fact it proves that the system features genuine redundancy Here at PowerBox Systems w...

Page 8: ...flying field as you will rarely need to consult the operating instructions This is the basic rule in programming buttons I and II are used to move the cursor or change values while the SET button is u...

Page 9: ...the SET button to select it cursor changes to a solid disc You can now alter the value using buttons I and II Once you have selected the desired value press the SET button to confirm it this saves sto...

Page 10: ...on on this subject can be found in the instructions for these components supplied by the manufacturers Compared with a direct unregulated voltage of 8 4V the advantage of a stabilised 7 4V supply is t...

Page 11: ...S point the first point in the TX SYSTEM menu enables you to select your radio control system Spektrum DSM2 and DSMX If you select Spektrum DSM2 or DSMX the additional menu point BIND now appears Whet...

Page 12: ...afe time to 0s this is important if you wish to use two receivers as it ensures a fast switch over if signal loss occurs Turn off the telemetry on one receiver SJ HoTT If you wish to use a HoTT receiv...

Page 13: ...out A more detailed description of the procedure can be found in the Support Forum on our website including information on the subject of telemetry JR DMSS In the case of the JR DMSS system you must u...

Page 14: ...ox Cockpit Competition SRS The numbers to the right of the colon are the channels as they arrive from the transmitter The FS or HD to the right of the numbers indicates Fail Safe or Hold mode Each cha...

Page 15: ...tter to move all the model s control surfaces the undercarriage and the throttle to the positions which you want them to take up if a fail safe situation should occur then press the SET button this ac...

Page 16: ...aps can be controlled using only one radio channel In models such as jets and warbirds which by their nature have a large number of working systems this feature can be very important but it can also m...

Page 17: ...T button You can now release the aileron stick the PowerBox maintains this position You now have both hands free and can adjust the position accurately with one hand using buttons I and II whilst chec...

Page 18: ...Now select INIT OUTPUT The output is initialised by moving the switch on your transmitter to both end points If you have set up a delay at the transmitter wait until the end point has been reached Use...

Page 19: ...P ASSISTANT describes the TASKs in the actual door sequencer in accordance with the data you enter The Assistant guides you through the settings everything you need to do is described on the screen Th...

Page 20: ...the SET button again to proceed The door sequencer s method of working is determined in the following menu The following sequences are available Mode 1 Extend undercarriage Open wheel doors extend un...

Page 21: ...ain wheel doors Move the cursor to the appropriate mode and press the SET button to confirm your choice Select OK to move on to the next screen display Connect your retract system valve to output 4 On...

Page 22: ...the next stage of the procedure Connect the nosewheel door servo to output 1 Press the SET button to close the nosewheel door repeat the procedure in the next set up screen to open the door The succee...

Page 23: ...and you will see this screen display The PowerBox door sequencer is an in house development which offers unprecedented facilities for the programmed movement of wheel doors Right at the outset it is i...

Page 24: ...the gear switch If you use the Assistant but find it necessary or desirable to alter the settings subsequently perhaps to fine tune the timing then this can be carried out using the menu points outli...

Page 25: ...as Stop and Start The following example demonstrates how one wheel door opens half way when the transmitter switch is operated pauses for a while then runs to its end point When the switch is reverse...

Page 26: ...In other words you can give free rein to your imagination Note if you wish simply to switch servos or valves on or off you must always enter a time difference in the sequence as the door sequencer nee...

Page 27: ...choice with the SET button at the same time the system stores the position of the nosewheel servo at which it is to remain 7 Reading out the flight recorder The RF Flight Recorder display is accessed...

Page 28: ...metry The Cockpit Competition SRS makes battery data available as telemetry information which can be exploited by various makes of radio control system The unit supports the following makes of equipme...

Page 29: ...lect one of the Reset options the intention is to avoid accidental erasure of data If you confirm this query the settings are permanently erased and cannot be restored The lowest line in the menu PC C...

Page 30: ...full battery voltage This means that the servos and receiver are being operated on an excessive voltage which could lead to failures in the longer term This malfunction usually occurs after a reversed...

Page 31: ...me rate Screen OLED 128 x 64 pixels graphic Servo sockets Competition 18 sockets 14 channels Cockpit 21 sockets 12 channels Temperature range 30 C to 75 C Weight 115 g SensorSwitch 15 g EMV approval E...

Page 32: ...32 13 Dimensions...

Page 33: ...Forum which covers all queries relating to our products This helps us considerably as we no longer have to answer frequently asked questions again and again At the same time it gives you the opportuni...

Page 34: ...e reason why we are able to grant a 36 month guarantee on our products valid from the initial date of purchase The guarantee covers proven material faults which will be corrected by us at no charge to...

Page 35: ...our obligation to pay compensation is limited to the invoice price for those of our products which are involved in the event unless this restriction is deemed unlawful For this reason we are unable t...

Page 36: ...erBox Systems GmbH certificated according to DIN EN ISO 9001 2008 Ludwig Auer Stra e 5 D 86609 Donauw rth Germany Tel 49 906 22 55 9 Fax 49 906 22 45 9 info PowerBox Systems com www PowerBox Systems c...

Reviews: