background image

8

Meats

Liquid / Cups

Approximate Minutes

Beef/Veal, roast or brisket

3-4

35-40

Beef Meatloaf, 2 lbs

1

10-15

Beef, Corned

4

50-60

Pork, roast 

1

40-45

Pork, ribs, 2 lbs.

3

20

Leg of Lamb 

2-4

35-40

Chicken, whole, 2-3 lbs.

3-4

20

Chicken, pieces, 2-3 lbs.

3-4

15-20

Cornish Hens, two

1

15

Meat/Poultry Soup/Stock

4-6

15-20

UNIT SPECIFICATIONS

NOTE: All pressure cooking modes require the addition of liquid in some form 

(water, stock, etc.). Unless you are familiar with the pressure cooking process, 

follow recipes carefully for liquid addition suggestions. Never fill inner pot above 

MAX line. Always use the Rapid Release Button to lower pressure quickly.

Vegetables

Liquid / Cups

Approximate Minutes

Asparagus, thin whole

1

1 -2

Beans, fava

1

4

Beans, green

1

2-3

Beans, lima

1

2

Beets, medium

1

10

Broccoli, pieces 

1

2

Brussel sprouts, whole

1

4

Carrots, 1-inch pieces

1

4

Corn, on-the-cob

1

3

Pearl Onions, whole

1

2

Potatoes, 1 1/2” chunks

1

6

Potatoes, whole, medium 

1

10-11

Squash, acorn, halved

1

7

Squash, summer, zucchini

1

4

Seafood / Fish

Liquid / Cups

Approximate Minutes

Clams

1

2-3

Lobster, 1 1/2 - 2 lbs.

1

2-3

Shrimp

1

1-2

Fish, Soup or Stock

1-4

5-6

Model 

Number            

Supply  

Power

Rated  

Power

Capacity  

of Inner Pot

Working  

Pressure

Safety Working 

Pressure

PCXL-PRO6 AC 120V 60HZ

1000W

6QT

0-80 kPa

80-90 kPa

PRESSURE COOKING  CHARTS

1.   DOES THE Power Pressure Cooker XL Pro™ 

HAVE LEAD IN IT?


No!

2.   WHAT TYPE OF STEEL IS THE UNIT  

MADE OF?


Stainless Steel

3.   HOW DO YOU ASSEMBLE/DISASSEMBLE 

THE UNIT?


See Diagram on page 3 of this manual.

4.   WHY WOULD THE LID COME OFF WHEN  

IT SHOULDN’T?


It should only come off if there was no pressure 

inside.

5.   WHAT IS THE DEFAULT TIME?


Each cooking mode has a default time that 

appears as soon as you select that desired mode 

button. Before the Default Time “minute count 

down” clock begins, the unit must first reach 

the proper pressure


and/or temperature for that 

mode.

6.  

HOW LONG DOES IT TAKE FOR THE UNIT  

TO REACH FULL PRESSURE AND FOR  

THE COOK TIME CLOCK TO START A  

COUNT DOWN? 

Up to 17 minutes.

7.  

CAN YOU CHANGE THE COOK TIME  

SO THAT IT IS MORE THAN THE  

DEFAULT SETTING? 

Yes!


SEE CHART ON PAGE 7.

8.   CAN YOU LEAVE THE UNIT ON WHILE  

NOT AT HOME? 

Yes!

9.   CAN YOU PUT FROZEN FOODS IN  

WITHOUT DEFROSTING?


Yes, remember to add an extra 10 minutes for 

frozen meats.

FREQUENTLY ASKED QUESTIONS

General Operating Instructions

Summary of Contents for PCXL-PRO6 PRO XL

Page 1: ...For Model PCXL PRO6 ...

Page 2: ...ful and popular kitchen appliances for worldwide use The Power Pressure Cooker XL Pro is the latest in our distinguished line We have tested and perfected the right combination of metals cooking surfaces and digital technology guaranteed to help you get mealtime raves from the whole family Once familiar with the one touch pre set system you ll find that many of your favorite family recipes can be ...

Page 3: ...roblems Always check the pressure release devices for clogs before use Do not open until the unit has cooled and all internal pressure has been released If the unit is difficult to open this indicates that the cooker is still pressurized do not force it open Any pressure in the cooker can be hazardous See Instructions For Use Do not use this pressure cooker for pressure frying with oil Thisapplian...

Page 4: ... During this process protect your skin from any contact with escaping steam The STEAM mode heats cooking liquid in the Inner Pot to a boil in a matter of minutes for steaming and cooking an endless variety of foods The KEEP WARM mode holds and keeps cooked food warm for an extended period of time Foods kept at KEEP WARM mode for periods beyond 4 hours may lose their good flavor and texture SHORT C...

Page 5: ... release port 5 Spring Loaded Safety Pressure Release Should all safety features listed above fail this spring loaded device located beneath the heating element will automatically lower the Inner Pot causing it to separate automatically from the Rubber Gasket This will enable the steam and pressure to automatically escape around the pot Lid avoiding a dangerous situation 6 Temperature Cut Off Devi...

Page 6: ...ket After cleaning re attach Gasket to Lid Liner and snap back in place 2 Inner Pot Note Max Fill Line 3 Placing The Lid On The Cooker Place Inner Pot into the unit with food Never load Inner Pot above the MAX line Rotate the Inner Pot to make certain that it is seated properly on the Heating Plate Check for proper placement of rubber Gasket Lid Liner underside Lid rim then place Cooker Lid on Coo...

Page 7: ...it must be cleaned thoroughly after each use in order to avoid staining caused by a build up of food or cooking residue DO NOT POUR COLD WATER INTO A HOT PRESSURE COOKER Note To ensure safe operation of this unit strictly follow the cleaning and maintenance instructions after each use Should a tiny bit of food such as a grain of rice or pea shell remain in the unit it could prevent the safety devi...

Page 8: ...zeros will stop rotating and begin counting down the time Upon completion the unit will beep the LED Display will be blank and the unit will enter KEEP WARM mode once the time has expired until canceled NOTE You may override pre programmed time by selecting the TIME ADJUSTMENT button IMPORTANT Any function can be stopped immediately by pressing the KEEP WARM SAUTÉ CANCEL button 1 time The Power Pr...

Page 9: ... is also important to be sure the Float Valve is assembled correctly Incorrect assembly may cause steam to come out the sides or prevent pressure from building The Float Valve should be able to move up and down freely only stopping when the silicon gasket meets the Lid It is however normal for condensation to appear in the condensation collector See illustration below for assembly 10 minutes 20 10...

Page 10: ...2 3 Lobster 1 1 2 2 lbs 1 2 3 Shrimp 1 1 2 Fish Soup or Stock 1 4 5 6 Model Number Supply Power Rated Power Capacity of Inner Pot Working Pressure Safety Working Pressure PCXL PRO6 AC 120V 60HZ 1000W 6QT 0 80 kPa 80 90 kPa PRESSURE COOKING CHARTS 1 DOES THE Power Pressure Cooker XL Pro HAVE LEAD IN IT No 2 WHAT TYPE OF STEEL IS THE UNIT MADE OF Stainless Steel 3 HOW DO YOU ASSEMBLE DISASSEMBLE THE...

Page 11: ...for all foods and particularly for those containing little acid These include vegetables meats and seafood When canning there is no room for experimentation Altering cooking time ingredients and temperatures can be dangerous and risky Using the exact time temperature and method specified in the recipe will protect the food from harmful bacteria molds and enzymes Adding too much time to a recipe wi...

Page 12: ...process The more air removed the longer the shelf life Raw Packing is the process of canning fresh but unheated foods The process causes foods such as fresh fruit to float in their jars Raw packed foods tend to lose color over time Raw packing may be preferable in some recipes Hot Packing is the process of canning foods that have been pre cooked prior to packing them in their jars This reduces the...

Page 13: ...rvation http www uga edu nchfp or your local county extension agent Safe Canning Tips Do not use over ripe fruit Bad quality degrades with storage Do not add more low acid ingredients onions celery peppers garlic than specified in the recipe This may result in an unsafe product Don t over season with spices Spices tend to be high in bacteria making canned goods unsafe Do not add butter or fat Fats...

Page 14: ...are easily removed by soaking jars several hours in a solution containing 1 cup of vinegar 5 percent acidity per gallon of water Lid Preparation The self sealing lid A consists of a flat metal lid held in place during processing by a metal screw band B When jars are processed the lid gasket softens to form an airtight seal with the jar To ensure a good seal carefully follow the manufacturer s dire...

Page 15: ...y trapped air bubbles as in FIG 2 4 Place a clean lid on top of the jar and then add a screw band Turn clockwise and hand tighten in place as in FIG 3 NOTE Never retighten lids after processing jars As jars cool the contents contract pulling the self sealing lid firmly against the jar to form a high vacuum Ifscrewbandsaretooloose liquidmay escape from jars during processing and seals may fail If s...

Page 16: ...nd carefully slide the Rapid Release Button forward fig 4 page 4 in short bursts at first After initial short bursts leave the button in the forward position until all the pressureandsteamhaveescaped Carefullyremovethelid 10 Using Canning Tongs remove the hot jars and place them on a heat resistant surface and allow to cool to room temperature 11 When jars are thoroughly cool remove the Screw Band...

Page 17: ...ranty of merchantability or fitness for a particular purpose on this product is limited in duration to the duration of this warranty Some states do not allow limitations on how long an implied warranty lasts so the above limitation may not apply to you 4 Repair or replacement of the product or if repair or replacement is not feasible a refund of the purchase price is the exclusive remedy of the co...

Page 18: ...16 ...

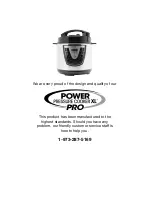
Page 19: ... product has been manufactured to the highest standards Should you have any problem our friendly customer service staff is here to help you 1 973 287 5169 We are very proud of the design and quality of our ...

Page 20: ...Distributed By Tristar Products Inc Fairfield NJ 07004 2015 Tristar Products Inc PCXL PRO6_IB_TP_ENG_V2_150105 ...

Reviews: