


Technical Specifications
Dimensions:
Footprint: 55in w x 22in d / 140cm w x 56cm d
Max. handlebar height: 41in / 103cm
Max. saddle height: 44in / 113cm
Weight:
Total: 121lb / 55kg
Flywheel: 23lb / 10.5kg
Max. user weight:
220lb / 100kg
Certification
BS EN 957-1:2005, BS EN 957-10:2005, ASTM F1250-00:2006
Warranty
Frame
5 years
Parts
1 year
Labor
1 year
Wear Items
6 months
Saddle Upholstery
Pedal Clip & Strap
Handlebar Grip
Brake Felt
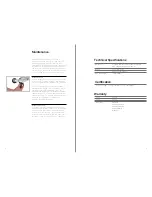
Regular maintenance must be performed on the
power
BIKE
™ for optimal performance and longevity.
Please read and follow all instructions below. If the
power
BIKE
is not maintained as described, components
may wear excessively and the power
BIKE
may become
damaged. Improper maintenance will void the warranty
terms. If you have questions about maintenance, contact
your local distributor or refer to www.powerbike.com.
Daily maintenance
1. Make sure that the power
BIKE
is level. If the power
BIKE
rocks on your floor, turn the leveling feet underneath the
front or rear stabilizer until the rocking motion is eliminated
2. After each user finishes exercising, the power
BIKE
should be disinfected and cleaned to maintain a hygienic
environment. First, apply a disinfectant spray to the
handlebars and the saddle. Dry the handlebars and the
saddle using a lint-free cloth. Next, apply a small amount
of disinfectant to a lint-free cloth and clean the adjustment
knobs and the lock handles. Avoid using strong
detergents on the power
BIKE
frame.
Regular maintenance
Some parts of the power
BIKE
may become loose as a
result of repeated use. Check pedals, toe clips, and pedal
straps, and make sure that they are properly tightened.
Next, check all exposed screws, bolts, and nuts, and
make sure that they are properly tightened. Finally, check
the saddle to make sure that it is not loose or damaged.
Maintenance
8
9


