background image


i

Important Safety Instructions 
 
For your safety please read the following instructions carefully before 

installing and connecting this unit to the mains supply. We advise you to 

follow all instructions, adhere to all warnings and keep these instructions 
for future reference. 
 
WARNING – to reduce the risk of fire or electric shock: 


Do not remove the cover from the unit. 


Do not expose the unit to rain or moisture. 


The unit must not be used near water or exposed to dripping or 

splashing water or other liquids. 


Do not place vases or other objects filled with water on the unit. In 

the event of any spillage of liquid onto the unit switch off 

immediately, disconnect from the mains supply and contact your 
dealer for advice. 


Do not use any cleaning fluids on the unit. Do not spray aerosols at 

or near the equipment. To clean the unit use a dry, lint-free cloth. 


Do not place naked flame sources, such as lighted candles, on the 

unit.  


Ensure that small objects do not fall through any ventilation grills. 

If this occurs switch off immediately, disconnect from the mains 
supply and contact your dealer for advice. 


Safety Precautions 
 
Check that the rear of the unit indicates the correct mains supply voltage 
and frequency. If your mains supply voltage or frequency is different 

please consult your dealer. The unit is designed to operate only on the 

supply voltage and type that is indicated on the rear panel. Connecting 
the unit to other power sources may result in damage. 
 
The unit is of Class 1 construction and must be connected to a mains 

socket outlet with a protective earth connection. The unit must not be 
used unless correctly earthed and must be switched off when not in use. 

 
The power supply cord is intended to serve as the disconnect device, the 
mains socket-outlet shall be installed near the equipment and shall be 

easily accessible. If you do not intend to use the unit for a long period of 
time, unplug it from the mains socket. Unplug the unit during lightning 

storms. 
 
Terminals marked with the following symbol are hazardous live and 

external wiring connected to these terminals requires installation by a 
competent person or the use of ready-made leads or cords. 


Summary of Contents for Belles 350A Reference

Page 1: ...ReferencePower Amplifier Instruction Manual ...

Page 2: ...ion grills If this occurs switch off immediately disconnect from the mains supply and contact your dealer for advice Safety Precautions Check that the rear of the unit indicates the correct mains supply voltage and frequency If your mains supply voltage or frequency is different please consult your dealer The unit is designed to operate only on the supply voltage and type that is indicated on the ...

Page 3: ...nion symbol for indicating separate collection for electrical and electronic equipment This product contains electrical and electronic equipment that should be reused recycled or recovered and so should not be disposed of with unsorted regular waste Please return the unit or contact your authorised dealer from where the product was purchased for more information Plug Fitting Instructions U K The p...

Page 4: ...ch is coloured GREEN YELLOW must be connected to the terminal which is marked with the letter E or coloured GREEN If a 13amp BS1363 plug is used a 4 0 amp slo blo fuse must be fitted or if any other type of plug is used a 4 0 amp slo blo or 4 0 amp slo blo fuse must be fitted either in the plug or adapter or on the distribution board ...

Page 5: ...per care the appearance of the Belles 350A Reference will be preserved for years Unpacking the Unit When you receive your unit carefully inspect the carton for any damage Any obvious dents or scuff marks should alert you to the possibility of damage to the contents If any external damage to the carton is found note the location in relation to the orientation of the amplifier as it is removed from ...

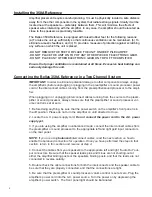
Page 6: ...ugging in or unplugging interconnect cables running from the source to the pream plifier or sound processor always make sure that the preamplifier or sound processor vol ume control is set at zero 1 Before doing anything be sure that the power switch on the amplifier s front panel is in the off position Please do not turn the amplifier on until directed to do so 2 Locate the A C power supply cord ...

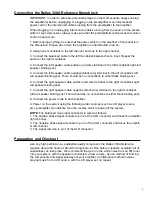
Page 7: ... post 6 Connect the right speaker cable positive red wire terminal to the right monoblock right red speaker binding post 7 Connect the right speaker cable negative black wire terminal to the right monoblock left red speaker binding post There should be no connections to either black binding post 8 Connect the power cords to each amplifier 9 Power on the system using the following order sources suc...

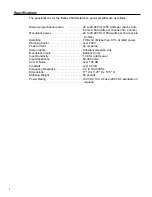
Page 8: ...hannel into 8 ohms Distortion THD and IM less than 0 1 at rated power Damping Factor over 2000 Peak Current 64 amperes Stereo Inputs Unbalanced stereo only Monoblock Inputs Balanced only Input Sensitivity 1 98 for rated power Input Impedance 50 000 ohms Hum Noise over 100 dB Crosstalk over 60 dB Frequency Response 0 2 to 100 000 Hz Dimensions 17 W x 5 25 H x 16 5 D Shipping Weight 65 pounds Power ...

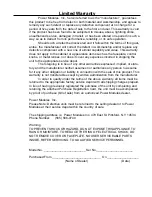
Page 9: ... and the manufacturer neither assumes nor authorizes any person to assume for it any other obligation or liability in connection with the sale of this product This warranty is not transferable except by written authorization from the manufacturer In order to qualify under the terms of the above warranty all items must be returned to the appropriate factory service depot with all shipping charges p...

Reviews: