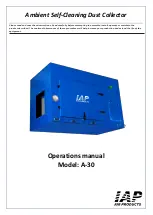
background image

1 HP Dust Collector

8

For technical questions call: 1-800-665-8685

8353237

V 1.50

SYMPTOM

POSSIBLE CAUSE

CORRECTIVE ACTION

Motor will not 

start, or it growls 

on start up.

1.


Power supply fuse or circuit breaker has tripped.

1.


Disconnect power, and inspect circuit for 

electricalshorts and repair. Replace circuit breaker if 

it is old or has tripped many times.

2.


Toggle switch is broken inside.

2.


Disconnect power, and use an ohmmeter to check 

switch terminals for continuity, and replace switch 

if  required.

3.


Start capacitor is at fault.

3.


Replace start capacitor.

4.


Motor fan cover is dented, stopping the fan from 

being able to spin.

4.


Replace motor fan cover (and fan, if damaged).

5.


Motor is at fault.

5.


Replace motor.

Motor runs 

slower than 

normal.

1.


Poor electrical connection.

1.


Inspect eh power supply for loose, corroded or 

overheated electrical connections and reapir.

2.


Low power source voltage

2.


Have the power source voltage checked; reduce the 

length of extension cord.

3.


Motor is at fault

3.


Replace the motor.

Loud repetitious 

noise, or 

excessive 

bibration coming 

from dust 

collector.

1.


Dust collector is not on a flat surface and 

wobbles.

1.


Stabilize the dust collector.

2.


Impeller fan is damaged and unbalanced.

2.


Unplug dust collector, and inspect the impeller for 

dents, bends, loose fins. Replace impeller if any 

damage is found.

3.


The motor mounting is loose.

3.


Make sure all fasteners on the dust collector are 

tight.

4.


Impeller is loose on the motor shaft.

4.


Replace the motor and impeller as a set if the 

motor shaft and the impeller hub are damaged.

5.


Motor fan cover is dented, causing the motor fan 

to hit the cover while spinning.

5.


Replace motor fan cover.

Dust collector does 

notadequately 

collect dust 

or chips; poor 

performance.

1.


Dust collection bag is full.

1.


Empty bags.

2.


There is a restriction at the inlet grate.

2.


Remove dust line from dust collector inlet and 

clean debris from the inlet grate (and wire- 

connector, if installed).

3.


The dust collector is too far away from the point 

of suction, or there are too many sharp bends in 

the ducting.

3.


Relocate the dust collector closer to the point of 

suction, and rework ducting without shrp bends.

4.


The lumber is wet and not flowing through the 

dust lines smoothly

4.


Process lumber with less than 20% moisture 

content.

TROUBLESHOOTING

Summary of Contents for 8353237

Page 1: ...User Manual 8353237 V 1 50 1 HP Dust Collector Please read and understand all instructions before use Retain this manual for future reference...

Page 2: ......

Page 3: ...way from the work area Distraction can cause you to lose control Do not let them handle tools hoses or extension cords No one should be in the work area if they are not wearing suitable protective equ...

Page 4: ...ccidental starting unplug the power cord before changing or cleaning the filter dust bag or chip bag 14 Do not use without the filter dust bag and or chip bag in place 15 Do not unplug by pulling on t...

Page 5: ...ere is a choice between different processes 5 Do not use for extended periods Take frequent breaks when using this tool 6 Let the tool do the work Grip tool as lightly as possible while still keeping...

Page 6: ...pport rods to the base plate with four M5 8x15 Phillip head screws and four flat washers and to the collector using two M5 8 x 15 Phillip head screws two flat washers and two hex nuts as shown in Figu...

Page 7: ...g clamp as shown in Figure 9 2 If belts are not already installed on the collection and filtration bags thread the cleated end of each belt through the left hole and out the right hole of each bag Mak...

Page 8: ...e bibration coming from dust collector 1 Dust collector is not on a flat surface and wobbles 1 Stabilize the dust collector 2 Impeller fan is damaged and unbalanced 2 Unplug dust collector and inspect...

Page 9: ...6 Switch safety key Part no Description 17 Swtich 18 Motor 19 Rubber gasket 20 Impeller housing support 21 Flat pin 22 Rubber gasket 23 Collector 24 Collection bag 25 Filtration bag 26 Power cord 27 4...

Page 10: ...1 HP Dust Collector 10 For technical questions call 1 800 665 8685 8353237 V 1 50...

Page 11: ...el du Propri taire 8353237 V 1 50 Collecteur de poussi re 1 CV Vous devez lire et comprendre toutes les instructions avant d utiliser l appareil Conservez ce manuel afin de pouvoir le consulter plus t...

Page 12: ......

Page 13: ...br s et sombres sont propices aux accidents 2 Travaillez dans un environnement de travail s curitaire N utilisez pas l outil dans des endroits humides ou mouill s Gardez l outil l abri de la pluie N u...

Page 14: ...ali re ou la poudre 6 Pour viter les risques pour la sant caus s par les vapeurs ou les poussi res n aspirez pas les mati res toxiques AVERTISSEMENT Pour r duire les risques d incendie de d charge lec...

Page 15: ...bord consulter un m decin et passer des examens m dicaux r guliers pour s assurer que les probl mes m dicaux ne sont pas caus s ou aggrav s par l usage de l outil Les femmes enceintes ou les personnes...

Page 16: ...ates 5 de mm 22 Rondelles plates 8 de mm 12 Vis cruciformes M5 0 8 x 15 6 Vis cruciformes M5 0 8 x 10 16 Vis cruciformes M4 0 7 x 8 2 POUR ASSEMBLER LE SOCLE DU COLLECTEUR DE POUSSI RE 1 Assurez vous...

Page 17: ...ates et deux crous hexagonaux tel qu illustr la figure 6 8 Installez le support du sac sup rieur sur le collecteur tel qu illustr la figure 7 en utilisant deux vis t te cruciforme M4 0 7 x 8 Figure 5...

Page 18: ...r par l orifice droite Assurez vous que les bouts crampon sont orient s vers l ext rieur 3 Les ressorts de la bride du sac doivent se trouver entre la courroie et le m canisme de verrouillage figure 1...

Page 19: ...rovenant du collecteur de poussi res 1 Le collecteur de poussi res oscille parce qu il ne se trouve pas sur une surface plane 1 Stabilisez le collecteur de poussi res 2 L h lice du ventilateur est end...

Page 20: ...ur No de pi ce Description 17 Interrupteur 18 Moteur 19 Joint en caoutchouc 20 Support de logement de la turbine 21 Goupille plate 22 Joint en caoutchouc 23 Collecteur 24 Sac de collecte 25 Sac de fil...

Reviews: