8
For technical questions call: 1-800-665-8685
V 3.04
8507626
9A Reciprocating Saw
INSTALLING THE BLADE
NOTE:
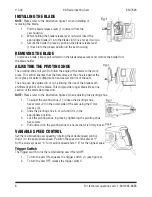
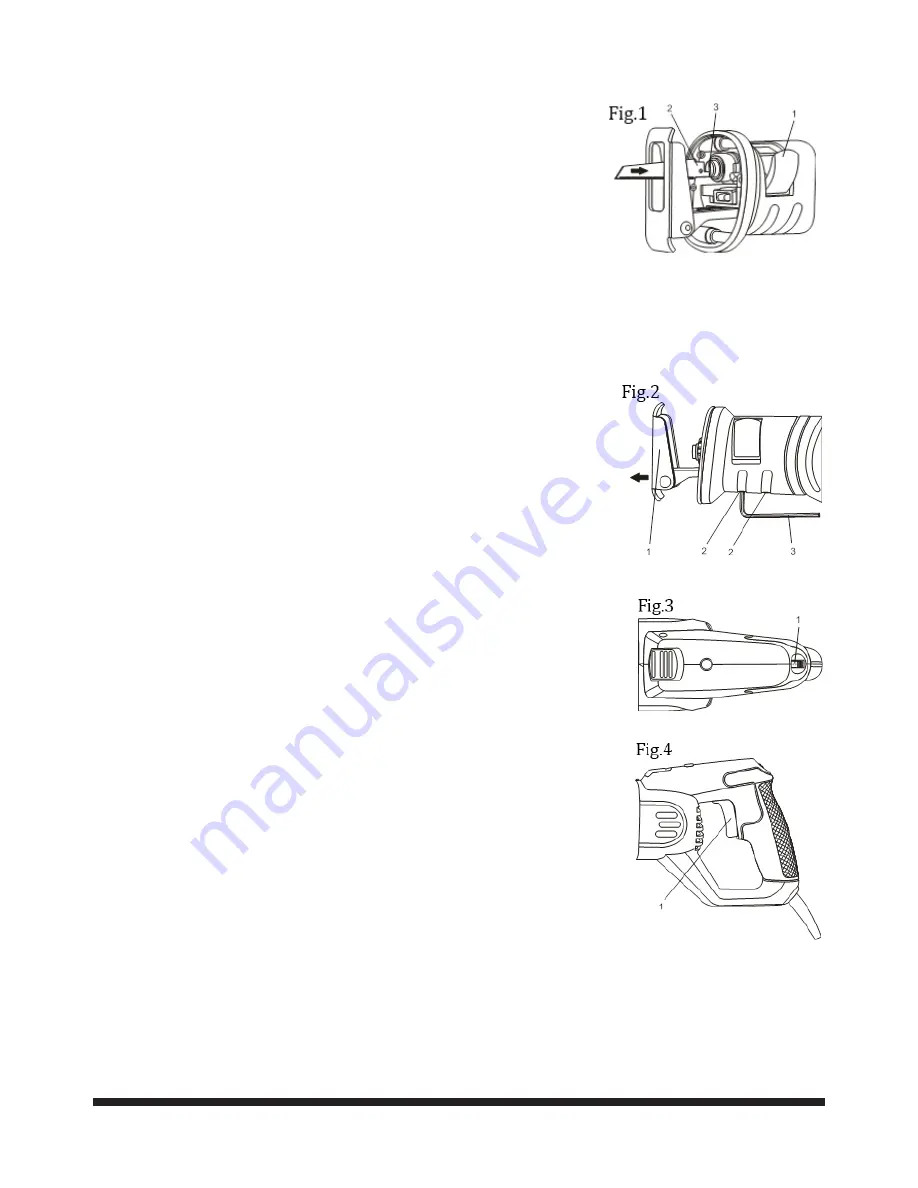
Please refer to the illustration figure 1 when installing or
removing the blade.
1. Pull the blade release lever (1) outward from the
saw housing.
2. While holding the blade release lever outward, insert the
appropriate blade (2) into the blade slot (3) as far as it will go.
3. Secure the blade in place by pushing the blade release lever
(1) back into the locked position in the saw housing.
REMOVING THE BLADE
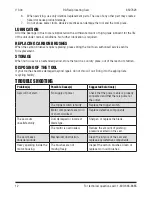
To remove a blade, simply pull outward on the blade release lever and remove the blade from
the blade holder.
ADJUSTING THE PIVOTING SHOE
The pivoting shoe will pivot to follow the angle of the blade to the work
piece. This action ensures that the flat surface of the shoe is against the
work piece for better cutting action and easier control of the saw.
The shoe can be adjusted in or out, allowing the use of the blade teeth
at different points on the blade. This will provide longer blade life as one
section of the blade becomes dull.
NOTE:
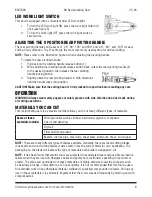
Please refer to the illustration figure 2 when adjusting the pivoting shoe.
1. To adjust the pivoting shoe (1), loosen the pivoting shoe
hex screws (2) on the lower side of the saw using the 4 mm
hex key (3).
2. Slide the pivoting shoe in or out until it is in the
appropriate position.
3. Lock the pivoting shoe in place by tightening the pivoting shoe
hex screws.
4. Pull outward on the pivoting shoe to ensure that it is firmly locked in place.
VARIABLE SPEED CONTROL
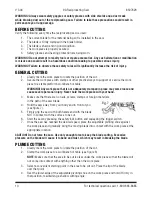
Set the reciprocating saw speed by rotating the variable speed control
dial (1) to the appropriate speed. Position the speed control dial at “1”
for the slowest speed, “3” for medium speed and at “6” for the highest speed (see figure 3).
Trigger Switch
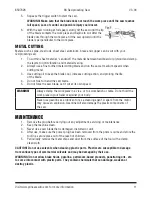
The trigger switch turns the reciprocating saw ON and OFF.
1. To turn the saw ON, squeeze the trigger switch (1) (see figure 4).
2. To turn the saw OFF, release the trigger switch.


