ANTI-THEFT FULL DETACHABLE PANEL
AUTO-LOADING COMPACT DISC PLAYER
AM/FM-STEREO DIGITAL PLL TUNING RADIO
INSTRUCTION MANUAL
TUNE
BN
D
EQ
EL
R
LOC
VOL
4/RDM
2/RPT
1/TOP
LUD
3/INT
5
6
APS
MUT
CLK
PW
SEL
PACD-875
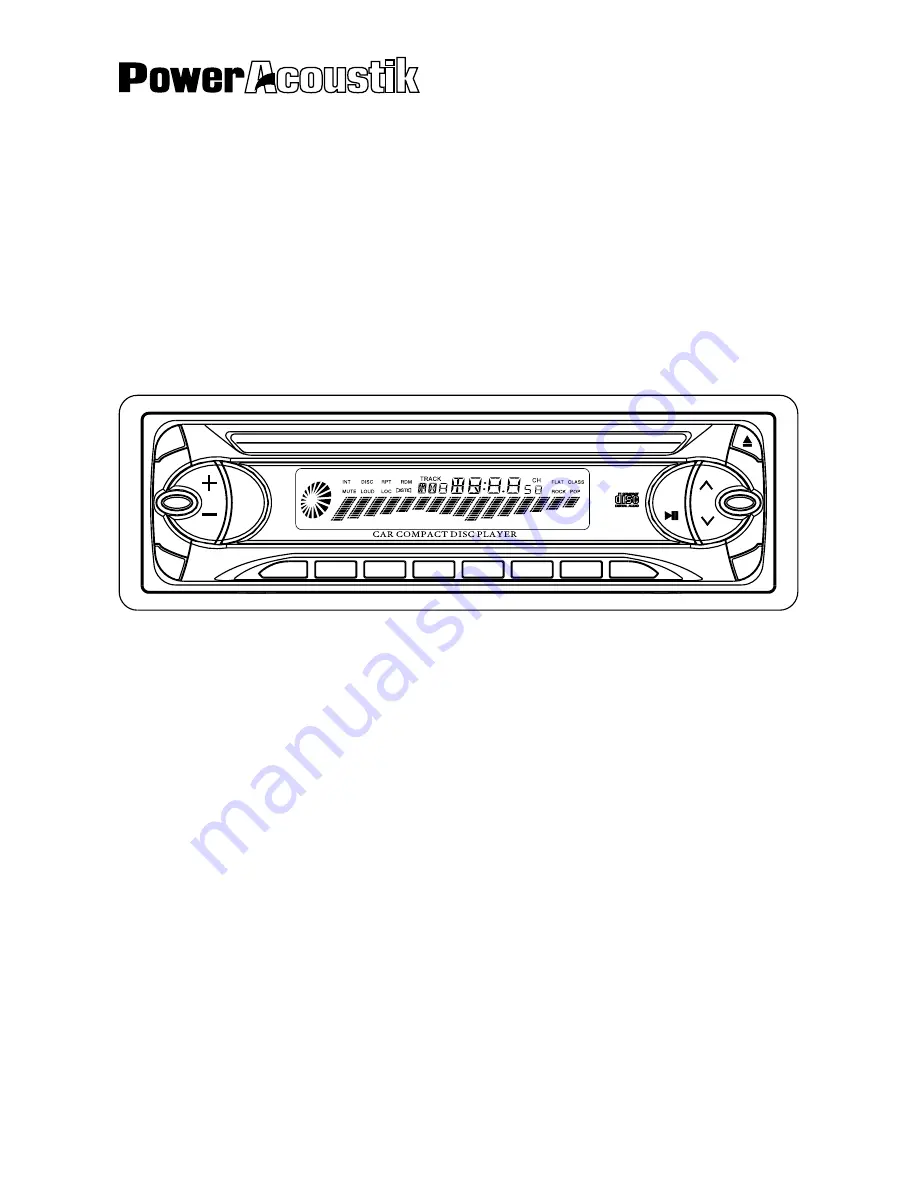
Page 1: ... THEFT FULL DETACHABLE PANEL AUTO LOADING COMPACT DISC PLAYER AM FM STEREO DIGITAL PLL TUNING RADIO INSTRUCTION MANUAL TUNE BND EQ EL R LOC VOL 4 RDM 2 RPT 1 TOP LUD 3 INT 5 6 APS MUT CLK R PW SEL PACD 875 ...
Page 2: ...nd without distortion we want you listening for a lifetime Once you have established a comfortable sound level Set the dial and leave it there Taking a minute to do this now will help to prevent hearing damage or loss in the future After all we want you listening for a lifetime ABOUT THIS MANUAL This product features a number of sophisticated functions ensuring superior reception and operation All...
Page 3: ... displayed and then press or button to adjust the sound level C Press and hold the or button to adjust the sound level D Adjust sound balance between front and rear speakers by using and buttons 3 LOC BUTTON Press the LOC button to select between local setting for reception of strong station and distant setting for reception of weak stations when tuning 4 MUTE BUTTON Press it to eliminate the soun...
Page 4: ...7 PRESET MEMORY BUTTONS A 18To memorize the current frequency press any one of the six preset Buttons hold for more than 2 seconds B To recall the preset memory press one of the preset buttons 1 6 C In CDP mode press 1 TOP button to play first track D In CDP mode press 2 RPT button to continuously repeat same track Press again to stop repeating E In CDP mode press 3 INT button to play first ten se...
Page 5: ...ted with either a ballpoint pen or thin metal object The RESET button is to be activated for the following reasons Initial installation of the unit when all wiring is completed All the function buttons do not operate Error symbol on the display Note If press RESET button the unit can t work yet please use a cotton swab soaked in isopropyl alcohol to clean the socket on the back of the front panel ...
Page 6: ...RONT RchSPK REAR RchSPK REAR LchSPK FRONT LchSPK AUTO ANTENNA GROUND B MEMORY B IGNITION SWITCH B ANTENNA CONNECTOR FUSEBOX NOTE In spite of having any kinds of speaker system must use 4 8 ohms impedance of speaker to reduce the distortion during high volume level GREEN GREEN BLACK GREY GREY BLACK WHITE WHITE BLACK ...
Page 7: ...6 INSTALLATION HEX BOLT METAL MOUNTING STRAP DASH BOARD CONSOLE SLIDE BRACKET HOUSING HEX NUT SPRING WASHER PLAIN WASHER PLAIN WASHER TAPPING SCREW ...
Page 8: ... panel into the case 2 To install the front panel insert the panel into the housing and make sure the panel is properly installed otherwise abnormalities occurs on the display or some keys will not function properly REMOVING THE FRONT PANEL INSTALLING THE FRONT PANEL 7 INSTALLATION Release Button Front Panel ...
Page 9: ...el surface down Doing so may damage the unit NOTE Do not try to insert another disc when one has been already inserted Doing so may damage the unit Handle the disc by its edge And to keep the disc clean do not touch the surface Do not stick paper or tape on the disc Do not expose the disc to direct sunlight or heat sources such as hot air ducts Or leave it in a car parked in direct sunlight where ...
Page 10: ...requency range 522KHz 1620KHz LINE OUT OPTION Output 500mV FM10 THD POWER CD PLAYER CD PLAYER System compact disc audio system Usable disc compact disc Signal format sampling frequency 44 1KHz No of quantization bits 1bit Frequency characteristics 5 40Hz 5dB 10K 20KHz 5dB Signal to noise radio 70dB 1KHz IEC A net work Number of channels 2 STEREO Chassis dimensions 184 W X 54 H X 170 D ...
Page 11: ...ry to play a dirty or defective new one Temperature inside the car Cool off or until the ambient is too high temperature return to normal Condensation Leave the player off for an hour then try again No sound Volume is in minimum Adjust volume to a desired level Wiring is not properly Check wiring connection connected Sound skips The installation angle is Adjust the installation angle less more tha...
Page 12: ...88 C2710 02 ...