background image

9

3-3. 

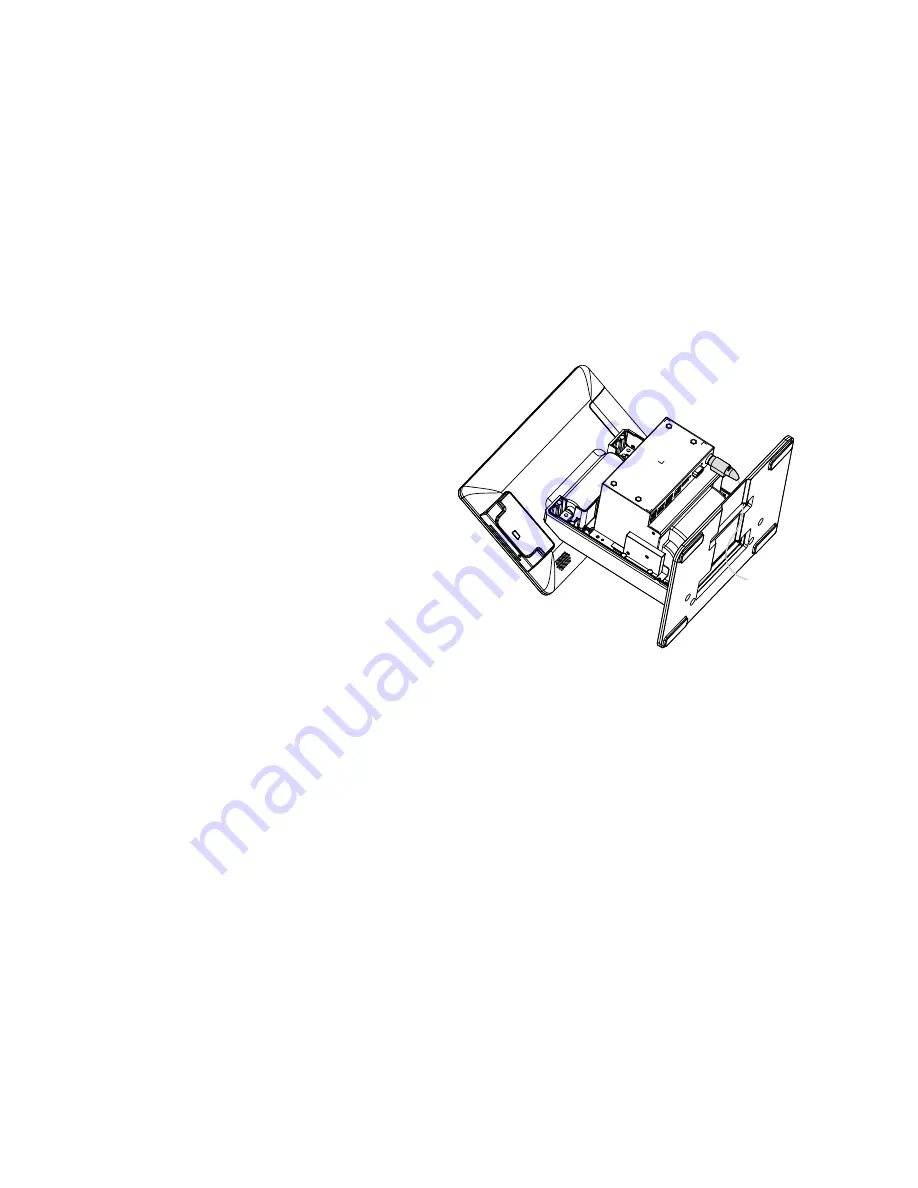
Installing the Power Adapter

The system is equipped with a 90W power adapter.  Please connect it to the system 

as shown below.
1.  Follow the steps decribed in 

Chapter 3-1 to remove the rear 

housing.

2.  Place the system face down to 

access the bottom of the stand.  

3.  Thread the power adapter cable 

through the hole of the stand as 

shown in the picture.

4.  Find the power connector on the 

right of the I/O panel (refer to 

chapter 2-4) and connect the 

power adapter directly to the DC-

IN connector.

Summary of Contents for ION TP5

Page 1: ...ION TP5 All In One Terminal User s Manual v1 2...

Page 2: ...asily accessible and in close proximity to the machine 2 Read these instructions carefully Save these instructions for future reference 3 Follow all warnings and instructions marked on the product 4 D...

Page 3: ...g to the manufacturer s instructions Battery Caution Risk of explosion if battery is replaced by an incorrectly type Dispose of used battery according to the local disposal instructions Safety Caution...

Page 4: ...tion recycling and disposal procedure To prevent possible harm to the environment or human health from uncontrolled waste disposal please separate this from other types of wastes and recycle it respon...

Page 5: ...lay within 30 min for the computer if applicable per Table2 and are recom mended by the ENERGY STAR program for optimal energy saving 3 Information about ENERGY STAR and the benefits of power manageme...

Page 6: ...e listed below Revision Description Date 1 0 Initial release July 2015 1 1 Instruction on locking the back cover added Instruction on installing the LCM module added April 2016 1 2 Rear 8 LCD installa...

Page 7: ...3 IO Port View 6 3 Assembly Disassembly 7 3 1 Unlocking the Back Cover 7 3 2 Removing the Rear Housing 7 3 3 Installing the Power Adapter 8 3 4 Dimensions 9 4 Peripheral Installation 10 4 1 Installing...

Page 8: ...viii 6 Jumper Settings 16 6 1 Printer Board Settings 16 Appendix Driver Installation 17...

Page 9: ...ix The page is intentionally left blank...

Page 10: ...1 1 Packing List 1 1 Standard Accessories a TP5 System b Power adapter c Power cord d RJ45 DB9 cable x1 e Driver CD a b c d e...

Page 11: ...2 1 2 Optional Accessories a MSR module b LCM module c Rear LCD module a b c...

Page 12: ...2 System View 2 1 Front View TP5E Item No Description 1 MSR module 2 Thermal printer open door button 3 Thermal printer 4 Printer indicator power error and paper Paper feed button 5 USB View angle of...

Page 13: ...4 TP5F Item No Description 1 MSR module 2 USB View angle of 0 degrees 2 1...

Page 14: ...5 2 2 Side View TP5E 1 2 Item No Description 1 MSR module 2 System cover IO board and thermal printer inside on TP5E TP5F 1 2...

Page 15: ...em No Description a Cash Drawer b LAN c USB 2 0 x2 d COM port e USB 2 0 f DC 19V in 2 3 IO Port View TP5E Item No Description a LAN b USB 2 0 x2 c COM port d USB 2 0 e DC 19V in a b c d e TP5F a b c d...

Page 16: ...7 2 4 Dimensions TP5E 227 8 mm 350 mm 370 6 mm 363 3 mm 10 mm 211 8 mm 339 7 mm 196 6 mm 165 mm 188 9 mm TP5F 10 mm 211 8 mm 339 7 mm 196 6 mm 105 mm 188 9 mm 227 8 mm 350 mm 365 6 mm 363 3 mm...

Page 17: ...r Housing 1 On some models the back cover of the system is secured by two locking screws which are located at the bottom of the stand 2 To open the back cover place the system face down Insert a flat...

Page 18: ...eps decribed in Chapter 3 1 to remove the rear housing 2 Place the system face down to access the bottom of the stand 3 Thread the power adapter cable through the hole of the stand as shown in the pic...

Page 19: ...ral Installation 4 1 Installing the MSR 2 Connect the MSR cable to the connector on the system side 3 Put the MSR module in place and fasten the screws x2 on the back to secure the module 1 Remove the...

Page 20: ...s decribed in Chapter 3 1 and 3 2 to open the back cover of the system then remove the LCM cover from the back housing 2 Attach the LCM module and fasten the screws x4 3 Connect the LCM cable x1 to th...

Page 21: ...the right side to open the thermal printer module 2 Place the paper roll inside the printer slot pull out a length of paper and then close the cover over the end of the paper 3 The paper will automat...

Page 22: ...open the back cover of the system then remove the LCM cover from the back housing 2 Attach the rear LCD display module and fasten the screws x4 3 Connect the rear LCD display cable to the connector on...

Page 23: ...14 5 Specifications...

Page 24: ...15...

Page 25: ...16 6 Jumper Settings 6 1 Printer Board Settings Printer Board Hardware Reset Function JP2 Normal N C Reset 1 2 Interface Select SW1 ON OFF 1 USB COM ON Down OFF Up...

Page 26: ...ng package includes a Driver CD where all drivers and utilities can be found Please insert the Driver CD into a computer with a CD drive and open the index htm file and select the terminal model For m...

Reviews: