background image


Page 3 

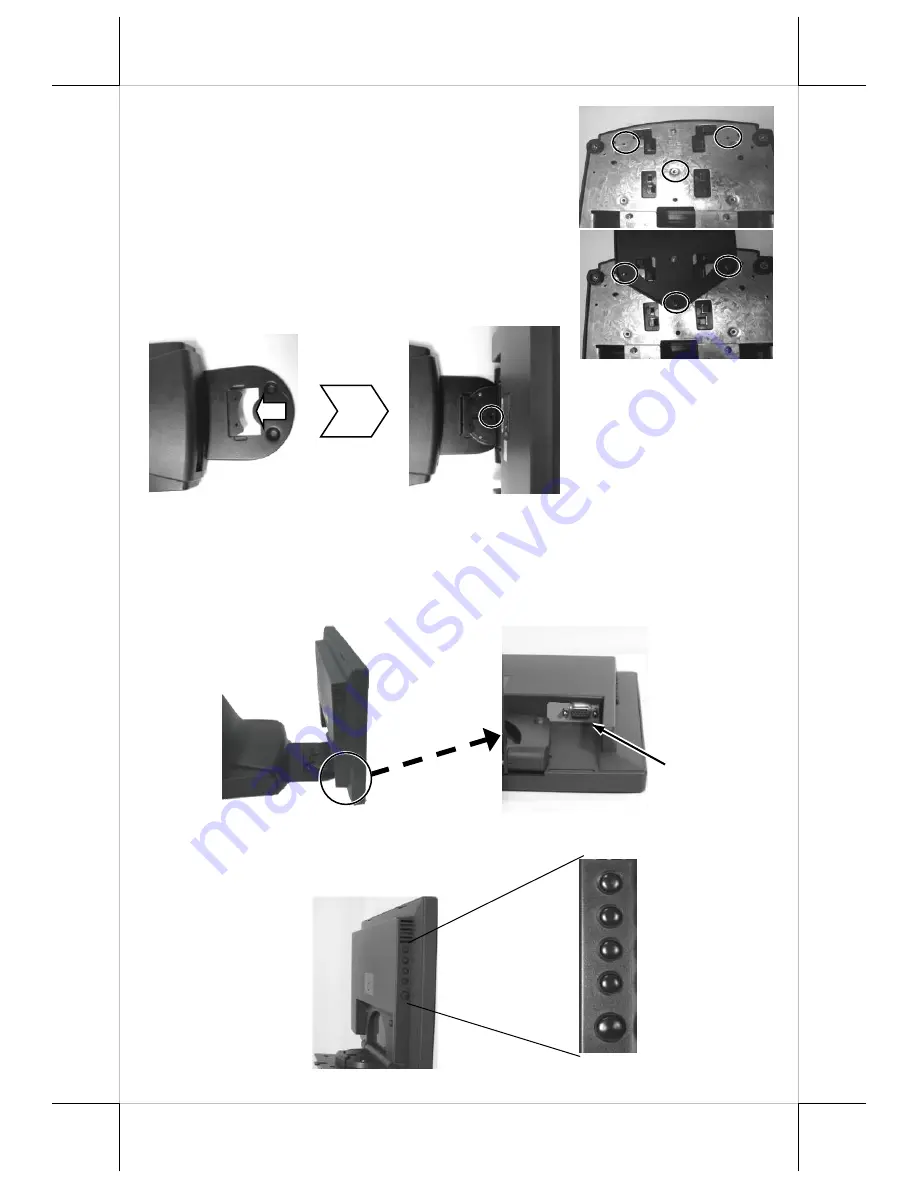
the metal plate and match these screws holes as 
lower right picture and fasten these screws.  
 
 
After installing the metal plate, please take the 
monitor and match the bottom of the panel unit into 
the integrated metal plate.  Screw on the pivot screw 
after monitor joined and the installation. 


After combination, please find the VGA connector which is in the right back  
of LM-6801E. Please connect VGA cable to Posiflex terminal and the final  
step is finished. 


OSD 

OSD buttons 


VGA Connector 

Summary of Contents for LM-6801E

Page 1: ...ate automatically when the machine is opened by any person other than the authorized technicians The user should consult his her dealer for the problem happened Warranty voids if the user does not follow the instructions in application of this merchandise The manufacturer is by no means responsible for any damage or hazard caused by improper application ABOUT THIS MANUAL This manual assists the us...

Page 2: ...ODUCT VIEW II HARDWARE INSTALLATION Please find the integrated metal plate in the content and it will be the first step on this installation Turn the terminal with Gen 6 base stand up side down before screw fitting the metal plate Please notice that there are four screw holes in the bottom of base stand which are circled in the right picture Take EXT button button OSD button Power button button Ge...

Page 3: ... the monitor and match the bottom of the panel unit into the integrated metal plate Screw on the pivot screw after monitor joined and the installation After combination please find the VGA connector which is in the right back of LM 6801E Please connect VGA cable to Posiflex terminal and the final step is finished OSD OSD buttons VGA Connector ...

Page 4: ...menu the following points are guidelines you are suggested to go through 1 Firstly press the OSD button to access the OSD menu 2 Scroll through OSD menu options using either the or button 3 Press the OSD button to select the particular menu option of interest It will lead you to its sub menu page if the selected menu option contains sub menu items 4 Under the selected menu item with available sub ...

Page 5: ...ress the button to increase contrast Press the button to decrease contrast Sharpness Press the button to increase sharpness Press the button to decrease sharpness Display Auto Adjustment Execute the auto tune function for OSD menu which will automatically perform fine tune of the image quality for optimizing screen performance H Position Press the button to move the screen to the right Press the b...

Page 6: ...age Specify the language used in the OSD menu Information Display information regarding display resolution horizontal vertical sync frequency pixel clock PCLK etc SUPPORTED DISPLAY MODES For video signals beyond the supported display modes there will be a message Out Of Range in the middle of screen Maximum supported color depth is 18 bits or 262 144 colors Supported display modes are as in the ta...

Reviews: