background image

11

FINE FINISHING

The action of the Delta Finishing Sander causes thousands of tiny abrasive
grits to move in circular orbits against the work at high speed. Each grain
moves in the same direction at a constant speed so the cutting action is uni-
form over the entire pad surface. Crossing and re-crossing of the abrasive
grits from all directions quickly levels surface irregularities to a fine, uniform
smoothness. Start the work with an abrasive grit just coarse enough to
remove the high spots and excessive roughness. Follow with a second sand-
ing using a grit one or two grades finer. Continue with successively finer grits
until the desired finish is obtained. DO NOT GO FROM A COARSE GRIT TO
A VERY FINE GRIT IN ONE STEP.

Going from a coarse grit to a very fine grit in one step could make it difficult
to remove swirl marks that might have been made by the coarse grit abrasive.
Use the finest grits practical for the roughing operation and then finish by
using successively finer grits.

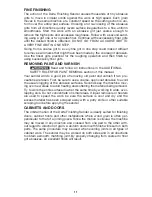
REMOVING PAINT AND VARNISH

Read and follow all instructions in the ADDITIONAL

SAFETY RULES FOR PAINT REMOVAL section of this manual. 

Your sander will do a good job of removing old paint and varnish if two pre-
cautions are taken. First, be sure to use a coarse, open coat abrasive to avoid
the usual clogging of the abrasive surfaces. Second keep the machine mov-
ing over new areas to avoid heating and softening the material being removed.
Try to work the entire surface down at the same time by working in wide, over-
lapping arcs. Do not concentrate on small areas. If liquid removers or heaters
are used to speed the work, be sure the surface is cool and dry and the
excess material has been scraped away with a putty knife or other suitable
scraping tool before applying the sander.

CABINETS AND DOORS 

The orbital motion of the Delta Finishing Sander is ideally suited for finishing
doors, cabinet fronts and other installations where wood grain is often per-
pendicular to that of a joining piece. Since the motion is circular, the machine
may be moved in any direction and crossed from one part to the other with-
out regard to direction of grain. A uniform and smooth finish will result on both
parts. The same procedure may be used when evening joints in all types of
cabinet work. The sander may be worked on both sides and in all directions
to obtain a smooth, matching joint. By properly changing from coarser to finer
grit abrasives, an excellent finish will result. 

Summary of Contents for CL180PS

Page 1: ...t www deltamachinery com For Parts Service Warranty or other Assistance please call 1 800 223 7278 In Canada call 1 800 463 3582 INSTRUCTION MANUAL Cordless Pad Sander Model CL180PS PART NO 912238 08...

Page 2: ...rmation we use the symbols below Please read the manual and pay attention to these sections Read and understand all instructions Failure to fol low all instructions listed below may result in electric...

Page 3: ...does not turn it on or off Any tool that can not be controlled with the switch is dangerous and must be repaired 4 Disconnect battery pack from tool and place the switch in the locked or OFF position...

Page 4: ...hese materi als Request and follow any safety information available from your material supplier Technical Service Manager Delta Machinery 4825 Highway 45 North Jackson TN 38305 There are certain appli...

Page 5: ...ing doorways with drop cloths 5 CHILDREN PREGNANT OR POTENTIALLY PREGNANT women and nursing mothers should not be present in the work area until the work is done and all cleanup is complete 6 WEAR A D...

Page 6: ...at least as specified in following chart D If an extension cord is to be used outdoors it must be marked with the suffix W A or W following the cord type designation For example SJTW A to indicate it...

Page 7: ...WORD Delta Model CL180PS is a cordless finishing sander This sander is designed for its portability and all purpose sanding CHARGING THE BATTERY CHARGING THE BATTERY PACK GENERAL Before using your cor...

Page 8: ...F 40 C After approximately one hour the Fast Charge indicator light red should go out indicating that the battery pack is fully charged and that the charger is now in a Trickle Charge mode green light...

Page 9: ...ucture Before starting to work make sure you have the right abrasive for the mater ial on which the sander is to be used Make sure you use the correct size abra sive paper or cloth Cut do not tear the...

Page 10: ...and slide switch A Fig 10 to the OFF position to stop sander Fig 10 USING THE SANDER STARTING TO WORK This finishing sander has been designed for one or two hand operation and can easily be guided ov...

Page 11: ...ur sander will do a good job of removing old paint and varnish if two pre cautions are taken First be sure to use a coarse open coat abrasive to avoid the usual clogging of the abrasive surfaces Secon...

Page 12: ...efore use LUBRICATION For your continued safety and electrical protection lubrication and service on this tool should ONLY be performed by an AUTHORIZED DELTA SERVICE STATION or a PORTER CABLE DELTA F...

Page 13: ...13 NOTES...
Page 14: ...ys Delta may require that electric motors be returned prepaid to a motor manufacturer s authorized station for inspection and repair or replacement Delta will not be responsible for any asserted defec...

Page 15: ...u 731 541 6042 pour obtenir de l aide pour en rep rer un Pour obtenir des pi ces et accessoires pour les produits Porter Cable Delta s adresser tout distributeur Porter Cable Delta centre de service a...

Reviews: