background image

74

Controls, Instruments

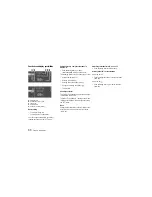
Resetting to public road mode

When race circuit mode is in use, the prompt 

“Race circuit mode yes/no” appears after 

switching on the ignition on the on-board 

computer:

Yes: 

Selecting “Yes” retains the set tire pressures for 

monitoring when driving on the race circuit.

No

Selecting “No” resets the tire pressures to be 

monitored to public road mode. 

Until the current pressures are displayed, “ -,- ” 

appears for approx. 2 minutes.

f

After changing to public road mode, call 

“Pressure info” in the Tire pressure menu 

and correct the tire pressures according 

to these specifications.

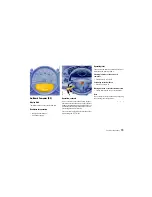
Tire pressure warnings

The tire pressure monitoring system warns about 

loss in pressure in two stages, depending on the 

amount of pressure loss:
Stage 1 – Tire pressure too low 
Stage 2 – Flat tire
Tire pressure monitoring gives a warning about 

loss of pressure both in public road mode as well 

as in race circuit mode.

Stage 1 – Tire pressure too low 

(3 to 6 psi (0.2 to 0.4 bar ) loss in pressure)

The pressure in the tires is too low by 3 to 6 psi 

(0.2 to 0.4 bar). 

Driving with insufficient tire pressure reduces the 

road safety of the vehicle and destroys the tire and 

wheel.

f

The tire pressure warning contains the 

affected tire with the tire pressure to be added. 

Correct the tire pressure at the next 

opportunity. 

This tire pressure warning appears with vehicle 

stopped and can be acknowledged. 

The tire pressure warning light in the instrument 

panel goes out when the tire pressure has been 

corrected.

Summary of Contents for Carrera GT

Page 1: ...sche crest Carrera Targa Boxster Cayenne Tiptronic and Tequipment are registered trademarks and the distinctive shapes of Porsche automobiles are trademarks of Dr Ing h c F Porsche AG All rights reserved Printed in Germany WKD 980 021 04 8 03 ...

Page 2: ... or death you should immediately inform the National Highway Traffic Safety Administration NHTSA in addition to notifying Porsche Cars North America Inc Porsche Cars N A If NHTSA receives similar complaints it may open an investigation and if it finds that a safety prob lem exists in a group of vehicles it may order a re call and remedy campaign However NHTSA can not become involved in individual ...

Page 3: ...ice life of your car please heed all operating instructions and special warnings These special warnings use the safety alert symbol followed by the words Danger Warning and Caution These special warnings contain important messages regarding your safety and or the potential for damage to your Porsche Ignoring them could result in seri ous mechanical failure or even physical injury f Do not alter yo...

Page 4: ...hanol or ether such as MTBE Under normal conditions the amount of these compounds in the fuel will not affect driveability You may use oxygenated fuels in your Porsche provided the octane requirements for your vehicle are met We recommend however to change to a different fuel or station if any of the following problems occur with your vehicle Deterioration of driveability and performance Substanti...

Page 5: ...res are valid only for Porsche approved tires For replacement tires it is imperative that you consult the Technical Data and Tires Wheels sections of this manual and follow the recommendations contained therein Front 32 psi 2 2 bar Rear 32 psi 2 2 bar ...

Page 6: ...ition 65 Warning Warning Engine exhaust some of its constituents and cer tain vehicle components contain or emit chemi cals known to the State of California to cause can cer and birth defects or other reproductive harm In addition certain fluids contained in vehicles and certain products of component wear contain or emit chemicals known to the State of California to cause cancer and birth defects ...

Page 7: ...he following precautionary measures Identification of all materials Use of recyclable materials Reusable components designed for simple removal These reasons result in a further increase in the recycling rate which is currently 80 per cent Emission control is built in Innovative engine technology combines high en gine performance and environmental compati bility The engine diagnosis system electro...

Page 8: ...mage due to excessive temperatures and abrasion could result Ground clearance Caution Risk of damage The vehicle may touch the ground as a result of the limited ground clearance f Drive carefully and slowly on steep slopes e g parking lots curbs uneven surfaces lifting platforms etc f Avoid steep ramps f Please refer to the chapter TOWING RECOVERY on page 172 Power transmission brakes The differen...

Page 9: ...d the tailpipes of the exhaust system can become very hot f Do not touch this area Look out for children Parts of clothing can become damaged Engine compartment lid rear wing Warning Risk of injury during manual retraction or extension of the rear wing with the vehicle stationary f Make sure that no persons or objects are within the range of movement of the rear wing Risk of pinching between the r...

Page 10: ...st always be taken into account that a modern high performance sports car repre sents a complex system with individual compo nents that are carefully designed and adjusted to work together perfectly Interfering in this system is only an option if it can be guaranteed that all of the components will con tinue to work together in a manner adjusted to the actual conditions of use Well founded special...

Page 11: ...11 Controls Instruments 14 114 Maintenance Car Care 116 142 Practical Tips Emergency Service 144 176 Vehicle Identification Technical Data 178 187 Index 188 192 ...

Page 12: ...12 ...

Page 13: ...ument Panel Canada Models 54 Engine Oil Temperature Gauge 56 Instrument Illumination 56 Trip Odometer 57 Speedometer 58 Changing over between Miles Kilometers 58 Tachometer 59 Turn Signal Indicator Light 59 High Beam 59 Cooling System 60 Fuel 61 Clock 62 Engine Oil Pressure 63 Check Engine Warning Light 64 On Board Computer BC 65 Warnings in the Instrument Panel and in the On Board Computer 81 Eme...

Page 14: ...are properly tightened f Check engine oil level add if necessary Make it a habit to have engine oil checked with every fuel filling f Check all fluid levels such as windshield washer and brake fluid f Be sure the vehicle battery is fully charged and cranks the engine properly f Check all doors and lids for proper operation and latch them properly f Check and if necessary replace a worn or cracked ...

Page 15: ...en the driving conditions warrant it f Always keep a safe distance from the vehicle in front of you depending on traffic road and weather conditions f Reduce speed at night and during inclement weather Driving in wet weather requires caution and re duced speeds particularly on roads with standing water as the handling characteristics of the vehicle may be impaired due to hydro planing of the tires...

Page 16: ...ing events sports driving schools etc during the first 1 000 miles 1 600 kilometers There may be a slight stiffness in the steering gear shifting or other controls during the break in period which will gradually disappear Break in brake pads and discs New brake pads and discs have to be broken in and therefore only attain optimal friction when the car has covered several hundred miles or km The sl...

Page 17: ...nal headlight dimmer flasher lever 5 Horn 6 Windshield wiper washer lever 7 Emergency flasher switch 8 Glove compartment with socket 9 Power window switch 10 Door mirror control 11 Inner door handle 12 Diagnostic socket 13 Seat adjustment 14 Parking brake 15 Front lid release engine compartment lid release 16 Steering wheel adjustment ...

Page 18: ...le They can operate power windows and other controls If the engine is left running they may accidentally engage the shift lever f Always remove the ignition key f Always set the parking brake f Lock the doors with the key or with the remote control Warning Risk of a serious accident The steering column will lock if you remove the key while you are driving or as the car is rolling to a stop You wil...

Page 19: ...eys have to be reported to the car control unit by your authorized Porsche dealer The key grip of the spare key can be exchanged for a main key grip Disabling key codes If a key is lost the key codes can be disabled by an authorized Porsche dealer All the remaining car keys are required for this pur pose Disabling the code ensures that the car can be started only using authorized keys Note f Pleas...

Page 20: ... Porsche dealer can program fur ther types of unlocking Type 1 The relocking time of the doors can be adjusted to suit your individual requirements 4 120 seconds Type 2 The doors stay locked when the front lid is un locked The remote control standby function switches off after 5 days If the vehicle is not started or unlocked with the re mote control within five days the remote control standby func...

Page 21: ... open and close the doors and protects the window seals f Therefore you should pull the door handle slowly so that the door window can be lowered before the door is opened Opening unlocked doors from outside f Slowly pull door handle A Opening unlocked doors from inside f Slowly pull door handle B Opening locked doors from inside f Slowly pull door handle B twice Please observe the chapter LOCKING...

Page 22: ...r s door Front lid Engine compartment lid Glove compartment Note Unlocking the vehicle by using the key in the door lock and opening the door may activate the alarm system within 10 seconds Automatic relocking If the car is unlocked by remote control and none of the car doors is opened within approx 60 seconds automatic relocking takes place This relocking time can be adapted to your individ ual r...

Page 23: ...nd alarm horn If the remote control is used for unlocking or locking a response is provided by the emergency flasher Unlocking single flash Locking double flash Locking twice continuous illumination for ap prox 2 seconds and short alarm horn signal The central locking switch A on the center console lets you lock and unlock both doors electrically Note If the doors are locked with the key or remote...

Page 24: ...here you need to exit the car through an automatically locked door remember the following procedure to open the door f Unlock the doors by pressing the central lock ing button or f pull the inside door handle twice to open the door Fault indication A double horn signal during locking indicates a defect in the central locking or alarm system Have the defect remedied at an authorized Porsche dealer ...

Page 25: ...t light flash for approximately five minutes When the alarm is triggered the key symbol A changes over to double flashes In order not to limit the action range of the infrared passenger compartment monitoring system f Move sun visors to one of the final positions Deactivating the infrared passenger compartment monitoring system for one locking process If a person or animal remains in the car while...

Page 26: ...accident f Do not put anything on or near the windows that may interfere with the driver s vision Readiness for operation of power windows With engine running or in ignition key position 1 or with door closed and ignition key withdrawn only until first opening of the door f Press the lower half of the rocker switch A until the window has reached the desired position One touch operation f Press the...

Page 27: ...0 seconds of the window being blocked the window will close with its full closing force Anti crushing protection is disabled f Once the anti crushing protection acts to stop the window and opens it slightly do not press the rocker switch again within 10 seconds without checking to make sure that nothing is blocking the path of the window The window will close with full closing force One touch oper...

Page 28: ...ight parking areas Adjusting 1 Select driver s side or passenger s side with rocker switch A 2 Move the door mirror glasses in the appropri ate direction using the control switch B If the electrical adjustment facility fails f Adjust mirror by pressing on the mirror face Door mirror heating The door mirror heating switches on automatically at temperatures below approx 37 F 3 C and switches off aut...

Page 29: ...Controls Instruments 29 Inside mirror When the mirror is being adjusted the anti glare lever A must point forward Basic position lever forward Anti glare position lever back ...

Page 30: ...er your shoulders must still rest on the backrest 3 If necessary correct the seat fore and aft adjustment Fore and aft f Raise locking lever A Move seat to desired position and release lever Ensure that the seat engages correctly Seat height adjustment It is possible to adjust the height of both seats As the seat mounting must be loosened to adjust the height this must only be done by an author iz...

Page 31: ...ing You may lose control of the vehicle f Do not adjust the steering wheel when driving Longitudinal adjustment 1 Push locking lever downwards 2 Adjust steering wheel to your seat position by moving the steering wheel longitudinally 3 Swivel locking lever back until you feel it engage If necessary move steering wheel slightly lon gitudinally to ensure engagement ...

Page 32: ...e same time Care and maintenance f Keep belt buckles free of any obstruction that may prevent a secure locking f Belts that have been subjected to excessive stretch forces in an accident must be inspect ed or replaced to ensure their continued effec tiveness in restraining you The same applies to belt tensioner systems which have been triggered In addition the anchor points of the belts should be ...

Page 33: ...uld never be worn behind your back or under your arm f To fasten grasp belt and pull the belt in a con tinuous slow motion across your chest and lap f Insert belt tongue into buckle on inboard side of seat Push down until it securely locks with an audible click Pull the belt to check f Pull shoulder section to make sure belt fits snugly across the pelvis f Belts should fit snugly across the pelvis...

Page 34: ...sufficient force In the event of a side impact of corresponding force the side airbag on the impact side is trig gered The inflation process generates the amount of gas required to fill the airbags at the necessary pres sure in fractions of a second Airbags protect the face and upper body while simultaneously damping the motion of the driver and passenger in the impact direction in the event of a ...

Page 35: ...di ately consult an authorized Porsche deal er in order to assure the airbag system is functioning properly Illumination of the airbag warning light during travel or repeated illumination longer than 5 seconds after the ignition circuit is turned on Illumination fails to light up during ignition circuit activation Airbag maintenance In order to ensure long term functioning the air bag system must ...

Page 36: ...ll stop Setting the parking brake f Pull the lever all the way up arrow With the ignition on the parking brake warning lights in the instrument panel and on board computer will come on if the lever is even slightly raised A firm pull upward is required to properly engage the parking brake If the brake is not fully set the vehicle may roll without control f Move the gearshift lever to reverse or fi...

Page 37: ...four times longer than 30 mph or 50 km h Tire trac tion is also less effective when the roads are wet or slippery f Therefore always maintain a safe distance from the car in front of you Brake system function Your Porsche is equipped with a power assisted hydraulic dual circuit brake system with disc brakes at the front and rear Both circuits function independently One brake circuit operates the f...

Page 38: ...nt panel does not go out there could be a defect in the brake booster Warning Risk of accident due to altered braking behavior f Adjust your speed accordingly for longer braking distances higher required pedal pressures and altered braking behavior f Drive carefully to an authorized Porsche deal er The brake system should be repaired im mediatlely Brake pedal Warning Risk of an accident Any obstru...

Page 39: ...t the intervals recommended in your Maintenance Booklet If the warning lights in the instrument panel and on board computer stay on when the engine is run ning or come on while driving the brake pads are worn excessively f Do not continue to operate the vehicle Have your authorized Porsche dealer inspect or replace the brake pads Brake pads Wear on the brake pads and brake discs depends to a great...

Page 40: ...tional brake system is in the area of main taining directional control and maneuverability of the car in emergency situations during normal driving including panic braking in turns Warning The increased control that is provided should not induce you to take greater risks with your safety The limits dictated by the laws of physics cannot be overcome even with ABS The risk of accidents due to inappr...

Page 41: ...t up while the system is electronically interrogated and goes out when the engine is started if the check is not yet complete If the ABS warning lamp fails to go out this indi cates that ABS has been deactivated due to a fault If the warning lights in the instrument panel and on board computer light up while you are driv ing this indicates that a fault has occurred In both cases normal braking as ...

Page 42: ...orque control When the wheel rotation speed of the front and rear axles differs by more than a specified value spinning this is detected by TC system and engine output is automatically reduced Brake control In addition to reducing engine power TC brakes the spinning drive wheels Simultaneous spinning of both drive wheels does not result in brake intervention This means driving stability is not mon...

Page 43: ...g process The TC information light in the instrument panel lights up for a lamp check when the igni tion is switched on The light indicates a control operation The warning light in the instrument panel lights up for a lamp check when the ignition is switched on The light indicates that TC is deactivated The lights in the instrument panel and in the on board computer indicate a defect The TC is out...

Page 44: ... the button until the rear wing has reached its final position Automatic control The rear wing extends at approx 75 mph 120 km h and retracts at approx 50 mph 80 km h If high engine power is used over longer periods of time the retraction of the rear wing is suppressed so that when the car is driven in a sporty manner the rear wing is not constantly extending and retracting When the vehicle is dri...

Page 45: ...r when the ignition key is withdrawn from the ignition lock The lights are switched off with a delay of ap prox 30 seconds after the door is closed The light goes out immediately as soon as the ignition key is inserted in the ignition lock or the vehicle is locked Orientation light A light emitting diode and in the interior light im proves your orientation inside the vehicle when it is dark The li...

Page 46: ... button 10 Emergency flasher switch 11 Porsche Online Pro control panel 12 Control and button for Porsche Online Pro 13 Rear wing button 14 Central locking button Readiness display for alarm system 15 Glove compartment with socket 16 Operating lever for on board computer 17 Horn 18 Locking lever for steering wheel adjustment 19 Power window buttons 20 Knob for temperature Air conditioning system b...

Page 47: ...Controls Instruments 47 ...

Page 48: ...nto neutral The clutch pedal must be depressed fully before the starter will engage Switch position 0 The ignition key can be withdrawn in this position only The steering is locked when the key is withdrawn f Engage the steering lock by moving the steer ing wheel to the left or right Turn the steering wheel to the locking position before you switch off the engine so that you don t have to exert yo...

Page 49: ...ill spring back to position 1 If the engine does not start at the first time or stalls at any time the key must be returned to position 0 When the engine is running the warning lights should go off If a light does not go off take appropriate action as indicated in this manual Switching engine off f Turn the ignition key from position 1 to position 0 Warning Risk of an accident The steering wheel w...

Page 50: ...f When starting the engine be ready to drive immediately Drive vehicle at moderate speeds and avoid engine speeds above 4 200 rpm during the first 5 minutes Danger Engine exhaust fumes have many compo nents which you can smell They also contain carbon monoxide CO which is a colorless and odorless gas Carbon monoxide can cause unconscious ness and even death if inhaled f Never start or let the engi...

Page 51: ...tment blowers radiator fans The radiator and radiator fans are in the front of the car and in the engine compartment The engine compartment blowers are mounted in the engine compartment Warning Risk of injury After the engine is switched off the engine compartment and coolant temperatures are monitored for approx 20 minutes During this period and depending on tem perature the engine compartment bl...

Page 52: ...Engine oil pressure gauge Warning lights indicator lights A Washer fluid level warning light B Check engine warning light C Traction Control information light D Traction Control warning light E ABS warning light F Brake fluid level Brake distribution warning light Brake booster warning light G Parking brake warning light H Brake pad wear warning light I Engine oil pressure warning light J Battery ...

Page 53: ...Controls Instruments 53 ...

Page 54: ...6 Engine oil pressure gauge Warning lights indicator lights A Washer fluid level warning light B Check engine warning light C Traction Control information light D Traction Control warning light E ABS warning light F Brake fluid level Brake distribution warning light Brake booster warning light G Parking brake warning light H Brake pad wear warning light I Engine oil pressure warning light J Batter...

Page 55: ...Controls Instruments 55 ...

Page 56: ...strument and switch symbol brightness can be manually adjusted Warning Risk of an accident personal injury and loss of control f Do not reach through the steering wheel spokes while driving f In the event of a sudden turn or airbag deploy ment serious personal injury could result if hand is positioned through steering wheel spokes Dimming instrument illumination f Turn adjustment button A in the a...

Page 57: ...n turn or airbag deploy ment serious personal injury could result if hand is positioned through steering wheel spokes Resetting to zero f Press adjustment button A for approximately one second or f Reset the distance in the SET menu of the on board computer f Please observe the chapter ON BOARD COM PUTER BC on Page 65 After exceeding 6 213 miles or 9 999 kilometers the counter returns to 0 ...

Page 58: ...e and speed displays in the on board computer and digital tachometer Warning Risk of an accident personal injury and loss of control f Do not reach through the steering wheel spokes while driving f In the event of a sudden turn or airbag deploy ment serious personal injury could result if hand is positioned through steering wheel spokes Switching between units f With the ignition on hold adjustmen...

Page 59: ...ar when the engine rpm drops below 1 500 rpm Caution To avoid severe engine damage f Always observe the engine rpm before down shifting to a lower gear so you do not exceed the maximum engine rpm Flashes in synchronism with the turn signals Left arrow left turn signals Right arrow right turn signals f If the flash frequency of the display becomes noticeably faster check the operation of the turn s...

Page 60: ...lt reme died at an authorized Porsche dealer Please observe the chapter COOLANT LEVEL on Page 117 Note To prevent excessive temperatures the cooling air passages must not be restricted by coverings e g films stone guards If the coolant level is too low the warning light flashes Additionally a warning is displayed in the on board computer f Switch engine off and allow to cool f Add coolant f Have t...

Page 61: ...of the level gauge lights up if less than approx 3 6 U S gallons 13 5 liters of fuel remains in the tank or the range on remaining fuel falls below ap prox 30 miles 50 km Additionally a warning is displayed in the on board computer f Fill up at the next opportunity Caution To prevent damage to the emission control system and engine f Never drive the tank completely out of fuel f Avoid high corneri...

Page 62: ...ours f Press adjustment button A for about one sec ond Hour display flashes f Turn button in the appropriate direction clockwise increase hours figure counter clockwise decrease hours figure Adjustment in hours turn button briefly Fast adjustment display cycles turn and hold button Setting minutes f Press adjustment button again Minutes display flashes f Set by rotating as in hours mode Leaving ad...

Page 63: ...instrument panel and in the on board computer come on with the engine running or while driving f Immediately stop in a suitable place f Switch off the engine f Check whether there is an obvious oil leak on or under the car f If no oil leak can be detected Measure the oil level using the on board com puter with the engine idling Please observe the chapter ON BOARD COM PUTER BC on Page 65 f Add engi...

Page 64: ...remains on briefly as a bulb check If the light does not come on have the bulb replaced promptly If the warning lights in the instrument panel and on board computer come on and remain on while driving it suggests a potential engine control problem and the need for system service or an improperly fastened fuel tank cap or refuelling with engine running Although the vehicle is usually driveable and ...

Page 65: ...ctional principle and help you to navi gate through the menu structure You can restore the factory default settings at any time by using the SET menu Operating lever The on board computer is operated with the lower left lever on the steering column Selecting functions of the on board computer f Push lever up 1 or down 2 Confirming selection Enter f Push lever forward 3 Moving back one or several s...

Page 66: ... step Outside temperature F Average speed mph Average fuel consumption mpg Range on remaining fuel miles Tire pressure Canadian vehicles The units in the on board computer are displayed in kilometers liters and C The values Trip odometer Average speed and Average consumption can be reset to zero using the BC menu Note Pulling the operating lever to the rear 4 takes you directly from a value which ...

Page 67: ...ating lever forward Option 1 Accept current speed f Push operating lever forward The acoustic warning signal is activated for the current speed Option 2 Preset speed f Select LIMIT activated with the operating lever f Press the operating lever forward if the not ac tivated display appears f Use the operating lever to select mph or mph f Push operating lever forward until the desired speed is reach...

Page 68: ...arning messages f Select CHECK with the operating lever f Push operating lever forward Any existing warning messages can be called us ing the operating lever You also can call warning messages which were acknowledged during the journey only until the next time the ignition is switched on f Push operating lever forward ...

Page 69: ...l measurement is indi cated by a time display and cycling segments of the oil level display Once the measurement has been completed you can read off the engine oil level on the segment display If the oil level has fallen below the min mark the segment below the min mark flashes The difference between the min and max marks on the segment display is approx 2 liters 2 13 quarts One segment of the dis...

Page 70: ...d does not indicate whether or not the oil level is correct BC Calling and resetting on board computer functions Switching on selection field A f Push operating lever forward Example Resetting average consumption f Select BC with the operating lever f Push operating lever forward f Select mpg with the operating lever f Push operating lever forward f Push operating lever forward The average consump...

Page 71: ... and check the tires for damage If necessary remedy the damages with a tire repair kit f Do not by any means continue to drive with defective tires f Defective tires must be immediately replaced by an authorized Porsche dealer Tire repairs are not permissible under any circumstances f Sealing the tire with the tire repair kit is only an emergency repair The maximum permitted speed is 80 km h 50 mp...

Page 72: ... pressure changes as the temperature changes The tire pressure increases or decreases by around 1 5 psi 0 1 bar for every 18 F 10 C change in temperature The tire pressure monitoring system takes this re lationship between tire pressure and temperature into account You can read the tire pressures to be cor rected in this display The tire pressure to be corrected is indicated on the displayed wheel...

Page 73: ...ated on the on board computer Note The desired pressures must not fall below 25 psi 1 7 bar for each tire or exceed a 6 psi 0 4 bar pressure differ ence on both wheels of an axle Otherwise a message appears on the on board computer and the new pressures will not be accepted In this event the pressure in the tires to be monitored must be set again 7 When all the desired tire pressures have been set...

Page 74: ...ystem warns about loss in pressure in two stages depending on the amount of pressure loss Stage 1 Tire pressure too low Stage 2 Flat tire Tire pressure monitoring gives a warning about loss of pressure both in public road mode as well as in race circuit mode Stage 1 Tire pressure too low 3 to 6 psi 0 2 to 0 4 bar loss in pressure The pressure in the tires is too low by 3 to 6 psi 0 2 to 0 4 bar Dr...

Page 75: ...detected without wheel position and tire pressure specifications f Manually check the tire pressure on all wheels and fill the tires f Please observe the chapter WARNINGS IN THE INSTRUMENT PANEL AND IN THE ON BOARD COMPUTER on Page 81 Changing a wheel and replacing tires After changing a wheel the tire pressure monitoring system requires some time for the current tire pressure specifications to ap...

Page 76: ...nnot monitor the tire pressure The warning light on the instrument panel and a message on the on board computer light up Monitoring is not active when there are defects in the tire pressure monitoring system wheel transmitters for tire pressure monitoring are not present temporarily after changing a wheel too many wheel transmitters are detected there is external interference by other radio source...

Page 77: ...1 from 3 to 6 psi 0 2 bar to 0 4 bar 3 Stage 2 from 6 psi 0 4 bar Tire pressure specifications Information on tire pressure for public roads can also be found in this Owner Manual on page 3 or on the tire pressure plate in the filler flap These values apply to cold tires at 68 F 20 C f Only use the pressure specifications from the Pressure info display in the Tire pressure menu or from the respect...

Page 78: ... and central lines of the on board computer Changing top display Total mileage Trip counter Outside temperature Range on remaining fuel Average speed Average fuel consumption Changing central display Total mileage Trip counter Outside temperature Range on remaining fuel Average speed Average fuel consumption Basic setting Restore the basic setting of the on board computer Language Select language ...

Page 79: ...pty and you add only a small quantity of fuel this cannot be used to calculate the range on remaining fuel Average consumption and average speed The displayed values are based on the distance travelled since the last reset to zero You can set the starting time for a measurement before or during the trip Switching the ignition off does not reset the mea surements Values can thus be collected over l...

Page 80: ...80 Controls Instruments ...

Page 81: ... check all fluid levels regularly in particular always check the engine oil level before refuelling Instrument panel On board computer Text display in on board computer Meaning measure Seat belt Driver and passenger must fasten their safety belts USA Handbrake Handbrake not released Canada Ignition key not removed Lights on Front rear lid not closed Close front lid and or engine compartment lid Re...

Page 82: ...e warning light Consider range on remaining fuel Refuel at the next opportunity Engine oil pressure too low Stop immediately at a suitable place measure oil level with the on board computer and if necessary add engine oil Temperature gauge warning light Engine temperature too high Switch engine off and let it cool Check coolant level and if necessary add coolant Temperature gauge warning light fla...

Page 83: ...ving Have the fault remedied at an authorized Porsche dealer Failure indicator Oil pressure indicator is faulty Have the fault remedied at an authorized Porsche dealer Failure oil level indicator Have the fault remedied at an authorized Porsche dealer Failure indicator Coolant temperature gauge is faulty Have the fault remedied at an authorized Porsche dealer Failure indicator The coolant temperat...

Page 84: ...approx 1 minute after the engine starts Drive off only if there is sufficient brake booster avail able and the message and warning light are out While driving Stop immediately in a suitable place Do not continue driving Have the fault remedied by an authorized Porsche dealer Canada USA Warning brake distribution Stop immediately in a suitable place Do not continue driving Have the fault remedied a...

Page 85: ...Go to workshop Have the fault remedied at an authorized Porsche dealer Failure outside temperature indicator Have the fault remedied at an authorized Porsche dealer TC failure Drive to workshop Traction Control is faulty Adjust your driving style and speed Consult an authorized Porsche dealer immediately Failure Rear wing control Driving stability is impaired Adjust your driving style and speed Co...

Page 86: ...ng A significant loss in tire pressure has occurred Stop at a suitable place Check the tires for signs of damage e g after changing a wheel Tyre pressure too low Top up air Tire pressure warning Gradual loss of pressure has been detected Correct the pressure as soon as possible e g after changing a wheel No monitoring System learning No RDK tire pressure monitoring System has not yet detected new ...

Page 87: ...rarily The tyres are temporarily not monitored New req press rejected New pressures implausible Fault when setting the tire pressure The pressures set on one axle deviate significantly at least 6 psi 0 4 bar from each other New req press rejected Pressure too low Fault when setting the tire pressure At least one of the set pressures for driving on the race track is below 25 psi 1 7 bar actual pres...

Page 88: ...88 Controls Instrument ...

Page 89: ...re pairs move the car well off the road Switch on the emergency flasher and mark the car with road flares or other warning devices f Do not remain in the car Someone approach ing from the rear may not realize your vehicle is stopped and cause a collision Danger of fire f Do not park or operate the vehicle in areas where the hot exhaust system may come in contact with dry grass brush fuel spill or ...

Page 90: ... possible due to provisions of law Note on operation If the ignition key is removed and the door is opened while the lights not the parking light left right are on a gong warns of possible battery discharge Light switch 0 Light is switched off 1 Parking lights Side marker lights license plate light instrument illumination 2 Low beam high beam Only with ignition on ...

Page 91: ...ntion when changing lanes on the freeway slightly lift or depress the lever to the resistance point The lever will return to the OFF position when released f If the frequency of the display becomes notice able faster check the operation of the turn sig nal bulbs Headlight flasher With ignition on or off f To flash the headlights to oncomming motor ists slightly pull the lever toward the steering w...

Page 92: ... not operate headlight washer when it is frozen 0 Windshield wiper off 1 Windshield wiper slow 2 Windshield wiper fast 3 Intermittent operation 4 Windshield washer system Sprays while the lever is pulled towards the steering wheel in the first position When the lever is released a few drying wipes are executed 5 Windshield wiper and washer system Sprays and wipes while the lever is pulled to wards...

Page 93: ... the knurled wheel Closing vents f Rotate knurled wheel downward Changing air flow direction f Swivel the vent fins in the desired direction Outside air or conditioned air can be delivered from all vents depending on the air distribution setting Fresh air intake In order to ensure proper air intake f Keep the fresh air intake between the wind shield and the front lid free from snow ice and leaves ...

Page 94: ...on with knob C Note on operation When selecting the air distribution intermediate settings can be selected Example A setting between the symbols central vents and footwell direct air to the central side and foot well vents Air flows to central and side vents recommended setting in Summer Air flows to footwell closing the center and side vents will increase the air quantity to the footwell signific...

Page 95: ...end the defrost function f Press knob C The outside air supply is interrupted and only the inside air is circulated The symbol in the switch lights up red Warning Risk of accident due to impaired vision In air circulation setting the windows can fog up f Only select circulating air setting for short periods f If the windows fog up end air circulation setting immediately by pressing the knob again ...

Page 96: ...itioning system on or off General instructions for air conditioning compressor Can switch off briefly to ensure sufficient engine cooling if the engine is operating under extreme load Switches off automatically at temperatures below approx 37 F 3 C and cannot be switched on even manually Operates most effectively with the windows closed If the car has been in the sun for a long time however it is ...

Page 97: ...re is no cigarette lighter Opening f Press ashtray lid briefly Emptying f Open ashtray and carefully pull out ash insert by the lid Warning Danger of fire f Never use ashtray for waste paper disposal as it could pose a fire hazard Sun Visors f Swing the sun visors down to prevent glare from the front ...

Page 98: ...Do not carry unsecured luggage or objects in the passenger compartment Storage options In the glove compartment in the doors in the door panels in the luggage set storage compartment for the roof panels under the front lid Glove compartment Warning Risk of injury by the glove compartment lid in case of an accident f Keep the glove compartment closed while driv ing Opening f Pull the catch and open...

Page 99: ...contains a leather bag for storing small objects Opening the tray f Press on the lid at the position shown A Closing the tray f Press on the lid at the position shown A until it engages Note Before closing the vehicle door make sure that the lid is closed f f f ...

Page 100: ...g passenger footwell Hanging bag C e g between the passenger seat and door Center console bag D under the center console Hanging the clothing bag f Hang the clothing bag on the rings behind the passenger s side Removing center console bag f Slide the bag out the guide opposite the direc tion of travel arrow Fastening center console bag f Slide the bag in the guide under the center con sole until i...

Page 101: ...ing front lid f Raise lid slightly and unlatch the safety catch with the lever arrow Closing front lid f Lower the lid and press with both hands left and right from the crest f Check that the lid has correctly engaged in the lock The warning light in the instrument panel comes on if the lids are not completely closed f Fully close the lid Warning Risk of loss of control or an accident result ing i...

Page 102: ...ening the engine compartment lid Engine compartment lid Caution Risk of damage The engine compartment lid is opened automatically by pneumatic springs when released f Before unlocking make sure there is sufficient clearance above the lid Danger of burning The area where the engine compartment is vented behind the rear wing and the tailpipes of the exhaust system can become very hot f Do not touch ...

Page 103: ...G OF THE ENGINE COMPARTMENT LID on Page 160 Opening the engine compartment lid The engine compartment lid is opened automati cally by pneumatic springs when released Closing the engine compartment lid Warning Risk of pinching between the rear wing and engine compartment lid when closing the lid f When closing put your hand on the lid arrow and press the lid until it engages f Lower the lid and pre...

Page 104: ...wheel housing Opening the left storage compartment f Release latches A and remove lid 1 Space for emergency kit 2 Tire repair kit 3 Screwdriver 4 Compressor 5 Recovery eye behind the compressor 6 Front towing eye Opening the right storage compartment f Release latch B and remove lid Space for the warning triangle is in the right stor age compartment ...

Page 105: ...f Only store clean roof panels in the compart ment under the front lid scratches f Only remove and install roof panels in the order described Removing the roof panels and storing them in the compartment under the front lid 1 Move both seats to the front position 2 Roof panel on the passenger s side Press release button A keep it pressed and swivel the latching lever downwards arrow B 3 Lift roof p...

Page 106: ...igure 5 Place the roof panel on the angles A of the foam parts in the compartment under the front lid Place the roof panels in the compartment under the front lid Close latching lever B 6 Take the fastening strap 1 No 1 out of the foam part 7 Engage the fastening strap No 1 on the points C ...

Page 107: ...Tighten the fastening strap close the Velcro strip 9 Roof panel on the driver s side Unlock and remove the roof panel 10 Close the latching lever Note on operation The roof panel on the driver s side is stored in the same position in the compartment under the front lid as it was taken from the roof Figure f f f ...

Page 108: ...t under the front lid Place the roof panels in the compartment under the front lid 12 Take the fastening strap 2 No 2 out of the foam part Engage the fastening strap No 2 on the points B 13 Tighten the fastening strap close the Velcro strip 14 Close the sliding panel C of the rear roof mounting point ...

Page 109: ...ing strap No 2 4 Carefully remove the fastening strap 5 Roll together the fastening strap and store it in the foam part 6 Take the roof panel for the driver s side out of the compartment under the front lid 7 Press release button B keep it pressed and open the latching lever arrow C 8 First insert the roof panel into the guides D in the windshield frame f f f ...

Page 110: ... dirt the protective bags can be pulled over the removed roof panels Caution Risk of damage The roof panels could be scratched f Only pull the protective bags over clean roof panels Vehicle Cover To protect against dirt the vehicle cover can be pulled over the vehicle Caution Risk of damage The vehicle could be scratched f Only pull the vehicle cover over a clean vehicle Risk of damage The vehicle...

Page 111: ... result in temporarily inaccurate navigation When the battery has been disconnected it may take up to 15 minutes before the navigation system becomes operational again Compact disc player Caution To avoid damage to compact disc player and discs f Use only compact discs labeled as shown hav ing no dirt damage or warpage f Never attempt to disassemble or oil any part of the player unit Do not insert...

Page 112: ...y distortion Fading and drifting can be minimized to a certain degree by careful attention to fine tuning or selec tion of a stronger signal Static and fluttering When the line of sight link between a transmitter and vehicle is blocked by large buildings or moun tains the radio sound may be accompanied with static or fluttering because of the characteristic of FM In a similar effect a fluttering n...

Page 113: ...e The transmission power must not exceed 10 W The devices must possess a type approval for your vehicle and have an e symbol If you should require equipment with transmission power values greater than 10 W please consult your authorized Porsche dealer for this purpose He is familiar with the technical requirements for installing devices of this kind The antennas for all radios and telephones with ...

Page 114: ...right in the shift gate or by moving the gearshift lever straight up and down Pushing the gearshift lever through the entire shifting path can cause snagging and mis shifting Reverse f Depress the clutch pedal for several seconds before shifting into reverse Only then move the gearshift lever to the left overcoming the spring tension and then to the front Both back up lights come on when the trans...

Page 115: ...ation 120 Brake Fluid Level 122 Fuel Economy 124 Operating Your Porsche in other Countries 124 Fuel Recommendations 126 Portable Fuel Containers 127 Emission Control System 128 How Emission Control Works 129 Fuel Evaporation Control 130 Washer Fluid 130 Power Steering 131 Wiper Blade 132 Air Filter 134 Combination Filter 134 Manual Transmission Oil 134 Car Care Instructions 135 ...

Page 116: ... radiator fans are in the front of the car and in the engine compartment The engine compartment blowers are mounted in the engine compartment The fans can start or continue running as a function of temperature even with the engine switched off Carry out work in these areas only with the en gine off the ignition switched off and exercise extreme caution f When the ignition is on high voltage is pre...

Page 117: ...ot f Allow the engine to cool down before opening the cap and protect your hands arms and face from any possible escape of hot coolant f Keep coolant out of children s reach f Also keep coolant away from your pets They can be attracted to it should there be a spill or to used coolant left in an open contain er Coolant can be deadly to pets if consumed 1 Switch engine off and let it cool Please obs...

Page 118: ...ion and oxidation of the lubricant If the vehicle is used for repeated short trips and consumes a normal amount of oil the engine oil measurement may not show any drop in the oil level at all even after 600 miles 1 000 km or more This is because the oil is gradually becom ing diluted with fuel or moisture making it appear that the oil level has not changed The diluting ingredients evaporate out wh...

Page 119: ... approx 0 3 liters 0 31 quart Warning Risk of burning from hot parts in engine com partment Risk of injury by rotating parts The engine compartment blowers in the en gine compartment can start up even with en gine off f Exercise extreme caution when working on the engine compartment f Top off engine oil only with the engine off Engine oil is hazardous to your health and may be fatal if swallowed f...

Page 120: ...vel with the on board computer again Observe the conditions for measuring the oil level 7 Add more engine oil if necessary Never add more engine oil than required to reach the max mark 8 Close the oil filler cap carefully Make sure that the cap is completely closed Engine Oil Recommendation Recommended oil viscosity ranges dependent on ambient temperatures Above 14 F 10 C SAE 0W 40 5W 40 and highe...

Page 121: ...ain has 100 efficient engine oil Engine oil performance class Engine oil is not only a lubricant but also serves to keep the engine clean to neutralize the dirt which penetrates into the engine through combus tion and to protect the engine against corrosion To perform these functions the oil is provided with additives which have been specially developed for these functions The efficiency of an oil...

Page 122: ... brake fluid not to soil the compartment of the roof panels or items of luggage Opening the cover of the brake fluid reservoir The reservoir for the hydraulic braking system is located in the compartment for the roof panels under a cover 1 Release the cover A Velcro strap and open 2 Unscrew screws B 3 Open cover C Checking the brake fluid level f Check the brake fluid level regularly at the transp...

Page 123: ...uid level too low in conjunction with large pedal travel a braking circuit failure If the warning lights should light up while driving f Stop immediately in a suitable place f Do not continue driving Please have the fault remedied at your nearest authorized Porsche dealer Brake booster warning The brake booster is monitored in addition to the brake fluid level If the brake fluid warning light ligh...

Page 124: ...Only switch on the air conditioning when neces sary The EPA estimated m p g is to be used for comparison purposes actual mileage may be different from the estimated m p g depending on your driving speed weather conditions and trip length Your actual highway mileage will probably be less than the estimated m p g f Please observe all local and national speed limits Operating Your Porsche in other Co...

Page 125: ...hapter EMISSION CON TROL SYSTEM on Page 128 Please observe the chapter FUEL ECONOMY on Page 124 Please observe the chapter LEVEL GAUGE on Page 61 Check engine warning light If the warning lights in the instrument panel and on board computer come on and remain on while driving it suggests an improperly tightened tank cap or refuelling with engine running Opening the filler flap The filler opening i...

Page 126: ...on Fuel Recommendations Your Porsche is equipped with catalytic convert ers and must use UNLEADED FUEL ONLY Your engine is designed to provide optimum per formance and fuel economy using unleaded premi um fuel with an octane rating of 98 RON 93 CLC or AKI Porsche therefore recom mends the use of these fuels in your vehicle Porsche also recognizes that these fuels may not always be available Be ass...

Page 127: ...r ether such as MTBE Under normal conditions the amount of these compounds in the fuel will not affect driveability You may use oxygenated fuels in your Porsche provided the octane requirements for your vehicle are met We recommend however to change to a different fuel or station if any of the following prob lems occur with your vehicle Deterioration of driveability and performance Substantially r...

Page 128: ...in accordance with the recommendations de scribed in your Maintenance Booklet Lack of proper maintenance as well as im proper use of the vehicle will impair the func tion of the emission control system and could lead to damage f Do not alter or remove any component of the emission control system f Do not alter or remove any device such as heat shields switches ignition wires valves etc which are d...

Page 129: ...ol unit The control unit corrects the air fuel ratio so the engine always receives an accu rately metered air fuel mixture Crankcase ventilation Through crankcase ventilation undesirable emis sions from the engine crankcase are not permit ted to reach the outside atmosphere These emis sions are recirculated from the crankcase to the air intake system From here the emissions mix with the intake air...

Page 130: ... air housing by the tank vent line mixed with the intake air and burned during normal combustion Washer Fluid The reservoir with a blue screw cap is in the en gine compartment Capacity The capacity is approx 4 8 quarts 4 5 liters Topping off washer fluid Clean water is generally not enough to clean the windshield and headlights It is advantageous to add a winter cleaner giving antifreeze protectio...

Page 131: ... Porsche dealer Checking hydraulic fluid f Please observe the chapter EXERCISE EX TREME CAUTION WHEN WORKING ON YOUR VEHICLE on Page 116 f Only use hydraulic fluid authorized by Porsche Specification Please observe the chapter CAPACITIES on Page 183 Check the fluid level with the engine stopped and engine at operating temperature 1 Start the engine and let it idle for approx 20 seconds Switch off ...

Page 132: ...eplacing it Maintenance note If the wiper blade rubs or squeaks this can be as a result of the following If the vehicle is washed residues may adhere to the windshield These residues can only be removed using a special cleaning solution Please contact your authorized Porsche dealer for further information The wiper blade may be damaged f Replace a damaged wiper blade as soon as possible Replacing ...

Page 133: ...t it en gages Ensure that the new wiper blade is inserted into the wiper arm in the same position The spoiler must point downwards Only use an Original Porsche wiper blade with spoiler 7 Push on wiper arm C 8 Screw in screw B The wiper blade D must lie against the marking on the windshield arrow 9 Tighten screw Tightening torque 21 Nm 16 ftlb 10 Push cover A on the screw ...

Page 134: ...lluted by exhaust fumes press the circulating air button A dirty filter can be the cause of reduced air flow f Have filter replaced by your authorized Porsche dealer Regular filter replacement is part of the routine maintenance service Manual Transmission Oil The transmission oil has to be checked and changed at the intervals listed in your Maintenance Schedule f Please observe the chapter CAPACIT...

Page 135: ...f serious personal injury or damage to the vehicle or property Cleaning agents may be hazardous to your health Most chemical cleaners are concentrates which require dilution High concentrations might cause problems ranging from irritation to serious injury as well as damage to your vehicle f Keep cleaning agents out of reach from chil dren f Observe all caution labels f Always read directions on t...

Page 136: ...ois leather Do not use the same chamois leather for dry ing as you use for cleaning the windshield and windows Warning Moisture which gets on to the brakes during a car wash can reduce braking efficiency or make the brakes pull unevenly which could increase the danger of an accident causing serious personal injuries or death f Always apply the brakes a few times after washing the car to test braki...

Page 137: ...s must only be performed by your authorized Porsche dealer f Have minor paint damage cracks scratches or stone damage repaired immediately by your authorized Porsche dealer Engine compartment The engine compartment and the surface of the engine are treated with a corrosion inhibitor at the factory If degreasing solvents are used to clean the en gine compartment or the engine is washed down the pro...

Page 138: ...er wiper performance deteriorates f Periodically clean the wiper blade with window cleaner especially after the vehicle has been washed We recommend Porsche window cleaner If it is very dirty e g with insect remains it can be cleaned with a sponge or cloth Undercoating Damage to the surface of the underbody while driving cannot be ruled out The car underside should therefore be inspected or repair...

Page 139: ...ts f Rinse cleaned surfaces with clear water Light alloy wheels Pitting may occur if metallic particles which cause contact corrosion e g brass or copper in brake dust are allowed to remain on the light alloy wheels for too long f If possible wash the wheels with a sponge or wash brush about every two weeks In areas where salt is spread on winter roads or there is a lot of airborne industrial dust...

Page 140: ...ble microfiber cloth f Remove heavy contamination with Porsche leather cleaner Please always follow the instructions for use given on the containers Caustic cleaners and hard cleaning objects must not be used Perforated leather must under no circum stances get wet on its reverse side Once cleaned leather particularly the heavily stressed leather seats must be treated only with Porsche leather care...

Page 141: ...ition and fully charged Windshield Headlight washer f Check and correct antifreeze cleaning solution level as necessary Electrical system f If the battery cables remain connected it is necessary to connect the trickle charger from time to time Do not fast charge the battery or f Disconnect the battery from the electrical sys tem by removing the ground isolating plug When the battery is disconnecte...

Page 142: ...142 Maintenance Car Care ...

Page 143: ...ng on your Vehicle 144 Tires Wheels 145 Lifting the Vehicle with a Lifting Platform or Garage Lift 152 Flat Tire 153 Wheel change 154 Electrical System 156 Replacing the remote control battery 157 Battery 161 Emergency Starting with Jumper Cables 167 Replacing bulbs 169 Adjusting Headlights 170 Towing 172 ...

Page 144: ...n belts or other moving parts The radiator and radiator fans are in the front of the car and in the engine compartment The engine compartment blowers are mounted in the engine compartment The fans can start or continue running as a function of temperature even with the engine switched off Carry out work in these areas only with the en gine off the ignition switched off and exercise extreme caution...

Page 145: ... consult your authorized Porsche dealer Danger Risk of loss of control and serious personal injury or death f If while driving your vehicle experiences a sud den vibration or ride disturbance and or you suspect that possible damage to your tires or vehicle has occurred you should immediately reduce your speed without excessive use of the brakes f Stop the vehicle as soon as possible and in spect t...

Page 146: ...s a tire graded 100 The relative performance of tires depends upon the actual conditions of their use however and may depart significantly from the norm due to vari ations in driving habits service practices and dif ferences in road characteristics and climate Traction AA A B C The traction grades from highest to lowest are AA A B and C and they represent the tire s ability to stop on wet pavement...

Page 147: ...rate tire pressure gauge when checking inflation pressures f Do not exceed the maximum tire pressure list ed on the tire sidewall Please observe the chapter VEHICLE IDENTI FICATION TECHNICAL DATA on Page 177 f Cold tire inflation pressure means all tires must be cold ambient temperature maximum 68 F 20 C when adjusting the inflation pres sure Avoid sunlight striking the tires before measur ing col...

Page 148: ...ses as they may lead to sudden deflation and loss of control which could cause severe personal injury f Specialized high performance tires on high performance sports cars exhibit more wear than those on a family sedan or even a high performance sedan Therefore it is important to check your tire pressure and condition at least every two weeks If you notice that tires are wearing unevenly con sult y...

Page 149: ...efore mounting new tires check with your Porsche dealer about the current release status Use tires with ZR quality standards There are currently no standards concerning tire strength at speeds above 150 mph 240 km h Tires should be replaced no less than on one axle at the time Only tires of the same make and type must be used Mixed tires are not permissible Initially new tires do not have their fu...

Page 150: ...use for the fault can be found drive carefully to the nearest authorized Porsche dealer Removing and storing tires Tires must always remain on the same side of the vehicle When wheels are removed the direction of rota tion and position of each wheel should be marked Example FR front right FL RR and RL Wheels must always be fitted in accordance with their marking and direction of rotation arrow The...

Page 151: ...ds only the use of fine link chains such as those approved by Porsche f Follow instructions issued by the supplier of the chains Different states and countries have varying statu tory requirements regarding maximum speed Check with local authorities for possible restric tions f Remove chains as soon as the roads are free of ice and snow Tire designations The designation to be used for ZR tires is ...

Page 152: ...operly f Never lift the vehicle at any other place than the jacking points f Never lift the vehicle by the engine transmis sion or axles f Do not damage any sensitive components in the vicinity of the jacking points Platform lift Before the car is driven on to a lifting platform it must be ensured that there is enough space be tween the lifting platform and the vehicle Garage lift A garage lift mu...

Page 153: ...re repair kit compressor and pressure tester are located in the left storage compartment of the engine compartment f Please observe the safety and operating in structions on the special sealant bottle with a special Porsche part number and on the com pressor these are essential f Have the sealant changed in accordance with the change intervals stated in the brochure Maintenance Important note Seal...

Page 154: ... When changing a wheel make sure that the brake discs are not damaged Socket A suitable socket A for loosening or tightening the central nut can be found in the compartment for the roof panels under the front lid The socket is not suitable for impact or impulse screwdrivers The tools required for changing a wheel e g jack torque wrench are not supplied with the car The socket is adjusted for the s...

Page 155: ...pushing on the wheel spray the cone and thread surfaces of the rim hub and central nut exclusively with Mc Lube Sailkote High Performance Dry Lubricant Never grease any parts Warning Risk of damage and accident when the rim hub and central nut are maintained improperly f Only spray the rim hub and central nut when the wheel is pushed on Contact surfaces between the rim and hub must not be sprayed ...

Page 156: ... alarm system is not changed by disconnecting the battery When the battery is disconnected the alarm sys tem ceases to function Overload protection If the central locking system is operated more than ten times within a minute further operation is blocked for 30 seconds Load switch off after two hours or five days If the ignition key is removed loads which are switched on or in standby e g interior...

Page 157: ...nal accessories for more than 5 minutes with the engine switched off battery will discharge Replacing the remote control battery The battery should be changed when the range of the radio remote control becomes smaller or when the GT logo no longer flashes when the remote control is operated 1 Using your finger nail or a small screwdriver carefully pry out the cover A of the key grip 2 Remove the P...

Page 158: ... are in the upper section of the fuse box in the driver s footwell Important note f If a fuse blows repeatedly please immediately consult an authorized Porsche dealer so that the short circuit can be located and corrected f Never try to repair fuses you may cause se rious damage to other parts of the electrical system Replacing fuses 1 Switch off the load with the defective fuse 2 Pull the Tenax s...

Page 159: ...g lug E of the cover on the frame of the fuse box Fold up the cover until the Tenax stud B can be felt to engage Fuse box in the engine compartment There is an additional fuse box in the engine com partment over the right rear wheel To open unscrew the screws F and open the cov er ...

Page 160: ...nnect the positive terminal of the jump box or donor battery with positive terminal A in the fuse box 5 Use the second jumper cable to connect the negative terminal of the jump box or donor bat tery to the upper hinge B of the driver s door 6 Unlock the engine compartment lid with the switch behind the parking brake 7 Disconnect the negative cable first then the positive cable 8 Push positive term...

Page 161: ...erminals and related acces sories contain lead and lead compounds chemicals known to the State of California to cause cancer and reproductive harm f Always protect your skin by washing thorough ly with soap and water Risk of damage to alternator and electronic control units f Do not disconnect the battery or ground isolat ing plug while the engine is running This also applies to cars equipped with...

Page 162: ... charge a frozen battery It may explode because of gas trapped in the ice Allow a fro zen battery to thaw out first f If you get electrolyte which is an acid in your eyes or on your skin immediately rinse with cold water for several minutes and call a doc tor Slow battery charging Caution Risk of damage if the charger is not connected to the jump lead starting points provided f Do not use carbon f...

Page 163: ...nd the longer the distance driven on each trip the more opportunity the vehicle s charging system will have to recharge the batteries Replacing battery The service life of the battery is subject to normal wear it depends greatly on care climatic condi tions and driving conditions distances loads f Only use an original Porsche battery with the correct part number as a replacement f Please observe t...

Page 164: ...d locations f The ground isolating plug must be plugged in f Please observe the separate operating instruc tions from the trickle charger manufacturer 1 Close any open windows and lids 2 Switch ignition off 3 Open the glove compartment 4 Press the socket in the glove compartment The socket folds down 5 Plug the trickle charger into the socket 6 Route the cable above the glove compartment cover arr...

Page 165: ...between the side window and the seal arrow 10 Close the vehicle doors 11 Only plug in the trickle charger into the wall outlet after it has been correctly connected up to the socket in the clove compartment Disconnecting the trickle charger 1 First unplug the trickle charger from the wall outlet 2 Then pull the trickle charger out of the socket in the glove compartment ...

Page 166: ...ystem ceases to function If the engine compartment lid is closed when the power supply is interrupted it can only be unlocked by connecting a donor battery f Please observe the chapter EMERGENCY UNLOCKING OF THE ENGINE COMPARTMENT LID on Page 160 1 Open engine compartment lid Please observe the chapter ENGINE COMPARTMENT LID on Page 102 2 Unclip the cover A from the ground isolating point 3 Remove...

Page 167: ...s of the jumper cable manufacturer f When connecting jumper cables make sure that they cannot get caught in any moving parts in the engine compartment The jumper cables must be long enough so that neither vehicles nor cables touch another f The vehicles must not be in contact otherwise current might flow as soon as the positive ter minals are connected f The cable clamps must not be allowed to con...

Page 168: ...onsumers and accessories move the gear shift lever into the neutral position and set the parking brake 2 Open the cap of the positive terminal for jump starting 3 Attach the positive cable first to the positive terminal for jump starting then to the positive terminal of the booster bat tery 4 Connect the negative cable first to the nega tive terminal of the booster battery then to the grounding po...

Page 169: ...lights Risk of damage Bulbs of a higher wattage can damage the lamp housing f Use only bulbs authorized by Porsche f Always carry spare bulbs with you In certain countries carrying spare bulbs is mandatory f Bulbs must be clean and free from grease Never touch bulbs with your bare hands Use a cloth or soft paper Caution Risk of damage to headlights due to exces sive temperatures and abrasion f Att...

Page 170: ... can settle For checking the headlight adjustment the verti cal position of the cutoff of the lowbeam see fig has to be projected on a vertical screen wall in distance of 7 5 m 24 6 ft from the front lens of the headlamp The correct position of the cutoff is 5 cm 2 0 in at 7 5 m or 24 6 ft 0 4 below a horizontal line x cm from ground to the center of the headlamp lens Lateral adjustment of the hea...

Page 171: ...odate the vehicle beam patterns to be aimed The screen should be wide enough to provide at least 1 m 3 3 ft of space outboard of the vehi cle s headlamp spacing A Opening for headlight vertical adjustment Vertical adjustment The opening A for vertical adjustment is located in the wheel well in front of the relevant front wheel f To adjust the headlights use a 5 mm Allen key with a long shaft and b...

Page 172: ... improper handling when transporting f Only transport the vehicle with great care f The vehicle must only be transported with all four wheels touching the ground at the same time f Special provisions may be required Towing eye front The towing eye is contained in the left storage compartment of the engine compartment in the tool kit Caution Risk of damage to the vehicle f Use the towing eye only f...

Page 173: ...e to the vehicle f Use the recovery eye only for an emergency to extricate the vehicle Under no circumstances is the vehicle to be secured using the recovery eye f Never use the recovery eye to tow any other vehicle f The recovery eye must be attached to the un derside panel on the unit carrier figure using the screws provided Tightening torque Tightening torque of the screws 33 Nm 24 ftlb f f f ...

Page 174: ...ehicle and the front spoil er for possible contact with the ground or the bed 5 While loading adjust the bed angle as neces sary to avoid contacting the vehicle 6 Secure the vehicle on the car carrier using ny lon wheel strap tie downs Lowering the vehicle from the car carrier bed 1 Lower the flatbed completely and position ramping in the track width of the vehicle at the edge of the bed 2 Slowly ...

Page 175: ...e is not dam aged 2 Secure straps to rear of flatbed 3 Reel in winch wire rope only far enough to ten sion tie down straps 4 Carefully feed towing straps through the open ing in the front wheels Make sure metal parts of straps do not dam age rim Make sure the strap is flat over the rim bead Make sure brake backing plate is not dam aged 5 Secure straps to front of flatbed 6 Release tension on winch...

Page 176: ...176 Practical Tips Emergency Service ...

Page 177: ...Vehicle Identification Technical Data 177 Vehicle Identification Technical Data ...

Page 178: ...car This label contains the following information 1 Vehicle Identification No 2 Type Type description 3 Engine code Transmission code 4 Paint No Interior 5 Optional equipment A duplicate of this label is in your Maintenance Booklet Note This data bank cannot be re ordered if it is lost or damaged Vehicle identification number In accordance with Federal Safety Regulations the vehicle identification...

Page 179: ...e time the vehicle was manufac tured The sticker also shows the month and year of pro duction and the vehicle identification number of your car perforations as well as the Gross Vehi cle Weight Rating and the Gross Axle Weight Rat ing Paint data The paint data plate is attached to the front side wall under the light in the compartment for the roof panels Engine number The engine number is stamped ...

Page 180: ...349 8 cu in 5733 cm3 Compression ratio 12 1 Net horsepower SAE J 1349 605 hp 450 kW at crankshaft speed 8000 rpm Net torque SAE J 1349 435 ft lb 590 Nm at crankshaft speed 5750 rpm Alternator 2100 W 150 A Engine control Stationary high voltage distribution sequential injection cylinder selective knock control stereo oxygen sensor closed loop control diagnostic system 4 overhead camshafts Porsche V...

Page 181: ...ar 1 87 1 3rd gear 1 36 1 4th gear 1 07 1 5th gear 0 90 1 6th gear 0 75 1 Reverse 2 19 1 Final drive ratio 4 44 1 Front 32 psi 2 2 bar Rear 32 psi 2 2 bar These tire pressures apply only to the tire makes and types approved by Porsche Please observe the chapter TIRES WHEELS on Page 145 ...

Page 182: ...out the current release status Tire and rim sizes Extensive tests are performed before specific tires and wheels are approved by Porsche Your Porsche dealer has infor mation about approved tires and wheels and is happy to assist you If aftermarket tires and or wheels are installed which are not approved by Porsche the vehicle s roadability and handling characteristics might be impaired Since Porsc...

Page 183: ... tank approx 24 3 U S gallons 92 liters Fuel quality Your engine is designed to provide optimum performance and fuel economy using unleaded premium fuel with an octane rating of 98 RON 93 CLC or AKI Porsche therefore recommends the use of these fuels in your vehicle Porsche also recognizes that these fuels may not always be available Be assured that your vehicle will operate properly on unleaded p...

Page 184: ...e load front 1576 lbs 715 kg Maximum axle load rear 2061 lbs 935 kg The maximum gross weight must not be exceeded Note If additional accessories are installed the useful load will be correspondingly less Length 181 61 in 4613 mm Width 75 63 in 1921 mm Height 45 91 in 1166 mm Wheelbase 107 48 in 2730 mm Ground clearance 3 39 in 86 mm Turning circle 42 3 ft 12 9 m ...

Page 185: ...nal equipment Transmission diagram The transmission diagram is based on standard values on the basis of a mean effective scrub ra dius Changes of the scrub radius the tire toler ance wear and tear deviating country equipment and tire slip have not been taken into account Engine diagram at full power Engine power Engine speed Torque ...

Page 186: ...186 Technical Data Acceleration diagram Time Speed ...

Page 187: ...Technical Data 187 Transmission diagram Engine speed Speed ...

Page 188: ...52 54 Fluid warning light 76 123 Pad wear warning light 52 54 Pads 16 39 Parking brake warning light 52 54 Test stand 43 Break in hints 16 Bulbs Replacing 169 C Capacities overview 183 Car care 135 Car washes 136 Catalytic converters 129 Cautions 116 144 Central locking 22 emergency operation 23 Check engine Warning light 52 54 64 Child restraint System 33 35 Clock 52 54 62 Clutch pedal 36 Combina...

Page 189: ...tire 153 Footbrake 37 Fresh air intake 93 Front lid 101 Lid warning light 52 54 101 103 Fuel 4 61 125 Containers 9 Economy 124 Evaporation control 130 Level gauge 52 54 61 Level warning light 61 Recommendation 126 127 Tank 126 Warning light 52 54 Fuses 158 G Garage lift 152 Gear Shifting 114 Glove compartment 98 Gong 18 49 67 87 90 Ground clearance 8 184 H Hands free microphone 111 Headlights 91 1...

Page 190: ...4 Passenger compartment monitoring infrared 24 Plastic parts care of 139 Platform lift 152 Power measurements 116 Power steering fluid level 131 183 Power windows 21 26 27 Practical tips 144 R Radiator fan 51 118 Radio reception 112 Rear lid 101 Rear view mirrors 28 Rear wing 9 44 Manual control 44 Warning light 44 Relays 156 Remote control 20 Changing the battery 157 Replacement key 19 Replacing ...

Page 191: ...52 54 57 Turn signals 59 91 Indicator lights 52 54 U Undercoating 128 138 V Valves 149 Vehicle Care 135 Data 179 Identification label 178 Identification number 178 Washing 136 Ventilation 94 96 Vents 93 96 W Warning lamps and messages 81 Washer fluid 130 183 Level warning light 52 54 Washing 136 Weights 184 Wheel 139 182 Central nut 155 Change 154 Socket 154 Windows 26 27 138 Washer nozzles 92 Was...

Page 192: ...192 Index ...

Reviews: