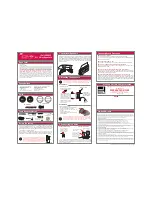
OPTION #1
—
Receivers that include a “Sub Out” feature—the most common hookup method
with Dolby
®
Digital receivers.
Note:
that one of the speaker input terminals on the rear of the speaker is marked red (+)
and the other black (-). Make certain that you connect the wire from the red (+) terminal
of your receiver to the red (+) terminal on your speaker, and the wire from the black (-)
terminal of the receiver to the black (-) terminal on your speaker. Speaker wire has some
indication (such as color coding, ribbing, or writing) on one of the two conductors to help
maintain consistency. If your subwoofer doesn't seem to produce much bass, it is most
likely that one of the speaker wires is connected backwards. Double check all connec-
tions for correct polarity.
Note:
Use either the L or R Line input (another hookup option is to use a Y-split
cable and connect both L and R Line inputs). After you make this Sub Out connection,
turn the "Low Pass" filter fully clockwise.
Connect all speakers directly to the receiver. When using method #1, adjust
your receiver’s speaker configurations as follows: Set Front, Center and
Surround speakers to “small.”
Receiver Settings:
Front, Center, and Surrounds = “SMALL”
Subwoofer = “ON,” or “YES,” or “PRESENT”
Set the crossover frequency on the receiver to 120Hz.
Consult your receiver’s owner’s manual for speaker configuration.
OPÇÃO #1
—
Receivers que oferecem um recurso de “Sub Out” (Saída sub)—o método de conexão
mais comum com receivers Dolby Digital.
Nota:
que um dos terminais de entrada na parte traseira da caixa acústica está marcado
(+) em vermelho e o outro (-) em preto. Certifique-se de conectar o cabo do terminal (+)
vermelho do receiver ao terminal (+) vermelho da caixa acústica e o cabo do terminal (-)
preto do receiver ao terminal (-) preto da caixa acústica. O cabo para caixa acústica está
marcado de alguma maneira (codificado por cores, faixas ou inscrições) em um dos dois
condutores para ajudar a manter a coerência da conexão. Se o subwoofer aparentemente
não produzir um bom nível de graves, é bem provável que um dos cabos da caixa acústica
tenha sido conectado de maneira invertida. Verifique novamente se a polaridade das
conexões está correta.
SYSTEM HOOKUP OPTIONS
Important
Use only one of these options. Never combine hookup options.
mportante:
Use apenas uma destas opções.Nunca combine várias opções de conexão.
Bene:
Usare una sola di queste opzioni. Non combinare mai opzioni diverse di collegamento.
Hinweis:
Verwenden Sie nur eine dieser Optionen. Kombinieren Sie nie die
Anschlussoptionen.
Importante:
Utilice solamente una de las opciones. No combine opciones de cableado.
Importante:
Utilisez seulement une de ces options.
Ne combinez jamais ces options de raccord.
8
Contact Polk Audio Customer Service 1-800-377-7655 (Outside US: 410-358-3600) Monday-Friday, 9:00 AM-6:00 PM Eastern Time, [email protected]
Note:
Hookup diagrams show wiring only, not speaker position. Shows
splitter connection for subwoofer. Splitter is an optional accessory.
If not using splitter, connect single cable to L or R LINE IN only.
Notas:
O diagrama mostra apenas a fiação e não ilustra a posição das
caixas acústicas. Mostra a conexão do divisor do subwoofer. O divisor
é um acessório opcional. Se não usar um divisor, conecte só um cabo
à entrada LINE IN L (esquerda) ou R (direita).
Nota:
Lo schema mostra solo il cablaggio, non l’ubicazione dei diffusori,
nonché la connessione dello splitter per il subwoofer. Lo splitter è un
accessorio opzionale; se non lo si usa, collegare il cavo singolo solo
all’ingresso di linea (LINE IN) sinistro (L) o destro (R).
Hinweise:
Das Diagramm zeigt nur die Verkabelung, nicht die Lautsprecher-
position. Zeigt die Splitter-Verbindung für den Subwoofer. Der Splitter ist ein
optionales Zubehörteil. Wenn Sie keinen Splitter verwenden, verbinden
Sie nur ein einzelnes Kabel mit dem Anschluss L oder R LINE IN.
Notas:
En el diagrama se muestra sólo el cableado, no la ubicación de los altavoces.
También se muestra la conexión con divisor de señal para el subwoofer. El divisor de
señal es un accesorio opcional. Si no va a usar el divisor de señal, conecte un solo
cable a la entrada de línea izquierda (L LINE IN) o derecha (R LINE IN).
Notes:
Le diagramme indique le câblage seulement, non la position des enceintes.
Il illustre également le diviseur pour connexion au subwoofer—ce diviseur est un
accessoire optionnel. Si vous n’utilisez pas de diviseur, connectez un seul câble à
l’entrée gauche ou à l’entrée droite (L/R LINE IN) du subwoofer.
5.1 SYSTEM
7.1 SYSTEM
ENGLISH
PORTUGEUSE
LINE LEVEL (OPTION 1)
All manuals and user guides at all-guides.com


