background image

32

Polaroid DVG-1080P HD Camcorder User’s Guide

www.polaroid.com

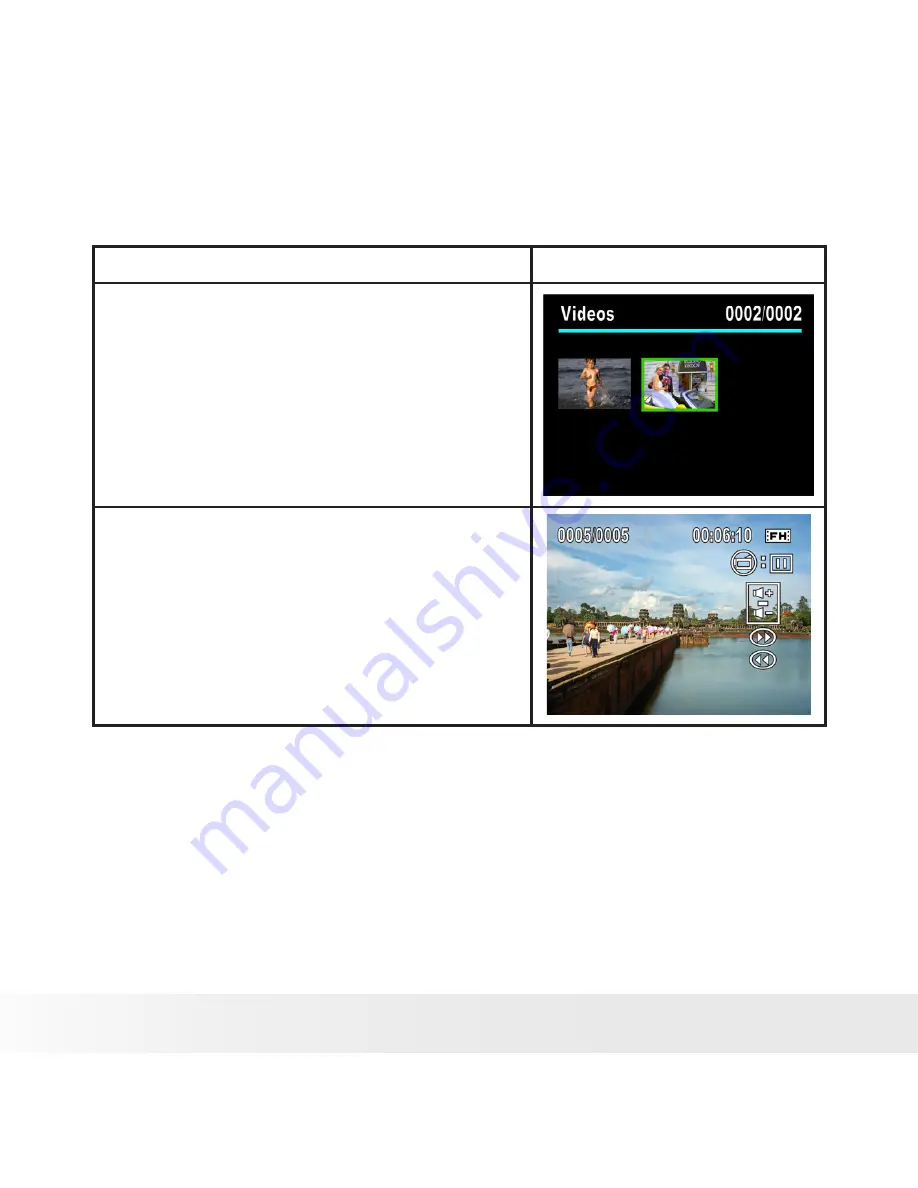
• Movie Playback

Operation

Display Screen

In  the  movie  thumbnail  preview 

1. 

folder,  use  the  direction  buttons  to 

locate the movies you want to view.
Press  the  Menu/OK  button  to  play 

2. 

the movies.

While playing videos, press Right/Left 

3. 

Buttons  to  fast  forward/rewind,  then 

release the button to stop.
Use  Up/Down  Buttons  to  adjust 

4. 

volume.

Summary of Contents for DVG-1080P - High-Definition Digital Video Camera

Page 1: ...ser s Manual Questions Need Some Help This manual should help you understand your new product or visit www polaroid com support If you still have questions call our help line found on the insert with...

Page 2: ...Product Overview 1 Speaker 2 Capture Lens 3 Light 4 Microphone 5 LED 6 Tele Wide Button 7 Picture Shutter Button 8 OK Menu Button 9 Movie Shutter Button 10 Right Button 11 Left Button 12 Record Play B...

Page 3: ...3 Polaroid DVG 1080P HD Camcorder User s Guide www polaroid com 17 LCD Panel 18 Power Button 19 Tripod mount 20 SD card slot...

Page 4: ...d Getting Started 12 Turning the Camera Off 12 2 Record Mode 13 Button Function 13 LCD Display Information 14 Movie Recording 17 Photo Recording 17 Using the Zoom Function 18 Record Menu Option 19 Rec...

Page 5: ...ctures 40 Make a Slide Show 41 4 Setting up your Camera 42 Setting Menu 42 Sound 42 Information 43 Time Setting 43 Format 44 TV 45 Language 46 Default Setting 46 5 Viewing Pictures and Movies on a TV...

Page 6: ...er User s Guide www polaroid com 9 Specifications and System Requirements 60 Specifications 60 System Requirements 62 10 Troubleshooting 63 Troubleshooting 63 11 Getting Help 64 Polaroid Online Servic...

Page 7: ...ls Outstanding features that your DVG 1080P digital video camera has A high quality glass lens system for well exposed sharp pictures from 0 5m to infinity including a 5X optical zoom mode and 4X digi...

Page 8: ...ckage Contents Digital Video Camera USB Cable AV Cable NP60 Battery HDMI Cable Quick Start Guide Quick Start Guide Guide de D marrage rapide Guida Rapida Gu a R pida de Inicio Guia de In cio R pido Sc...

Page 9: ...Battery power is full Battery power is adequate Battery power is low Battery power is exhausted Please recharge the battery Installing and Removing the Battery 1 Open the camera s battery cover by pus...

Page 10: ...m ion battery included with your camera is a high capacity battery Here are some helpful hints to extend battery life considerably by limiting the following activities Reviewing photos on the LCD Scre...

Page 11: ...n in the illustration To remove the SD card press the card 2 inwards to release it When the card pops out gently 3 remove it from the slot Note When a memory card is inserted movies pictures are saved...

Page 12: ...rame turns from white to green then press the Camera Shutter button all the way down to take your picture Focusing Frame White Focusing Frame Green 4 To view stored movies or pictures press the Record...

Page 13: ...Power Button Press and hold down for one second to turn the camera on or off RECORD PLAY Button functions Switch between Record Playback Mode 111 Return to the previous page 222 For a quick review pre...

Page 14: ...14 Polaroid DVG 1080P HD Camcorder User s Guide www polaroid com LCD Display Information The illustration below shows what may be displayed when videos and photos are recorded...

Page 15: ...30fps HD 720p 30fps WVGA 60fps VGA 30fps QVGA 30fps Picture Resolution High Standard Low 2 Number of images that can still be taken at the current resolution Recording time remaining for movies that c...

Page 16: ...ite Balance 9 SD Card inserted 10 Battery full power Battery medium power Battery low power Battery power depleted Pls recharge your battery 11 Zoom meter HD 1080p 1X 10X 5X Optical zoom and 2X Digita...

Page 17: ...le You may change the resolution setting in the Setup menu Video Quality HD 1080p 30fps HD 720p 30fps WVGA 60fps VGA 30fps QVGA 30fps Photo Recording 1 Press the Camera Shutter Button halfway down til...

Page 18: ...Screen In the Effect Mode Submenu press 1 Up Down Button to seclect Macro Use Right Left Buttons to choose 2 Macro or normal Press Menu OK Button to confirm the 3 setting Using the Zoom Function The...

Page 19: ...www polaroid com Record Menu Options Movie Mode Picture Mode Effect Resolution Stabilization Resolution Self timer Light Macro Scene Exposure White Balance Record Mode Functions Operation Display Scr...

Page 20: ...s then press Menu OK Button to validate After validating the settings press Record Play Button to back to Record mode Press Record Play Button to exit to 6 Record Mode without any change Movie Mode Su...

Page 21: ...eft Buttons 2 to move between the five settings Press Menu OK Button to 3 confirm our setting Image Stabilization Operation Display Screen In the Movie Mode submenu 1 press the Down Buttons to enter t...

Page 22: ...t Left Buttons to select 2 the Picture Mode The Picture Mode submenu 3 contains 2 options Resolution and Self timer for you to adjust the camera settings Picture Resolution Operation Display Screen In...

Page 23: ...Picture Mode submenu press 1 the Up Down Button to select Self timer setting Use the Right Left Buttons to choose 2 between On or Off Press the 3 Menu OK Button to confirm your setting Effect Submenu...

Page 24: ...light will be turned on and keeps providing light in the low light environment 2 OFF The light is turned off Operation Display Screen In the Effect Mode press the the UP 1 Down Button to select Light...

Page 25: ...K Button to confirm your setting Scene You can select the mode according to your environment 1 Auto Used for most photo movie scenes 2 Skin Shoot with an effect that makes skin tones more natural 3 Ni...

Page 26: ...e camera on a flat steady surface or use a tripod when taking shots in Night mode Exposure The camera adjusts image exposure automatically In certain circumstances you may wish to adjust the exposure...

Page 27: ...ight outdoor scenes Fluorescent Used for fluorescent lighting conditions Tungsten Used for tungsten lighting conditions Operation Display Screen In the Effect Submenu press the 1 Down buttons to selec...

Page 28: ...to the next movie picture Fast forward Left Button Go to the previous movie picture Fast rewind Menu OK Button Enter to the movie or picture option menu confirm y Tele Up Button Zoom in Volume increas...

Page 29: ...29 Polaroid DVG 1080P HD Camcorder User s Guide www polaroid com LCD Display Information Indicators on the LCD screen while in Playback Mode...

Page 30: ...HD 720p 30fps WVGA 60fps VGA 30fps QVGA 30fps High Standard Low 2 Movie playback time counter 3 Indicates the selected picture is locked 4 Current Number Total number of movie or picture 5 Volume 6 In...

Page 31: ...Press the RECORD PLAY Button 1 to switch from the Record Mode to the Playback Mode Main Menu There are 2 options in the Playback Mode Videos and Photos Press the Direction Button to 2 select the spec...

Page 32: ...Screen In the movie thumbnail preview 1 folder use the direction buttons to locate the movies you want to view Press the Menu OK button to play 2 the movies While playing videos press Right Left 3 But...

Page 33: ...ion Display Screen In the Movie Playback Mode press 1 the Menu OK Button to enter Movie Playback menu screen Use the Up Down Buttons to select 2 one of four options Delete Lock Repeat One and Repeat A...

Page 34: ...RD PLAY Button to exit Before a movie is deleted a confirmation 5 screen will appear choosing Yes will execute the operation and No will cancel the operation Press the Menu OK Button to confirm 6 your...

Page 35: ...movies from being deleted accidentally Operation Display Screen 1 Use the UP Down Buttons to select the Lock option 2 Press the Menu OK Button to go to the Lock menu 3 Use the Right Left Buttons to se...

Page 36: ...function automatically repeats playing a single Video or all videos in order Operation Display Screen Use the Up Down Buttons to select 1 the Repeat One option or Repeat All option Press the Menu OK...

Page 37: ...the direction buttons to locate the picture you want to view Press the Menu OK button to view 2 the picture Use the Right Left Buttons to go to the 3 next or last picture While the picture is being v...

Page 38: ...Mode Menu Operation Display Screen In Picture Playback Mode press 1 Menu OK Button to enter Picture Playback menu screen Use Up Down Buttons to select 2 three options Delete Lock and Slideshow Delete...

Page 39: ...PLAY Button to exit Before a picture is deleted a 5 confirmation screen will appear choosing Yes will execute the operation No will cancel the operation Press Menu OK Button to validate the 6 setting...

Page 40: ...ures from being deleted accidentally Operation Display Screen Use the Up Down Buttons to select the 1 Lock option Press the Menu OK Button to go to the 2 Lock menu Use the Right Left Buttons to select...

Page 41: ...in order Operation Display Screen Use Up Down Buttons to select the 1 Slideshow option Press Menu OK Button to start the 2 slide show press it again to stop and return to the previous page Need help...

Page 42: ...ect 2 Setting This Setting Submenu contains 3 7 options for configuring your Camera s set up They are Sound operation sound Information Time Setting Format TV Language and Default Setting Sound Enable...

Page 43: ...ws the indicator s on the LCD display Off Do not show the indicator s on the LCD display In the setting submenu press the 1 Down Button select Information Use the Right Left Buttons to choose 2 betwee...

Page 44: ...K Button to confirm 3 your setting Pressing the RECORD PLAY button leaves the Time Setting without any changes Format Yes Formats either the internal memory or SD card if inserted No Do not format the...

Page 45: ...nfirm your setting NOTE All the data will be erased when the SD card is formatted Make sure all the data are backed up to PC before formatting SD card TV Ensures that the appropriate TV standard in yo...

Page 46: ...0Hz Press the Menu OK Button to confirm 3 your setting Language Use this option to select the language you want Operation Display Screen In the setting Submenu press the 1 Down Button to go to the Lan...

Page 47: ...he 2 Default Setting confirmation screen Use the Right Left Buttons to choose 3 between Yes or No Choosing Yes will execute the 4 operation No will cancel the operation Press the Menu OK Button to con...

Page 48: ...Mode Normal Scene Auto Exposure 0EV WB White Balance Auto Sound On Information On TV Depends where sold Language Depends where sold Volume Level 12 Need help with your digital camera Call our toll fre...

Page 49: ...ored pictures and movie on a TV are exactly 4 the same as for viewing them on the LCD monitor Note The camera will not capture a movie recording or take pictures when it is connected to an HDTV The LC...

Page 50: ...r s Guide www polaroid com Note The LCD Panel will not turn on when the camera is connected to a TV Need help with your digital camera Call our toll free customer service number Look for the insert wi...

Page 51: ...d to view the User s Manual Many computer users will find they already have this software installed on their computer To install the bundled software Insert the CD ROM into your computer s CD ROM driv...

Page 52: ...ng movies and picture s can be 2 found on your computer at My Computer Removable Disk DCIM 100MEDIA In this folder you can view delete move or copy any movie pic 3 ture you want Use the bundled ArcSof...

Page 53: ...mpression features burning the movie clip into DVD You can share this DVD movie with family and friends by using regular DVD player To create a DVD Install ArcSoft MediaImpression Refer to Section 7 1...

Page 54: ...HD Camcorder User s Guide www polaroid com The operation screen will appear 5 Select the folder that contains the video files you want to burn Select the file s Click button to add the files into sli...

Page 55: ...0P HD Camcorder User s Guide www polaroid com Click Start to start DVD burning 6 Need help with your digital camera Call our toll free customer service number Look for the insert with this icon Or vis...

Page 56: ...are allows you to effortlessly upload videos to YouTube enabling you to share them with your friends and family around the world To upload video files to YouTube 1 Install the ArcSoft MediaImpression...

Page 57: ...User s Guide www polaroid com 5 Select the video file you want to upload and click Upload to YouTube option at the bottom menu 6 If this is your first time using this function please follow the instru...

Page 58: ...om 7 Using the web browser on you PC Go to http www youtube com login then Log onto your YouTube account If you do not have a YouTube account You will need to create an account first 8 After you log o...

Page 59: ...59 Polaroid DVG 1080P HD Camcorder User s Guide www polaroid com Click Allow Button shown on YouTube website 9 Click Save Button to upload the video...

Page 60: ...Lens f 6 8 34mm F3 5 3 7 Focus range Macro 1 cm 80cm Normal 10cm infinite Zoom HD 1080p 1X 10X 5X Optical 2X Digital Other video resolution 1X 20X 5X Optical 4X Digital Shutter Electronic LCD monitor...

Page 61: ...240 30fps White balance Auto Manual Daylight Fluorescent Tungsten Exposure 1EV 1EV Self timer 10 seconds delay Light Digital light On Light On Off File format Picture JPG Movie AVI Image play Single I...

Page 62: ...it Color Display Note The LCD screen is manufactured using extremely high precision technology However some tiny black and or bright dots white red blue or green may appear on the LCD screen These dot...

Page 63: ...s condition is to format SD card by using this camera instead of PC Please refer to the detailed Format instruction in Section 3 Why do some of my indoor pictures look blurry and dark 444 The camera a...

Page 64: ...entre Ireland Hangzhou Tel 353 0 61 702087 Tel 86 571 88210575 Fax 353 0 61 702001 E mail support arcsoft com cn E mail eurosupport arcsoft com Web http www arcsoft com cn new support For Japan For Ta...

Page 65: ......

Page 66: ...66 Polaroid DVG 1080P HD Camcorder User s Guide www polaroid com Part No UMDVG1080PUS001...

Reviews: