Polaroid DHX-202 User Manual Download Page 6

Disc handling precautions

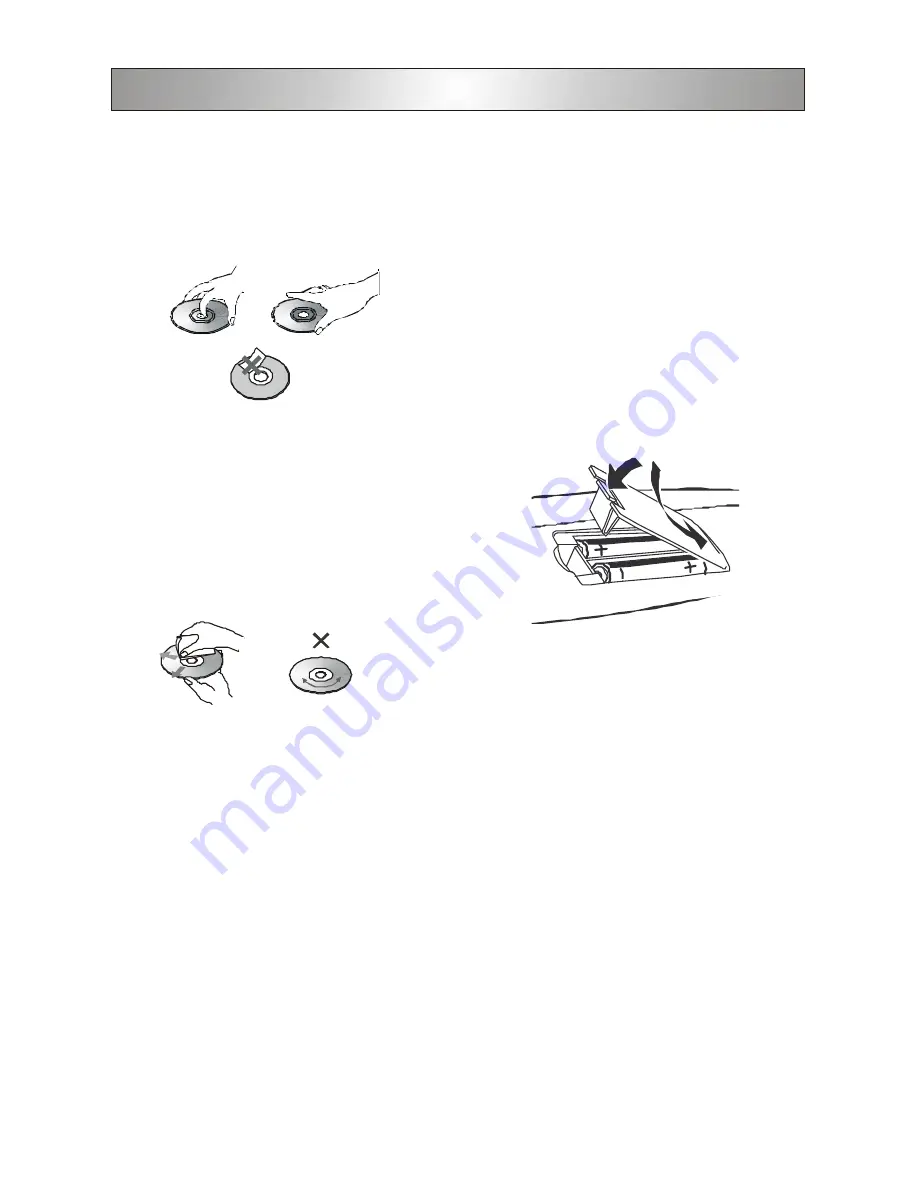
To keep the disc clean, handle the disc by its edge. Do not touch

the surface.

Do not stick paper or tape on the disc.

If there is glue (or a similar substance) on the disc, remove the glue

completely before using the disc.

Do not expose the disc to direct sunlight or heat sources such as

hot air ducts, or leave it in a car parked in direct sunlight as a

considerable rise in temperature will adversely affect the disc.

After playing, store the disc in its case.

Do not write on the label side with a ball-point pen or other writing

implements.

Be careful not to drop, bend, or crack the disc.

Disc cleaning precautions

Before playing, clean the disc with a cleaning cloth. Wipe the disc

from the center outward.

Do not use solvents such as benzine, thinner, commercially avail-

able cleaners or antistatic spray intended for vinyl LPs.

Disc playing precautions

Do not place more than one disc in the disc tray at a time.

Do not place the disc wrong side up in the tray.

Do not try to close the disc tray when the disc is not placed

properly in the tray.

Accessories

Check that you have the following items:

 Remote Control x1

 Owner’

s Manual x1

     Warranty Card x1

Installing batteries in the remote control

1. Open the battery cover on the back of the remote.

2. Insert two AAA batteries, making sure that the polarities (+ and -)

    are aligned correctly.

3. Replace the battery cover.

You can control the system using the supplied remote. When using

the remote, point it at the remote sensor on the front panel of this

system.

6

General Information(continued)

Note:


•  

  Do not leave the remote in an extremely hot or humid place.

 •  

  Do not use a new battery with an old one, always replace the

       batteries at the same time using fresh, new batteries.

 •  

  Do not drop any foreign objects into the remote casing,

      particularly when replacing the batteries.

 •  

  Do not expose the remote sensor to direct sunlight or lighting

      apparatuses, doing so may cause the remote to malfunction.

•  

  If you do not use the remote for an extended period of time,

      remove the batteries to avoid any possible damage from battery

      leakage and erosion.

Notes on disc

If remote doesn’

t operate properly:

     Check the polarity (+,-) of the batteries (Dry-Cell).

     Check if the batteries are drained.

     Check if remote sensor is blocked by obstacles.

     Check if there is any fluorescent lighting nearby.


Summary of Contents for DHX-202

Page 1: ...Progressive Scan DVD Player DHX 202 20051104...

Page 2: ...eriods of time 14 Refer all servicing to qualified service personnel Servicing is required when the apparatus has been damaged in any way such as power supply cord or plug is damaged liquid has been s...

Page 3: ...vironment to a warm one If moisture forms inside this unit it may not operate properly If this happens remove power and place the unit at a well ventilated area and let the moisture to evaporate befor...

Page 4: ...Connections Basic Setup Setup menu 10 System setup 10 11 Language setup 11 12 Audio setup 12 Video setup 13 Playing Discs General operation 14 Basic playback 14 Playing MP3 JPEG picture discs 14 Using...

Page 5: ...ecorded Conventions about this manual Instructions in this manual describe the controls on the system You can also use the controls on the remote control if they have the same or similar names as thos...

Page 6: ...tray Accessories Check that you have the following items Remote Control x1 Owner s Manual x1 Warranty Card x1 Installing batteries in the remote control 1 Open the battery cover on the back of the re...

Page 7: ...to skip to the next track only during playback 6 PLAY PAUSE Button Press to start or pause disc playback 1 COMPONENT VIDEO OUT Pr Cr Pb Cb Y Jacks Connect to the Pr Pb Y input of TV 2 COAXIAL OUT Jack...

Page 8: ...e audio channels of a DVD 12 PLAY Press to start the playback 13 STOP Press to stop the playback 14 OPEN CLOSE Press to open or close the disc tray 15 MUTE Press to turn off the sound immediately and...

Page 9: ...responding AUDIOIN jacks on your TV CD or TAPE recorder Use the coaxial cables to connect the COAXIAL jack to correspond to receive a digital signal Use the component cables to connect the COMPONENT j...

Page 10: ...the whole TV screen with a portion automatically cut off 4 3 LB If you have a conventional TV set and your DVD is formatted for widescreen viewing use this setting Wide bands will be displayed on the...

Page 11: ...ER DEFAULT EXIT SETUP TO SET PRESS THEN OK TO QUIT PRESS SETUP RESTORE ENGLISH JAPANESE FRENCH SPANISH PORTUGUESE GERMAN The default setting is ENGLISH AUDIO LANG MENU LANG This function allows you to...

Page 12: ...hannel stereo output for stereo listening through the analog left and right outputs VSS 2 channel virtual surround outputs Note Depending on the disc the actual outputs may not match your selection AU...

Page 13: ...support this function then it will appear as follows VIDEO SETUP BRIGHTNESS CONTRAST HUE SATURATION VIDEO OUT EXIT SETUP 12 10 8 6 4 2 0 TO SET PRESS TO QUIT PRESS SETUP THEN OK VIDEO SETUP BRIGHTNESS...

Page 14: ...verse or fast forward For DVD MP3 CD discs FF fast forward FF x2 FF x4 FF x8 FF x20 FR fast reverse FR x2 FR x4 FR x8 FR x20 2 To resume normal play press PLAY Press SLOW to play the currently playing...

Page 15: ...of the menu vary from disc to disc 2 Use the buttons to select the title or chapter you want to play Depending on the disc you can use the number buttons 0 10 9 10 to select the title or chapter 3 Pre...

Page 16: ...uttons 0 10 9 10 to input the track numbers in the order you want 3 Repeat step 2 to store other tracks 4 To start program play press PLAY 5 To stop playback press once 6 To cancel the program press C...

Page 17: ...below ZOOM 2 ZOOM 3 ZOOM 4 ZOOM 1 2 ZOOM OFF 2 To pan though the enlarged image press buttons to move the zoomed picture left right up or down Selecting subtitle language This function can only be us...

Page 18: ...change the aspect ratio There is no sound or only a very low level sound is heard The system is in pause mode in slow motion play mode or fast forward or fast reverse is performed Press to return to...

Page 19: ...onse DVD PCM 20 Hz 22 kHz 1 0 dB CD 20 Hz 20 kHz 1 0dB S N ratio 80dB Dynamic range DVD PCM 85dB CD 85dB Audio L R 2V 1K Hz 0dB Distortion 0 1 General Power supply 120V 60Hz Power consumption 15W 19 S...

Reviews: