background image

5

12

BLUETOOTH

GETTING STARTED

PLAYING CONTENT

The overhead unit can accept audio from devices with Bluetooth.

To listen to input from a Bluetooth device:

Press the Input source key [                ] until the Bluetooth input source sceen is displayed.

Continuing to press the key will display the input source screens for AM, FM and AUX as 
described in the section “Input Source Screens.”

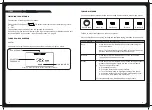
BLUETOOTH SOURCE SCREEN

The input source screen displayed when you select Bluetooth input is shown in the figure 

below.

BT

DISCONNECTED

Example of Bluetooth source screen.

The source screen will show disconnected until a device is paired.

To pair a device:
• 

Make sure source screen says disconnected.

• 

Search for “MTX AUDIO” on your Bluetooth enabled device.

• 

Once you have connected the source screen will say connected and you will also 
hear a connection beep.

CONTROLLING BLUETOOTH PLAYBACK

You can control your device from the overhead unit using the Back, Forward and Play/
Pause keys as shown on page 2.

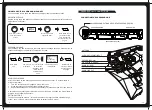
POWERING THE UNIT ON OR OFF

When you power on the overhead unit it will automatically start playing music from 
the most recently selected input source.

TO POWER THE UNIT ON OR OFF

POWER

• 

Momentarily press the Power key on the unit.  As the unit starts 
up, a splash screen is displayed for several seconds, followed by 
the input source screen for the current input source.

• 

When the unit is on, momentarily press the Power key to power 
off the unit.

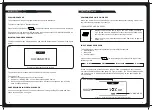
INPUT SOURCE SCREENS

The overhead unit supports inputs from several different sources:
• 

AM/FM radio

• 

Bluetooth

• 

Auxiliary Input

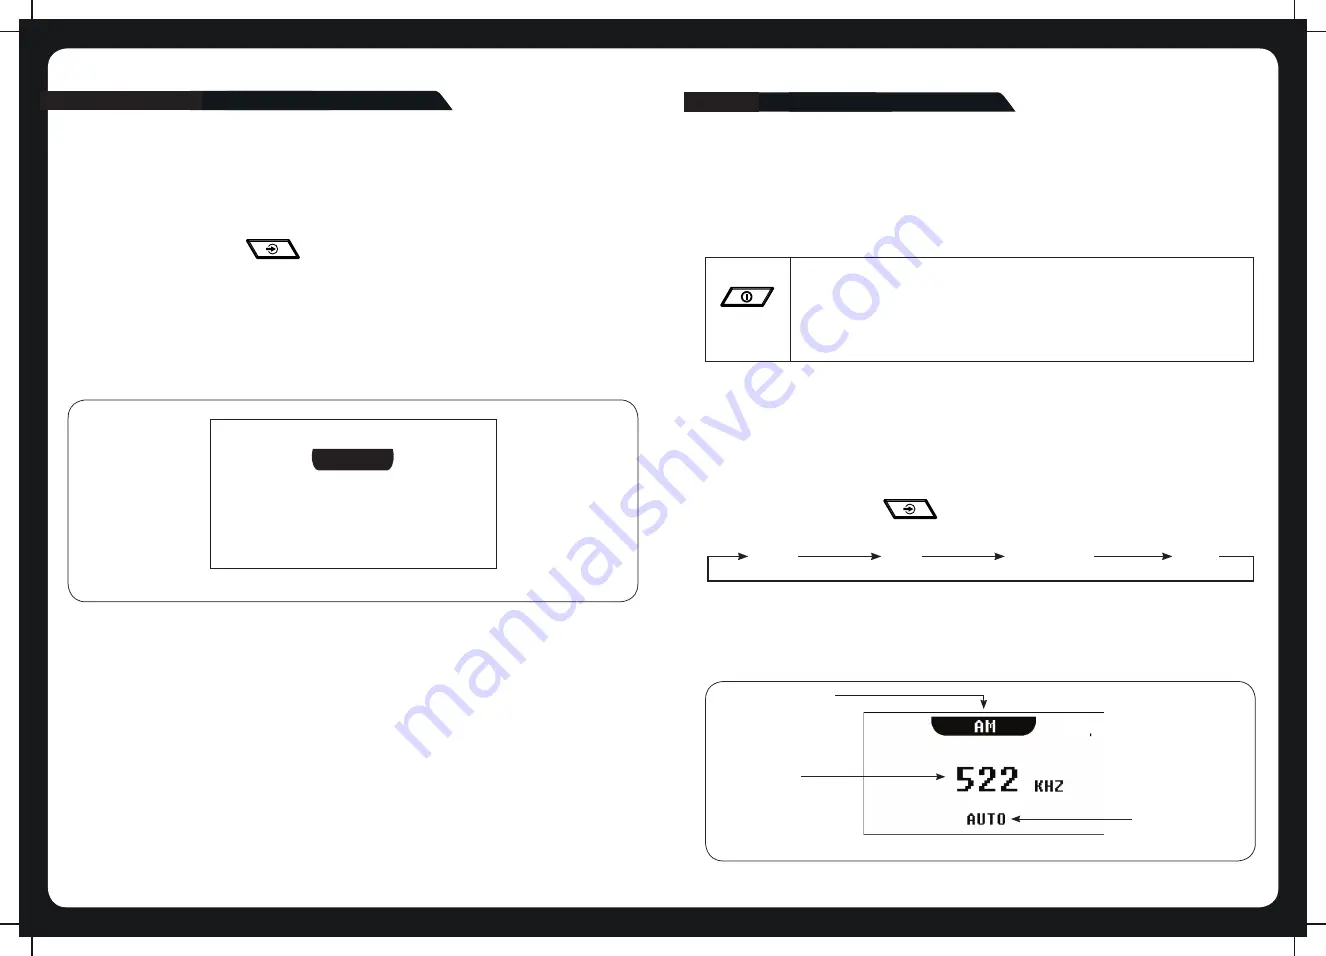
Press the Input source key [                ] to step through the input source types in the 
following order:

AM

FM

Bluetooth

Aux

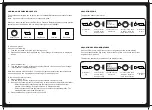
When you select one of these sources, the overhead unit displays a source screen, 
similar to the AM source screen shown in Figure 1 below.  The title bar always shows 
the source name.  Additional information varies depending on the source type you 
have selected.

SOURCE NAME

SELECTED
FREQUENCY

TUNING MODE

Figure 1 - Example source screen (AM input selected)

Summary of Contents for MTX Audio 2635986

Page 1: ...OVERHEAD AUDIO UNIT Model 2881115 Accessory Model 2635986 OEM 21A10201 ...

Page 2: ...in a residential installation This equipment generates uses and can radiate radio frequency energy and if not installed and used in accordance with the instructions may cause harmful interference to radio communications However there is no guarantee that interference will not occur in a particular installation If this equipment does cause harmful interference to radio or television reception which...

Page 3: ...Muting Output AdjustingTone Adjusting Screen Brightness TUNER Listening to theTuner Tuner Source Screens Tuning Methods Adding and Removing Presets AUXILIARY INPUT Listening to Auxiliary Input Auxiliary Source Screen BLUETOOTH Playing Content Bluetooth Source Screen Controlling Bluetooth Playback OVERHEAD UNIT CONNECTIONS Connecting the Overhead Unit APPENDICES Troubleshooting 2 2 2 3 3 3 4 5 5 5 ...

Page 4: ...USER INTERFACE AND CONTROLS CONTROL PANEL LAYOUT KEY NAMES Key Name Key Name POWER MUTE SOURCE MENU BACKWARD PLAY PAUSE FORWARD ROTARY KNOB 2 NOTES ...

Page 5: ...ey to open a menu In an open menu you can use the Menu key at any time to save changes and exit Press the Menu key to exit from the current menu level Press and hold the Menu key to exit from the menu completely Time out feature after a few seconds of inactivity the menu exits and any changes are saved automatically 3 14 APPENDICES TROUBLESHOOTING Resetting the unit Should the overhead unit become...

Page 6: ...D BRIGHTNESS The Settings menu is displayed Press Menu to exit See Menu Key Operation on page 5 MULTI LEVEL MENUS All of the menus on the overhead unit have more than one level To access items in multi level menus Turn the rotary knob to highlight a menu item then Press the rotary knob to select the highlighted item Repeat these steps as many times as necessary to reach the menu item you require I...

Page 7: ...head unit using the Back Forward and Play Pause keys as shown on page 2 POWERINGTHE UNIT ON OR OFF When you power on the overhead unit it will automatically start playing music from the most recently selected input source TO POWERTHE UNIT ON OR OFF POWER Momentarily press the Power key on the unit As the unit starts up a splash screen is displayed for several seconds followed by the input source s...

Page 8: ...output The volume continues at the previously set level AUXILIARY INPUT LISTENINGTO AUXILIARY INPUT The overhead unit can accept audio from devices with an audio output To listen to input from an auxiliary device Press the Input source key until the AUX input source screen is displayed Continuing to press the key will display the input source screens for AM FM and Bluetooth as described in the sec...

Page 9: ...esets Remove preset 3 Do one of the following there is no warning or confirmation prompt before deletion Select Remove all presets and press the rotary knob to remove all current presets The message Presets removed is displayed briefly Select a preset and press the rotary knob to remove the selected preset The selected preset is removed from the list 4 Press the Menu key or leave to time out to ex...

Page 10: ...e Forward Backward To tune to a required frequency channel or preset Press the Play Pause key to step through the available tuning methods for each band Tuning Method When tuning with this method Auto Manual Preset Press the Forward or Backward key to start searching for available stations Note The search stops when a station is found or when the unit has scanned all available frequencies once Pre...

Reviews: