background image

5

INTRODUCTION

Preservation of the Environment

POLARIS is committed to supporting an environmental education cam-
paign. We encourage governments to adopt rigorous safety training pro-
grams that encourage protection of our environment, including wildlife 
and vegetation.

Snowmobile clubs and other organizations are working together to pro-
tect our environment.  Please support their efforts and operate your 
snowmobile with consideration for the protection and preservation of 
our environment.

Noise Level

One of the most publicized issues about snowmobiles is noise.  The 
Society of Automotive Engineers (SAE), the standard-setting body for 
snowmobile development, recommends that snowmobiles conform to 
prescribed sound levels.

POLARIS snowmobiles are engineered to conform to these SAE stan-
dards. Our muffler systems are designed to reduce noise levels and must 
not be altered or removed. The sound of your snowmobile may not be 
welcome to non-snowmobilers, so you have a responsibility to operate 
your snowmobile with concern for others. We do our part by manufac-
turing quieter machines; we ask your help to further reduce the impact 
of noise by operating your snowmobile safely and responsibly.

Air Pollution

POLARIS engineers continuously investigate ways to reduce emission 
levels of two-stroke engines. We expect our efforts to lead to the reduc-
tion of potential air pollution.

In addition to our technological research, we encourage government 
agencies, manufacturers, distributors, dealers, ecologists, and other 
interested parties to work together to develop data on environmental 
topics.

Summary of Contents for 550 IQ 136 2013

Page 1: ...Snowmobile Owner s Manual for Maintenance and Safety 550 IQ Shift 550 IQ 136 550 IQ LXT...

Page 2: ...ns in this manual and on all product labels Failure to follow the safety precautions could result in serious injury or death WARNING The engine exhaust from this product contains chemicals known to th...

Page 3: ...The text is printed on 100 recycled with 40 post consumer waste PCW...

Page 4: ...For your nearest Polaris dealer call 1 800 POLARIS or visit www polarisindustries com Polaris Sales Inc 2100 Hwy 55 Medina MN 55340 Phone 1 888 704 5290 Part No 9923893 Rev 01 Printed in USA 9923893...

Page 5: ...l vehicles manufactured in the world today Many years of experience have gone into the engineering design and development of your POLARIS vehicle making it the finest machine we ve ever pro duced For...

Page 6: ...the information presented in this publi cation Depictions and or procedures in this publication are intended for reference use only No liability can be accepted for omissions or inaccuracies Any repri...

Page 7: ...nowmobile s controls and features The Perfect Fit 28 This section explains how to tailor the suspension and other features for an optimum riding experience Pre Ride Inspections 40 This section explain...

Page 8: ...______________________________ Key Number ___________________________________________________________ Important Notes for Owners and Drivers After reading this manual store it in the snowmobile for co...

Page 9: ...rm to prescribed sound levels POLARIS snowmobiles are engineered to conform to these SAE stan dards Our muffler systems are designed to reduce noise levels and must not be altered or removed The sound...

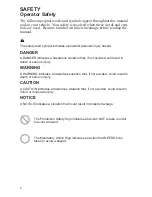
Page 10: ...ous situation that if not avoided will result in death or serious injury WARNING A WARNING indicates a hazardous situation that if not avoided could result in death or serious injury CAUTION A CAUTION...

Page 11: ...in excellent operating condition at all times Always check major and vital safety components before every ride All POLARIS snowmobiles are designed and tested to provide safe operation when used as d...

Page 12: ...n off the igni tion raise the hood make the adjustment secure shields and guards secure the hood and then restart the engine to check its operation WARNING Serious injury can occur if fingers or cloth...

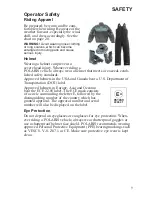
Page 13: ...A and Canada bear a U S Department of Transportation DOT label Approved helmets in Europe Asia and Oceania bear the ECE 22 05 label The ECE mark consists of a circle surrounding the letter E followed...

Page 14: ...two way radio or cel lular telephone For added protection carry the following items on your snowmobile at all times Disabled Operators Safe operation of this rider active vehicle requires good judgem...

Page 15: ...ng with a passenger it s the driver s responsibility to operate the snowmobile safely Slow down Control becomes more difficult with two people on board More space is required to make turns and longer...

Page 16: ...ew Always leave yourself a way out Variances in snow depth and or water currents may result in uneven ice thickness Always check with local residents or authorities for general information on conditio...

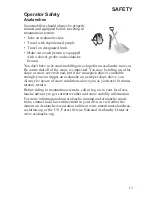
Page 17: ...lope or snow covered road but if the snowpack above is unstable enough you can trigger an avalanche on a steeper slope above you Always be aware of snow conditions above you as you travel in moun tain...

Page 18: ...erfering with full left and right steering If difficulty is encountered remove ice and snow build up that may be obstructing the steering linkage Driving on Slippery Surfaces WARNING Never attempt an...

Page 19: ...to help slow the machine and keep it from rolling freely downhill WARNING When driving on long downhill stretches pump the brakes Riding the brakes may cause the brake system to overheat which may res...

Page 20: ...balance and avoid possible roll over Slow down when reaching the crest of a hill Be prepared to react to obstacles sharp drops or other people or vehicles that may be on the other side of the hill If...

Page 21: ...ing and create an unstable condition Cold Weather Drive Away Whenever your snowmobile has been parked for a length of time espe cially overnight always make sure the skis and track are loosened from i...

Page 22: ...ive wear and damage to the slide rail track and or engine If the machine becomes stuck in snow clear the running board area of snow then step down the snow in front of the machine so that when the thr...

Page 23: ...s yours make sure they take a snowmobile safety course Everyone can benefit from the course Don t jump your snowmobile over large drifts or similar terrain Jumping may injure your back because of spin...

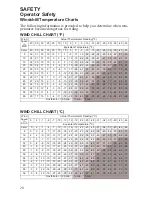
Page 24: ...93 50 26 19 12 4 3 10 17 24 31 38 45 52 60 67 74 81 88 95 55 25 18 11 4 3 11 18 25 32 39 46 54 61 68 75 82 89 97 60 25 17 10 3 4 11 19 26 33 40 48 55 62 69 76 84 91 98 Frostbite in 30 min 10 min 5 min...

Page 25: ...als on the snowmobile If any decal becomes illegible or comes off contact your POLARIS dealer to purchase a replacement Replacement safety decals are pro vided by POLARIS at no charge The part number...

Page 26: ...y result in severe injury or death No Passenger Warning Snowmobiles designed for single rider use have a warning decal on the lower right console WARNING This vehicle is designed for operator only NO...

Page 27: ...ehind before and while backing up Avoid sharp turns Shift to or from reverse only when stopped Apply throttle slowly NOTE For more information see Owner s Manual If electric reverse Machine stopped an...

Page 28: ...d adequate clothing while operating this vehicle This vehicle is designed for adult use only Check local laws for age requirements When operating with a passenger on approved models only reduce speed...

Page 29: ...ompartment if equipped 10 Suspension 11 Track 12 Skis 13 Nosepan 14 Front Bumper do not use for pulling or dragging the snowmobile 15 Passenger Grab Handle LXT 16 Passenger Seat LXT 17 Passenger Backr...

Page 30: ...Headlight Adjuster 5 Speedometer 6 Engine Stop Switch 7 Choke Lever 8 Ignition Switch 9 Brake Lever 10 Parking Brake 11 Handlebar Grip Warmer Switch 12 Thumbwarmer Switch 13 Electronic Reverse Button...

Page 31: ...w a passenger to sit on the cargo area Adjustable Headlights Adjust the headlight beam by moving the adjuster to the left or right Passenger Grab Handle If equipped the passenger grab handles can be a...

Page 32: ...conditions We recommend starting with factory settings and then customizing each adjustment individually to suit rider preference The machine should be methodically tested one change at a time under t...

Page 33: ...one inch of pre load beyond the factory settings and ensure that both sides are adjusted the same When decreasing preload make sure at least two turns of preload are hold ing the spring between the r...

Page 34: ...nts involve a compromise or trade off For example a suspension set up for snowcross racing would provide a very stiff ride on the trail A suspension set up for trail riding would bottom out harshly on...

Page 35: ...n ice or hard packed snow adding a set of bogie wheels to the rail may enhance the machine s performance Bogie wheel kits are available from your dealer POLARIS offers track kits for improved flotatio...

Page 36: ...h the rider seated measure the dis tance between the ground and the rear bumper at the exact location used for measurement X This is measurement Y To determine sag commonly referred to as ride in subt...

Page 37: ...rmer ride is desired See your dealer for more information Limiter Strap Position Ski Pressure Ski pressure is set at the factory to deliver the optimum balance between ride and handling If a rider pre...

Page 38: ...pension coupling Front To Rear Coupling and the Front Rear Scissor Stop FRSS The front rear scissor stop FRSS couples the movement of the front torque arm with the rear torque arm and limits the amoun...

Page 39: ...e arm Adjusting the RRSS either allows more weight to transfer to the rear for more traction or allows less weight to transfer to the rear resulting in improved cornering performance An adjustment dot...

Page 40: ...r most trail riding conditions To decrease weight transfer under acceleration for improved corner ing rotate the RRSS to a higher position To increase weight transfer or ski lift during acceleration r...

Page 41: ...Inspect skags frequently Worn skags may reduce steering and braking control on hard packed snow and ice Replace worn skags to maintain proper balance and vehicle control WARNING Loss of control can re...

Page 42: ...hicle when the handle bars are turned fully to the left or right Handlebar Position Follow these steps to adjust handlebar position 1 Remove the handlebar cover 2 Loosen the four upper and four lower...

Page 43: ...ffers a wide range of accessories for your snowmobile to help make each ride more enjoyable Use only POLARIS parts and accessories on your POLARIS snowmo bile Use of unapproved parts and accessories m...

Page 44: ...Cooling System Seal 73 Parking Brake Lock Brake Lever Brake System 42 43 77 Auxiliary Shut Off Switch Engine Stop Switch 46 Ignition Switch 46 Taillight Brakelight Headlight 46 Suspension Mounting Bo...

Page 45: ...experience Throttle Lever The throttle and brake are the primary controls of your snowmobile Always make sure both are functioning properly Squeeze the throttle lever to make sure it compresses evenly...

Page 46: ...es low brake fluid level or air in the hydraulic system Refer to the brake bleeding infor mation on page 79 or see your dealer for service Lever Feel If the brake lever feels spongy when squeezed chec...

Page 47: ...into place Do not force the lock or it may break The brake light will illuminate if the parking brake lever lock is set while the engine is running It will also illuminate when the service brake is i...

Page 48: ...h could cause loss of control resulting in serious injury or death Always inspect the track for damage before using the vehicle Use of traction products such as studs increases the possibility of trac...

Page 49: ...ve wear is found see your POLARIS dealer for replacement Pre Ride Suspension Inspection Loose nuts and bolts can reduce your snowmobile s reliability and cause needless repairs and down time Before be...

Page 50: ...engine Pull it up to allow restarting Ignition Switch Make sure the engine stops when the ignition switch is turned to OFF Tether Switch if equipped If your machine has a tether switch remove the teth...

Page 51: ...not operate the electric starter or pull rope starter while the engine is running NOTICE Don t pull the starter rope to the fully extended position and don t allow it to snap back into the housing Da...

Page 52: ...ine parts Do not operate at full throttle or high speeds for extended periods during the first three hours of use Vary the throttle openings and machine speeds to reduce friction on all close fitting...

Page 53: ...for the part numbers of POLARIS products Never mix brands of oil Serious chemical reactions can cause injection system blockage resulting in serious engine damage Oils may also be incompatible and th...

Page 54: ...iate stand to securely support the rear of the snow mobile at the rear bumper The track should be about 4 10 cm off the ground 2 Start the engine and allow it to warm up two to three minutes 3 Depress...

Page 55: ...ng is performed or where gasoline is stored If gasoline spills on your skin or clothing immediately wash it off with soap and water and change clothing Never start the engine or let it run in an enclo...

Page 56: ...uel POLARIS recommends the regular use of isopropyl based fuel system deicer Add one to two ounces per gallon 8 16 ml per liter of gasoline to prevent engine damage resulting from fuel system icing an...

Page 57: ...the proper oil level will prevent system aeration and possi ble loss of pumping action which could result in engine damage This is especially important when the machine is operated in mountainous ter...

Page 58: ...too much air too little fuel may result in piston burning bearing failure or complete engine failure A rich mixture too much fuel too little air may foul plugs and cause generally poor engine performa...

Page 59: ...lled in produc tion is not correct for all altitudes and or temperatures See page 74 for more information NOTICE A main jet that s too small will cause a lean operating condition and may cause serious...

Page 60: ...safety switch can result in serious injury or death in the event of an accident If the throttle safety switch does not shut off the engine during a carburetor throttle system malfunction immediately p...

Page 61: ...throttle lever operates properly turn the ignition switch on and go through normal starting procedures 5 If the engine doesn t start take the snowmobile to an authorized POLARIS dealer for service Exc...

Page 62: ...er 45 sec onds in reverse This feature protects the engine from overheating and will reset when it is shifted into forward or when the engine is stopped and restarted WARNING Improper reverse operatio...

Page 63: ...started Disengaging Reverse 1 Stop the snowmobile and leave the engine idling 2 Push the yellow reverse button for one second and release The engine will slow and and begin to rotate forward The light...

Page 64: ...used If passengers are to be towed on a toboggan or sled make sure the pole is at least four feet 1 2 meters long to prevent any possibility of contact between the snowmobile s track and a person ridi...

Page 65: ...a minimum octane level of 87 R M 2 If your snowmobile is equipped with a check engine light and it comes on you must take your snowmobile to a qualified dealer for diagnostic service Specifications an...

Page 66: ...rvals All necessary replacement parts and labor incurred with the exception of authorized warranty repairs become the responsibility of the regis tered owner If during the course of the warranty perio...

Page 67: ...C Clean R Replace L Lubricate Item See Page Frequency 150 mi 240 km 500 mi 800 km 1000 mi 1600 km 2000 mi 3200 km Pre Season CLUTCH Clutch Alignment Offset without belt 82 I I I Drive Belt Condition 8...

Page 68: ...AGEMENT Pilot Air Screws I I I Carburetor synchronize 74 I I I Idle RPM I I I Throttle Lever 57 I I I I I Oil Pump Lever synchronize I I I Throttle Cable 67 L L L Choke Cable 67 L L L Choke 67 I I I V...

Page 69: ...nsion Shock Oil I I I I Cooling System 73 I I I I Drive Shaft Bearing 67 L L L I Jackshaft Bearings 96 L L L I Skags Wear Bars 93 I I I I I Ski Saddle Spindle Bolts I I I I I Steering Arm s I Drive Ch...

Page 70: ...ined in the Periodic Maintenance Table beginning on page 62 and before seasonal storage When operating in heavy wet snow conditions lubricate every 500 miles 800 km Lack of lubrication will adversely...

Page 71: ...than four pumps Throttle Cable Lubricate the throttle cable lightly with grease or oil With the engine off turn the handlebars to the left and lubricate liberally as shown Choke and Choke Cable Lubric...

Page 72: ...sight glass 2 Change the chaincase oil after the first 500 miles 800 km then every 1000 miles 1600 km or seasonally POLARIS recommends the use of POLARIS Synthetic Chaincase Lube See page 102 for the...

Page 73: ...from the plug 4 Install a new sealing washer on the drain plug Tip The sealing surfaces on the drain plug and the oil tank should be clean and free of burrs nicks or scratches 5 Reinstall the drain p...

Page 74: ...the assembly process Avoid prolonged idle speeds which cause plug fouling and carbonization Use recommended spark plugs with the proper gap Use only resistor type spark plugs Torque spark plugs to 18...

Page 75: ...rburetor throttle body adjustments Wet Fouled Plug The wet fouled insulator tip is black A damp oil film covers the firing end There may be a carbon layer over the entire nose Generally the electrodes...

Page 76: ...omy or carburetor mal function Always reinstall the intake filters before operating the snowmobile Oil Lines Inspect oil line condition every 1000 miles 1600 km Oil Filter The oil filter is located at...

Page 77: ...kinked replace it promptly Cooling System Inspect the fan intake and outlet edge seal at the input and output for cracks loosening of duct and blockage or obstructions Make any neces sary repairs pro...

Page 78: ...engine damage Have your POLARIS dealer perform all carburetor adjustments to ensure all adjustments are done correctly Carburetor Adjustments The frequency at which the carburetors are synchronized or...

Page 79: ...r Always work in a well ventilated area away from anything that may cause the fuel to ignite such as open flames sparks heaters trouble lights cigarettes etc Review the fuel warnings on page 51 Cleani...

Page 80: ...move all chain slack to the tensioner side Lock the brake lever lock or have an assistant hold the brake lever firmly 2 Loosen the adjuster bolt jam nut 1 3 Finger tighten the adjuster bolt 2 until it...

Page 81: ...ath Properly functioning brakes are vital to your safety Be sure the brake pads do not drag on the disc and that brake lever travel is not excessive Always replace brake pads when the brake pad materi...

Page 82: ...a plastic sight glass in the brake reservoir If the fluid is sufficient the sight glass will be black If the sight glass is any color other than black add brake fluid Keep the master cylinder cover f...

Page 83: ...2 Fill the master cylinder reservoir to between the MIN and MAX marks or 1 4 5 16 inch 6 8 cm below the lip of the reservoir opening Reinstall the gasket and cover 3 Slip a rubber tube over the ball o...

Page 84: ...from the housing 4 With the wire harness 2 attached to the bulb 3 with draw the bulb from the housing 5 Grasp the bulb by its metal base and carefully separate the bulb from the harness Headlight Bulb...

Page 85: ...lacement 1 Remove the screws securing the taillight lens Remove the lens 2 Push the bulb inward and turn it counter clockwise to remove it 3 Install a new bulb Push the bulb inward and turn it clockwi...

Page 86: ...epairs have been made All clutch maintenance and repairs must be performed by an autho rized POLARIS dealer Any unauthorized modifications to clutches such as adding or removing weights will void the...

Page 87: ...Reinstall it before starting the snowmobile Drive Belt Removal NOTICE Do not attempt to remove the drive belt after operating in reverse The snowmobile must be stopped after forward motion to prevent...

Page 88: ...ead them If required separate the sheaves as outlined in the belt removal procedures 2 Rotate the L wrench counter clockwise to tighten the sheaves while working the belt to the outer edge of the shea...

Page 89: ...tch see page 83 Turn the wrench clockwise slightly to remove pressure from the sheaves 2 Loosen the 7 16 inch jam nut 3 Using a 1 8 inch Allen wrench turn the set screw inward clock wise to increase t...

Page 90: ...eath Never operate with a damaged track Never rotate a damaged track under power 1 Using a hoist safely lift and support the rear of the snow mobile off the ground 2 Rotate the track by hand to check...

Page 91: ...er surfaces that have little or no snow for lubrication The slide rail needs snow for lubrication Excessive wear indicates insufficient lubrication A new rail slide can cause faster heat build up in l...

Page 92: ...hould be made only after the track is warmed up and limber 1 Turn the engine off 2 Lift the rear of the machine and safely support it off the ground 3 Place the recommended weight or downward pressure...

Page 93: ...ws to provide equal adjust ment on both sides of the track 8 Repeat the measurement on the other side of the track Tip Check more frequently when the machine is new 9 Start the machine and slowly rota...

Page 94: ...op the engine and let the track come to a stop do not apply brakes 3 Inspect track alignment by looking through the track window to make sure the rails X are evenly spaced on each side If the track ru...

Page 95: ...91 MAINTENANCE Steering System Steering Inspection and Adjustment Each week or before a long ride check all steering system fasteners and tighten if necessary X X X X X...

Page 96: ...icle weight compressing the suspension measure 10 inches 25 4 cm forward from the center of the ski mounting bolt See illustration At this point measure between the skis This is measurement X 3 Perfor...

Page 97: ...cle control may result causing serious injury or death Check skags before each use of the snowmobile to ensure positive steer ing characteristics Skags must be replaced when worn to half their orig in...

Page 98: ...wear limit indicator groove to indicate the minimum per missible slide thickness Replace the rail slides if they are worn to the top of the groove at any point along their length Failure to do so may...

Page 99: ...ong the useful life of many components See page 102 for the part numbers of POLARIS products Cleaning and Preservation Proper storage starts with cleaning washing and waxing the hood chassis and plast...

Page 100: ...and corrosion on precision engine parts during storage Whenever the machine is stored for a period of more than 60 days the engine must be fogged with fogging oil Follow the engine fogging instruction...

Page 101: ...sion Moderate track tension should be maintained during summer storage The machine should be supported off the ground to allow the track to hang freely Transporting the Snowmobile Whenever the snowmob...

Page 102: ...544 cc Cylinders 2 Bore x Stroke mm 73x65 Alternator Output 280 watt Carburetor Throttle Body 2 Mikuni Carburetor Model VM34 Idle RPM 1700 200 Cooling Fan Air Ignition Type Kokusan 16 Bit ER Ignition...

Page 103: ...Clip Position 4 4 3 3 2 2 1 1 2400 3000 8000 10000 Main Jet 210 200 190 180 175 170 160 160 Pilot Jet 45 45 45 45 45 45 45 45 Clip Position 4 3 3 2 2 2 1 1 3000 3700 10000 12000 Main Jet 200 190 180...

Page 104: ...d Cooling Engine EC55PM0124 Displacement 544 cc Cylinders 2 Bore x Stroke mm 73x65 Alternator Output 280 watt Carburetor Throttle Body 2 Mikuni Carburetor Model VM34 Idle RPM 1700 200 Cooling Fan Air...

Page 105: ...Clip Position 4 4 3 3 2 2 1 1 2400 3000 8000 10000 Main Jet 210 200 190 180 175 170 160 160 Pilot Jet 45 45 45 45 45 45 45 45 Clip Position 4 3 3 2 2 2 1 1 3000 3700 10000 12000 Main Jet 200 190 180...

Page 106: ...il 2 5 gal 9 5 l Chaincase Lubricants 2873105 Synthetic Chaincase Lubricant qt 95 l 2872951 Synthetic Chaincase Lubricant 12 oz 355 ml Grease Specialized Lubricants 2871312 Grease Gun Kit Premium All...

Page 107: ...o narrow Replace the drive belt Excessive belt sheave clearance SEE YOUR DEALER Drive belt turns over Wrong belt for appli cation Replace the drive belt Clutch alignment out of spec Adjust alignment o...

Page 108: ...ve clearance SEE YOUR DEALER Loose torque stop Inspect and adjust Sticky clutch SEE YOUR DEALER Engine doesn t turn Seized engine SEE YOUR DEALER Seizure is a result of poor lubrication inade quate fu...

Page 109: ...nge plug s Poor engine com pression Mixture is too lean A main jet that is too small will cause seizure result ing in loss of power This indicates a major engine problem that must be repaired before o...

Page 110: ...age 36 Machine darts from side to side Check ski alignment see page 92 Make sure spindles and all steering components turn freely Check for excessive play in steering assembly see your dealer Ensure s...

Page 111: ...atures Check for snow ingestion Ice and snow build up between track and tunnel Warm the engine at least five minutes Take the drive belt off the machine in extremely cold weather and warm it up Break...

Page 112: ...ontained in this manual Your dealer is also familiar with POLARIS policies and procedures and will be happy to assist you When contacting us about parts service or warranty always provide the fol lowi...

Page 113: ...owner reports theft A In addition to notifying the proper law enforcement officials the owner must call POLARIS Customer Service B Owners must provide their name address telephone number and the mode...

Page 114: ...stration Form must be completed by your dealer and submitted to POLARIS within ten days Upon receipt of this registration POLARIS will record the registration for warranty No verification of registrat...

Page 115: ...RIS control This warranty does not cover the use of unauthorized lubricants chemicals or fuels that are not compatible with the snowmobile The exclusive remedy for breach of this warranty shall be at...

Page 116: ...nformation How to Obtain Warranty Service If your snowmobile requires warranty service you must take it to a POLARIS dealer authorized to repair POLARIS snowmobiles When requesting warranty service yo...

Page 117: ...ected by the Owner s manual is highly recommended Should a failure occur dur ing the warranty period resulting from the use of non recommended products warranty coverage may be denied Warranty does no...

Page 118: ...t tension adjustment or altitude compensation failure due to snow water dirt or other foreign substance ingestion contamination improper maintenance modified components use of aftermarket components r...

Page 119: ...s authorized location This policy does not apply to Safety Bulletins How to Get Service In the Country where your vehicle was purchased Warranty or Service Bulletin repairs must be done by an authoriz...

Page 120: ...tices regarding your vehicle If Purchased From A Private Party If you purchase a POLARIS product from a private citizen outside of the country in which the vehicle was originally purchased all warrant...

Page 121: ...components of systems whose only purpose is to control emissions Repairing or replacing other components not covered by this war ranty is the responsibility of the vehicle owner This emissions limited...

Page 122: ...by a defect in material or workman ship This limited warranty does not cover damage due to accidents abuse or improper handling maintenance or use This limited warranty also does not cover any engine...

Page 123: ...r each time your snow mobile is serviced This will provide you and future owners with an accurate log of maintenance and services performed on the snowmobile DATE MILES KM TECHNICIAN SERVICE PERFORMED...

Page 124: ...120 MAINTENANCE LOG DATE MILES KM TECHNICIAN SERVICE PERFORMED COMMENTS...

Page 125: ...121 MAINTENANCE LOG DATE MILES KM TECHNICIAN SERVICE PERFORMED COMMENTS...

Page 126: ...d Preservation 95 Clutch Alignment Offset 82 Clutch and Drive System 96 Clutch Cover Warning 21 Clutch Safety 17 C Clutch System 82 85 Clutching 550 IQ SHIFT 99 550 IQ 136 LXT 101 Cold Weather Drive A...

Page 127: ...80 81 Limiter Strap Position 33 Low Oil Indicator Light 53 Lubrication 66 69 M Maintenance 17 Maintenance Interval Table 63 65 Maintenance Log 119 121 Maintenance Program 62 Maneuverability 17 N No Pa...

Page 128: ...nsion Coupling IQ 34 35 Suspension Inspection Pre Ride 45 Suspension Performance Tips 31 Suspension Front Lubrication 66 Suspension Rear Lubrication 66 T Taillight Brakelight Replacement 81 Throttle C...

Reviews: