background image

Instr 9925231

Rev 03 07/15

Page 2 of 4

REF

QTY

PART DESCRIPTION

PART NUMBER

9*

8

Washer - 0.20 X 0.67 X 0.048

7556034

1

Instructions

9925231

Items marked (*) are included in Hardware Kit PN 2205553.

TOOLS REQUIRED

• Safety Glasses
• Torx Driver Set

IMPORTANT

Your SPORT ROOF KIT is exclusively designed for your vehicle. Please read the installation instructions
thoroughly before beginning. Installation is easier if the vehicle is clean and free of debris. For your safety, and to
ensure a satisfactory installation, perform all installation steps correctly in the sequence shown.

APPROXIMATE ASSEMBLY TIME

Approximately 15–20 minutes

INSTALLATION INSTRUCTIONS

1. Place vehicle in “PARK”. Turn key to “OFF”

position and remove from vehicle.

2. Remove roof panels, front

3

and rear

2

, from

shipping box and place upside down on flat
surface. Ensure surface is clean and will not
damage roof panels.

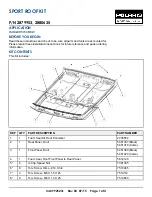
3. If not already installed, press sealing foam

4

into

front channel of rear roof

2

as shown.

4. Optional: Sealant may be applied to rear roof

2

at

each end of sealing foam

4

as shown.

Summary of Contents for 2879953

Page 1: ...includes REF QTY PART DESCRIPTION PART NUMBER 1 1 Foam Seal Kit Roof Perimeter 2205554 2 1 Rear Panel Roof 5451337 Black 5451918 Camo 3 1 Front Panel Roof 5451369 Black 5451920 Camo 4 1 Foam Seal Roof Front Panel to Rear Panel 5814120 5 4 U Clip Speed Nut 7081305 6 8 Torx Screw Hi Lo 14 X 3 4 7519045 7 4 Torx Screw M6 X 1 0 X 20 7519112 8 6 Torx Screw M6 X 1 0 X 25 7519650 Instr 9925231 Rev 03 07 ...

Page 2: ...n and free of debris For your safety and to ensure a satisfactory installation perform all installation steps correctly in the sequence shown APPROXIMATE ASSEMBLY TIME Approximately 15 20 minutes INSTALLATION INSTRUCTIONS 1 Place vehicle in PARK Turn key to OFF position and remove from vehicle 2 Remove roof panels front 3 and rear 2 from shipping box and place upside down on flat surface Ensure su...

Page 3: ...foam seals from kit 1 will be installed Install foam seals along panel edges as shown 7 Install four U clip nuts 5 into front roof mounting pillars Ensure nuts are oriented as shown 8 With help of an assistant place combined roof assembly on top of vehicle ROPS so that front retaining hooks engage slots in upper mount plate and middle retaining hooks are on forward side of ROPS cross member as sho...

Page 4: ... screws 8 as shown NOTE Two additional screws 8 are provided for installation of headliner sold separately to underside of rear roof panel 11 Loosely install four screws 7 through front upper mount plate into U clip nuts 5 as shown 12 Torque all roof screws 7 8 to specification TORQUE 12 15 in lbs 1 4 1 7 Nm ...

Reviews: