background image

3

Telephone Helpline

: 1300225960

Pack Contents

The following is included:

POLAR prides itself on quality and service, ensuring that at the time of packaging the contents are supplied 
fully functional and free of damage.
Should you find any damage as a result of transit, please contact your POLAR dealer immediately.

Installation

1.

Remove the appliance from the packaging. Make sure that all protective plastic film and coatings are 
thoroughly removed from all surfaces. 

2.

Maintain a distance of 20cm (7 inches) between the unit and walls or other objects for ventilation. 
Increase this distance if the obstacle is a heat source. 

Operation

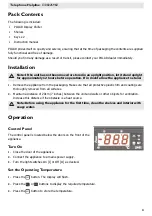
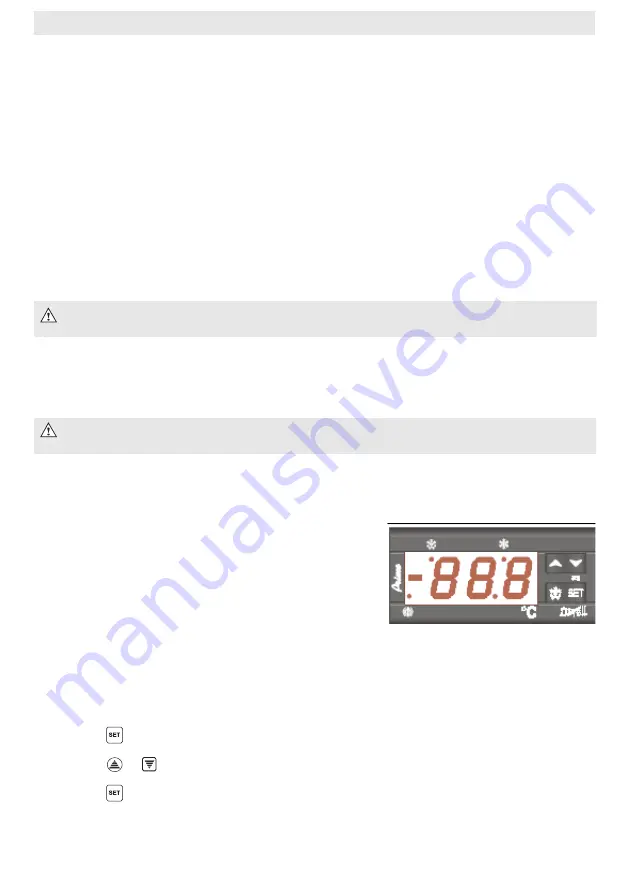
Control Panel

The control panel is located below the doors on the front of the 
appliance.

Turn On

1.

Close the door of the appliance.

2.

Connect the appliance to a mains power supply.

3.

Turn the light switches On [I] or Off [O] as desired.

Set the Operating Temperature

1.

Press the

 button. The display will flash.

2.

Press the

 or

 buttons to display the required temperature.

3.

Press the

 button to store the temperature.

Note: If the unit has not been moved or stored in an upright position, let it stand upright 
for approximately 12 hours before operation. If in doubt allow the appliance to stand.

Note: Before using the appliance for the first time, clean the shelves and interior with 
soapy water.

POLAR Display Chiller

Shelves

Keys  x  2

Instruction manual

Summary of Contents for CD984-A

Page 1: ...Display Chiller Instruction manual Model CD984 A DM075 A DM076 A ...

Page 2: ...igerator Always carry store and handle the appliance in a vertical position and move by holding the base of the appliance Always switch off and disconnect the power supply to the unit before cleaning Keep all packaging away from children Dispose of the packaging in accordance with the regulations of local authorities If the power cord is damaged it must be replaced by a POLAR agent or a recommende...

Page 3: ...nce if the obstacle is a heat source Operation Control Panel The control panel is located below the doors on the front of the appliance Turn On 1 Close the door of the appliance 2 Connect the appliance to a mains power supply 3 Turn the light switches On I or Off O as desired Set the Operating Temperature 1 Press the button The display will flash 2 Press the or buttons to display the required temp...

Page 4: ...he interior of the appliance as often as possible Do not use abrasive cleaning agents These can leave harmful residues Clean the door seal with water only Always wipe dry after cleaning Do not allow water used in cleaning to run through the drain hole into the evaporation pan A POLAR agent or qualified technician must carry out repairs if required Replacing the Interior Lamp 1 Turn Off and disconn...

Page 5: ...e foodstuffs are being stored in the appliance Remove any excessive hot foodstuffs or blockages to the fan Appliance is overloaded Reduce the amount of food stored in the appliance Factory default parameters adjusted Call POLAR agent or qualified Technician The appliance is leaking water The appliance is not properly levelled Adjust the screw feet to level the appliance if applicable The discharge...

Page 6: ...household waste To help prevent possible harm to human health and or the environment the product must be disposed of in an approved and environmentally safe recycling process For further information on how to dispose of this product correctly contact the product supplier or the local authority responsible for waste disposal in your area POLAR parts have undergone strict product testing in order to...

Page 7: ...equirements for Low Voltage Electrical Equipment Standards EN 55014 1 2006 EN 55014 2 1997 A1 EN 61000 3 2 2006 EN 61000 3 3 1995 A1 A2 EN 61000 3 11 2000 EN 55015 2006 EN 61547 1995 A1 AS NZS 60335 2 89 2002 A1 2003 A2 2005 A3 2007 with AS NZS 60335 1 2002 A1 2004 A2 2007 A3 2007 AS 1731 14 2003 ProducerName POLAR Producer Address 15 Badgally Road Campbelltown NSW 2560 Date 09 07 12 Signature Ful...

Page 8: ...CD984A_DM075A_DMO76A_ML_A5_v4 ...

Reviews: