PNMMAN1902 –PNM IT801 User Manual
Piece:
Manual
Quantity:
XXXXX
Size:
8.5 x 11”
Colors:
4/4
Finishing:
Fold, Trim
Mail:
N/A
CREATIVE PROOFREADER COPY COPYWRITER CREATIVE ACCOUNT
DIRECTOR SUPERVISOR SERVICES MANAGER
MANAGER
Program Specific Checklist
Name:
Date:
®
Phone Number
_________
_________
®
URL
_________
_________
®
Program Details
_________
_________
PNMMAN1902
PNM IT801 User Manual
Job Opened:
February 1, 2019
Requested In-Home Date:
February
Latest Revision:
April 5, 2019
Approved:
______________
LETTER
8.5” X 11”
14
PNM Wi-Fi Web-Programmable Thermostat User’s Manual
7.
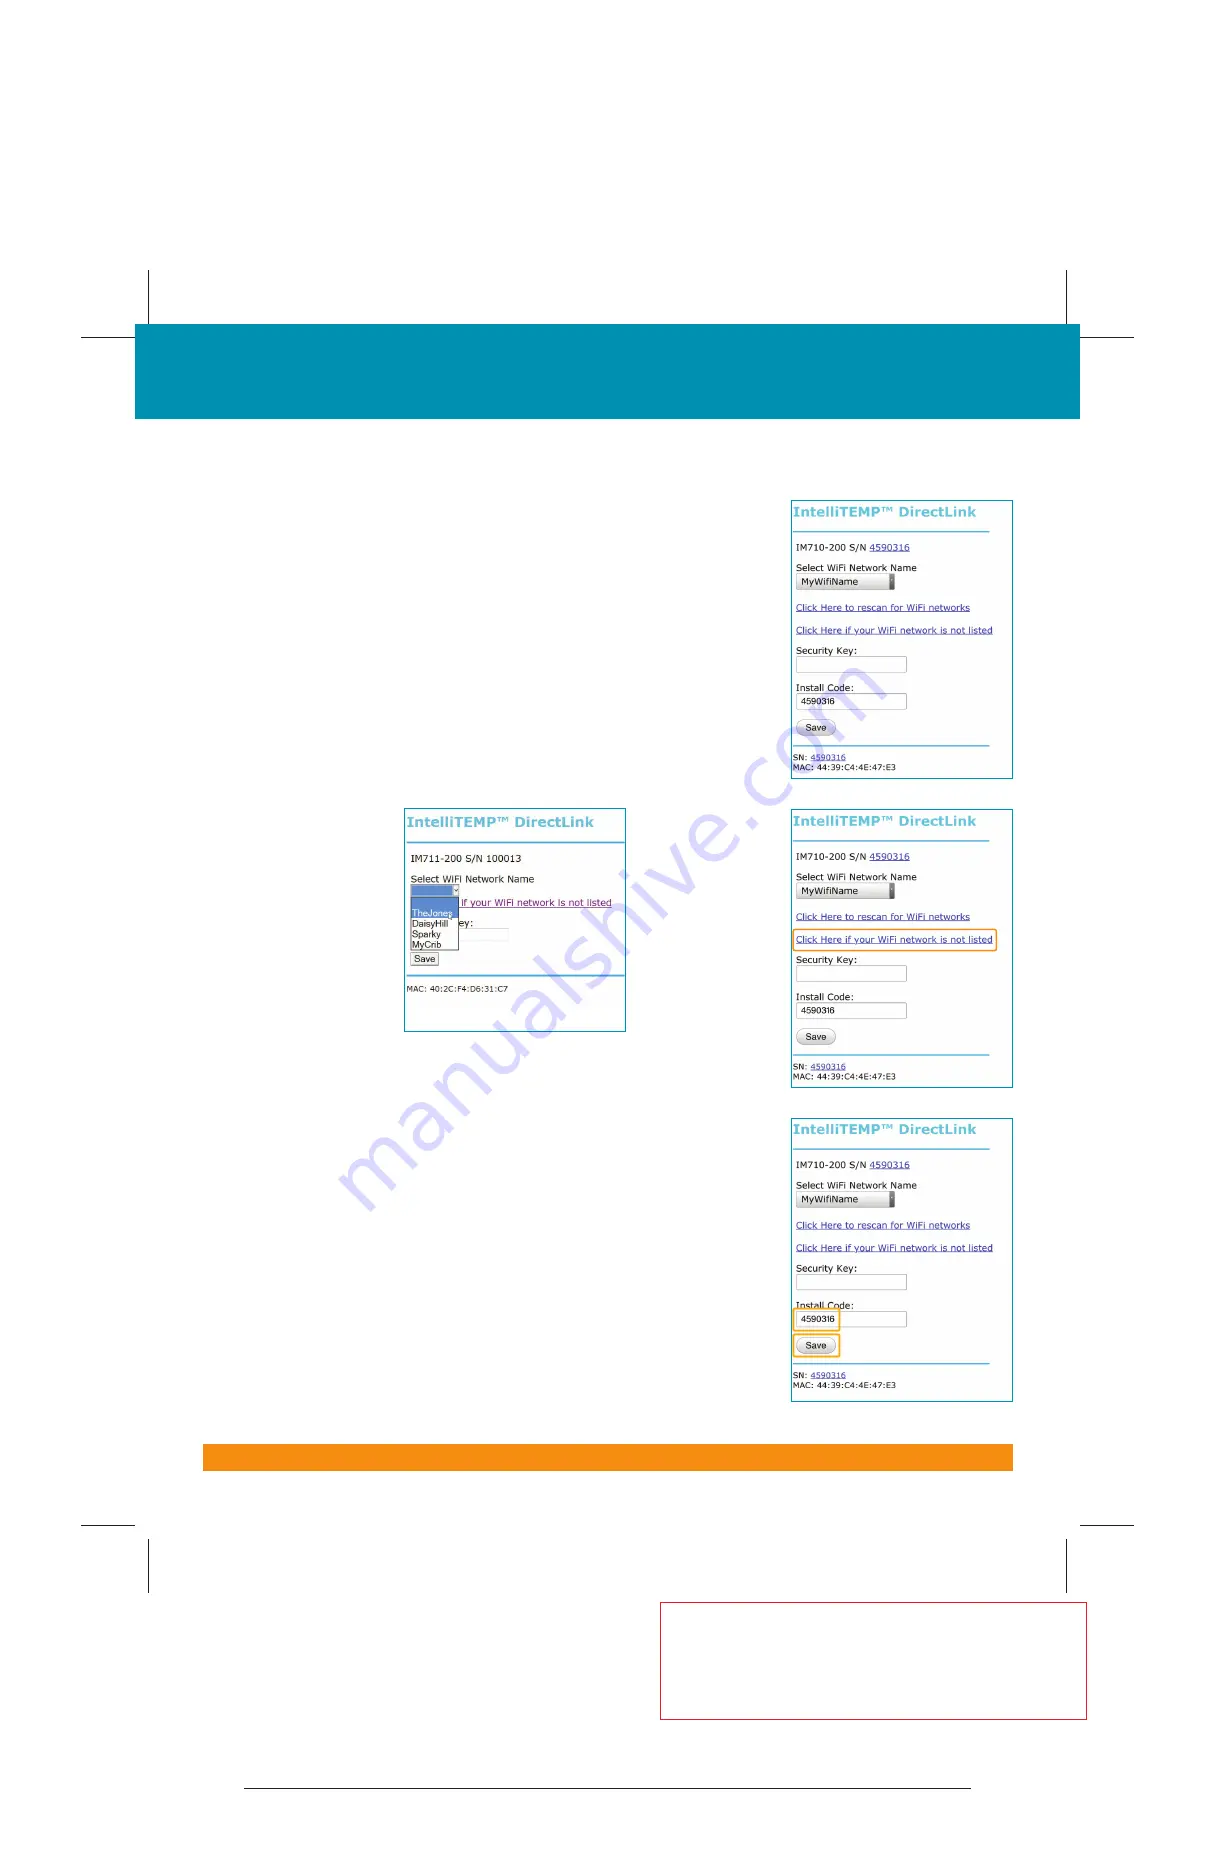
Open the web browser on your device. If your browser is set to automatically open a
web page, the IntelliTEMP configuration page, as pictured to the right, should
automatically appear.
8. If the settings page does not appear after a few seconds, type “directlink/settings” in
the browser's address bar, then press
ENTER
. If the IntelliTEMP configuration page
still does not appear on the thermostat Main Menu screen, press the button next
to
Menu
. Then press the button next to
Other
. The thermostat will display the
Wi-
Fi SETTINGS
menu. Press the button next to
Select
. The message area of the
thermostat will display the Wi-Fi
Network Name to which you are currently
connected. Press the button next to
Next
. The IP Address of your device will be
displayed in the thermostat’s message area. In the browser bar of your device, type
“http://” followed by the IP address displayed on the thermostat. Press
ENTER
.
The IntelliTEMP configuration window will open.
9. Use the dropdown
menu on the
configuration page
to select your user
network name.
10. If your wireless
Internet router is
set to hide the
network name or
your network is not
listed in the
dropdown menu,
click on the link
below the menu to
display the manual
settings page.
11. Enter the Security Key or password for your wireless Internet access.
12. Enter the Install Code for your thermostat. This is the thermostat's serial number
as it is at the top of the screen.
13. Once all fields are filled in correctly, click on the
Save
button.
Step 3: Menus
A. Wi-Fi Settings Menu (continued)


