0000104750/210616/B MobilePro | MobilePro/PTFE
EN - 9
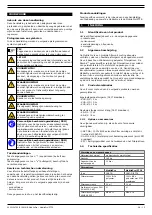
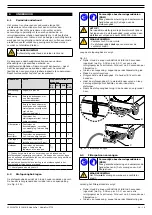
Component
action
Frequency: every X
months
X=
1-3
X=3
X=6
X =12
Dust tray
Empty; refer to
X *)
Housing
Clean the outside
with a non-aggressive
detergent.
X
Clean the inside with
an industrial vacuum
cleaner and remove
dust from the filter
compartment.
X
Check sealing
material. Replace if
necessary.
X
Filter
cartridge
Check for damage,
clogging and
saturation. Replace if
necessary.
X
Extraction fan Check for encrusted
particles. Clean if
necessary.
X
Pressure
regulator
Make sure that the
pressure setting is
correct (5 bar).
X
Mains cord
Check for damage.
Repair or replace if
necessary.
X **)
*) During use, you must check the level of contents in the dust tray
regularly. The emptying frequency depends on the intensity of use
and will be a matter of experience.
In the initial stage, do a check on the level of contents of the dust
tray 2 times per month.
**) Before every use
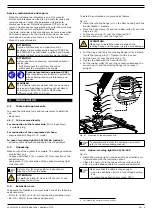
6.2
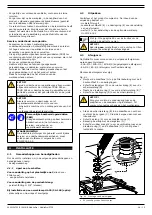
Emptying the dust tray
Location of the dust tray: in the dust tray holder at the bottom
of the unit. The dust tray holder is locked by a draw latch (ref.
Personal protective equipment (PPE)
Wear respiratory protection and protective
gloves when you empty the dust tray.
aTTENTION
The industrial vacuum cleaner that you use to
empty the dust tray must meet dust class H
according to EN 60335-2-69 or HEPA class
(efficiency ≥99.97% at 0.3 µm).
WaRNINg
- Prevent excessive draughts.
- Do
not
empty the dust tray while the fan is
running.
To empty the dust tray, proceed as follows.
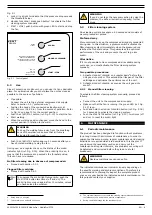
• Option: push and hold the
MANUAL CLEANING
button (ref.
Fig. 5.1B and section 5.3.1) for 5 seconds to activate an
additional cleaning cycle. This takes approx. 60 seconds.
• If applicable: disconnect the compressed air supply.
• De-energize the unit.
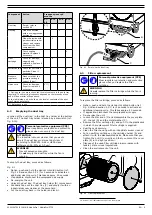
• Unlock the dust tray. The dust tray holder (B) comes down.
• Gradually take out the dust tray (C) and empty it with an
industrial vacuum cleaner at the same time.
• Put the dust tray back in the holder and lock it.
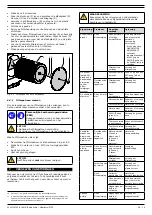
Fig. 6.1 Emptying the dust tray
C
B
A
6.3
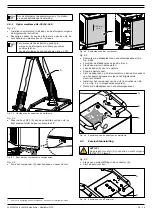
Filter replacement
Personal protective equipment (PPE)
Wear respiratory protection and protective
gloves when you replace the filter
cartridge.
WaRNINg
Do
not
replace the filter cartridge while the fan is
running.
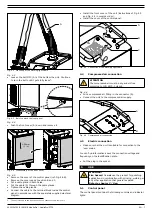
To replace the filter cartridge, proceed as follows.
• Option: push and hold the
MANUAL CLEANING
button (ref.
Fig. 5.1B and section 5.3.1) for 5 seconds to activate an
additional cleaning cycle. This takes approx. 60 seconds.
• If applicable: disconnect the compressed air supply.
• De-energize the unit.
• Loosen the star knob (F) and disassemble the cover plate
(E), the nut (D) and the metal washer (C).
• Remove the filter cartridge (B) and put it in the plastic sack
in which the replacement filter cartridge is supplied.
• Seal the sack securely.
• Clean the filter housing with an industrial vacuum cleaner.
• Put a new filter cartridge on the cartridge holder (A) and
attach it with the disassembled parts. Make sure that you
tighten the nut (D) correctly and that you mount the cover
plate (E) in the right position
10
.
• Dispose of the used filter cartridge in accordance with
federal, state or local regulations.
• Clean the environment of the unit.
Fig. 6.2
B
A
C D
F
E
Filter replacement
10. Sticker “UP” indicates the top of the cover plate.
Summary of Contents for MOBILEPRO
Page 73: ......
Page 74: ...www plymovent com 0000104750 210616 B MobilePro MobilePro PTFE...


