www.plymovent.com
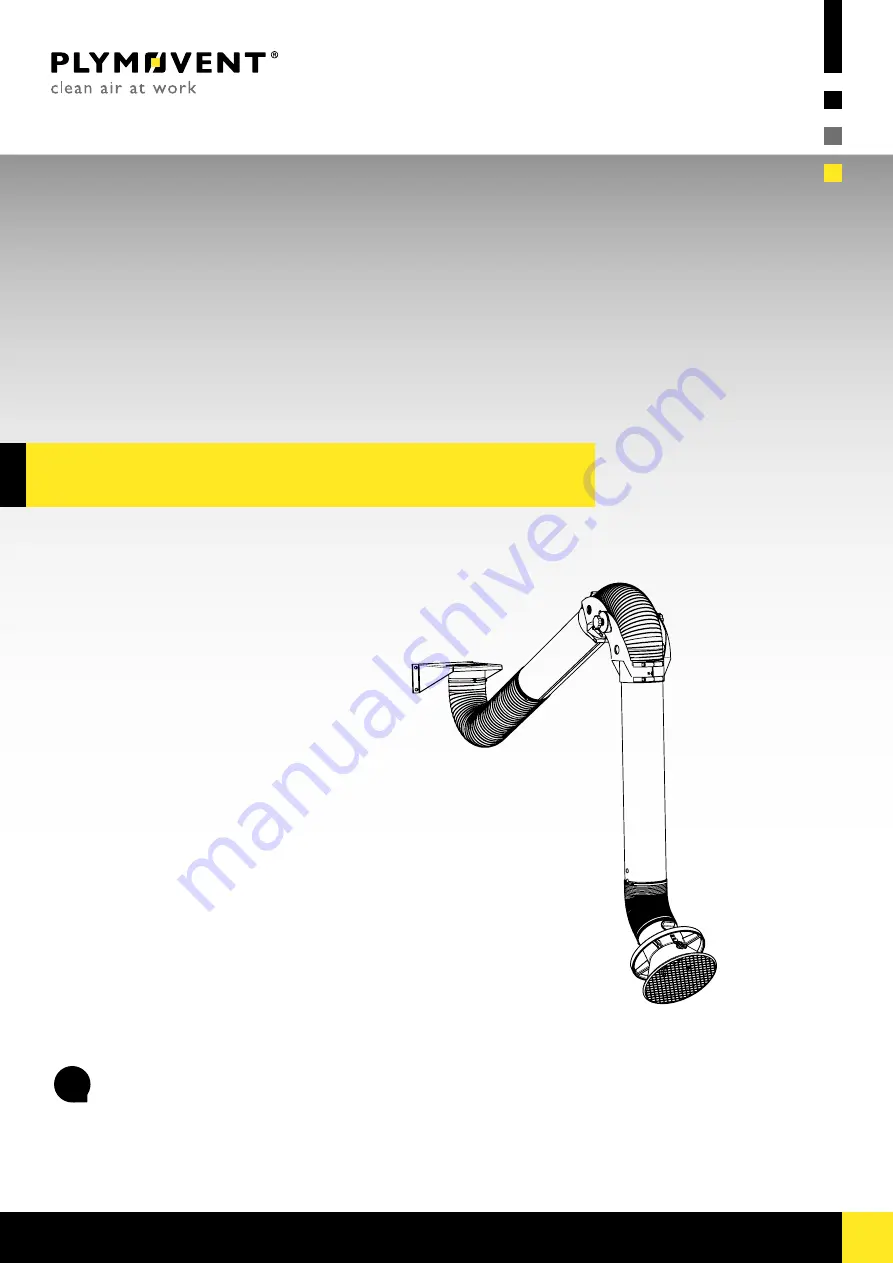
Extraction arm
C
A
B
D
E
H
G
F
KUA-160/H /S
/ATEX
Installation and user manual
EN
Page 1: ...www plymovent com Extraction arm A KUA 160 H S ATEX Installation and user manual EN...
Page 2: ...lation use maintenance and repair of the product mentioned on the cover page of this document This publication is to be used for the standard model of the product of the type given on the cover page T...
Page 3: ...h The arm is fitted with a control valve and is 360 rotatable1 The hood is 90 movable in four directions The KUA 160 arm is available in four different types type H for hanging mounting wall bracket i...
Page 4: ...always fully responsible for observing the local safety instructions and regulations Observe all applicable safety instructions and regulations User manual Everyone working on or with the product must...
Page 5: ...cement saw dust wood dust etc Inspect the product and check it for damage Verify the functioning of the safety features During use always use Personal Protective Equipment PPE to avoid injury This als...
Page 6: ...re depends on the wall type You can mount the wall bracket on e g A a thin brick or concrete wall min thickness 100 mm with four threaded rods M10 B a thick brick or concrete wall with four cotter bol...
Page 7: ...bolts M6x25 washers M6 Fig 4 3 A B C D E F B D F G G Mounting of the arm For mounting of the hood refer to paragraph 4 6 In case of a KUA 160 H ATEX subsequently proceed with paragraph 4 7 4 4 4 Fan...
Page 8: ...ivel ring D with the hose clamp C ATTENTION Make sure to install the washer M20 E between the rotating flange and the swivel ring to avoid damage B A C D F E B A C D F E Fig 4 7 Arm on mobile unit For...
Page 9: ...ith a handle for easy positioning and a valve to regulate or shut off the airflow All movement of the arm is controlled from the hood Fig 5 1 A Sealed shut off valve H D types only B Control valve C H...
Page 10: ...al arm movement If necessary adjust the friction refer to section 6 2 X 6 2 Arm adjustment If the extraction arm or a part of it does not stay in the desired position you must adjust the friction Fig...
Page 11: ...ppendix I regarding basic health and safety requirements in connection with the construction and manufacturing of machinery Applicable standards EN ISO 12100 2010 Safety of machinery Basic concepts ge...
Page 12: ...rane 1 Start with par 4 4 1 par 4 4 2 INS_FlexMax 2 Arm mounting par 4 4 3 par 4 4 3 par 4 4 3 3 Fan mounting par 4 4 4 par 4 4 4 4 Hood mounting par 4 6 par 4 6 par 4 6 KUA 160 H ATEX Wall Stanchion...
Page 13: ...e anchor bolts A A A A mounting plate A mounting plate A mounting plate A DESCRIPTION REV DRAWING NO 3RD ANGLE PROJECTION 0 MATERIAL DR The information contained in this drawing is the sole property o...
Page 14: ...550 0000101906 0000101915 0000101904 0000101905 0000101913 0000101914 0000101908 0000101537 0000102989 0000101903 B C D C D A A B B 0000102396 0000102398 0000102400 0000102397 0000102399 0000102401 00...
Page 15: ...160 4 KUA 160 2S 0000101904 Hose L 850 mm 163 mm incl 2 hose clamps 0000102387 Inner frame KUA 160 2S complete 0000102396 Inner tube KUA 160 2 0000102397 Outer tube KUA 160 2 KUA 160 3S 0000101905 Hos...
Page 16: ...www plymovent com 0000101887 010920 B KUA 160...