A
C
E
B
F
G
H
S2
1
С1
S1
K
2
3
4
5
6
7
1
B1
A2
A1
C2
S1
B2
B2
B3
A3
I
J
K
For a stronger construction, it’s preferably to use glue when
assembling.
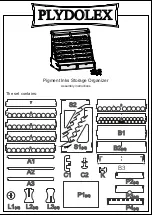
The assembly of this organizer is quite simple. For a stronger
construction, it’s preferably to use glue when assembling. The first thing
to do is to connect the part "1"with the part "S2" as shown in Figure A.
Next, we take the part "S1" and connect it rigidly with the fixing element
"C1" as shown in Figure B.
A special key "
K
" shown in Figure B helps insert more conveniently the
fixing components "C".
Use it during all the steps of the assembly.
Then repeat the steps in Figures A and B for the parts numbered 2-7, so
that it looks like in Figure C. After that put the resulting structure on the
legs and install the false wall "B1" on the back side, securely fixing it with
the fastener "C1" as shown in Figure D. Similarly, perform the steps in
Figure E and fasten everything with the second element "S1", securely
fixing it with the fasteners "C". Connect the parts "B2", as shown in Figure
G. Proceed to the assembly of the shelf, alternately install the parts "B3"
and " A3 " as shown in Figure H.
D


