BITalino R-IoT
User Manual
BR 20200207
26 of 42
That will usually require to log in once again after a reboot of the AP.
Tune the DHCP settings. Most of the time the DHCP will be active on addresses from
192.168.1.100 to 192.168.1.199. Change this from 192.168.1.110 to 192.168.1.150,
anything to avoid having the default destination IP address (192.168.1.100) to be in the
DHCP lease pit. Alternatively, you can leave it in the DHCP area and reserve the address
based on the MAC address of your computer (see DHCP address reservation).
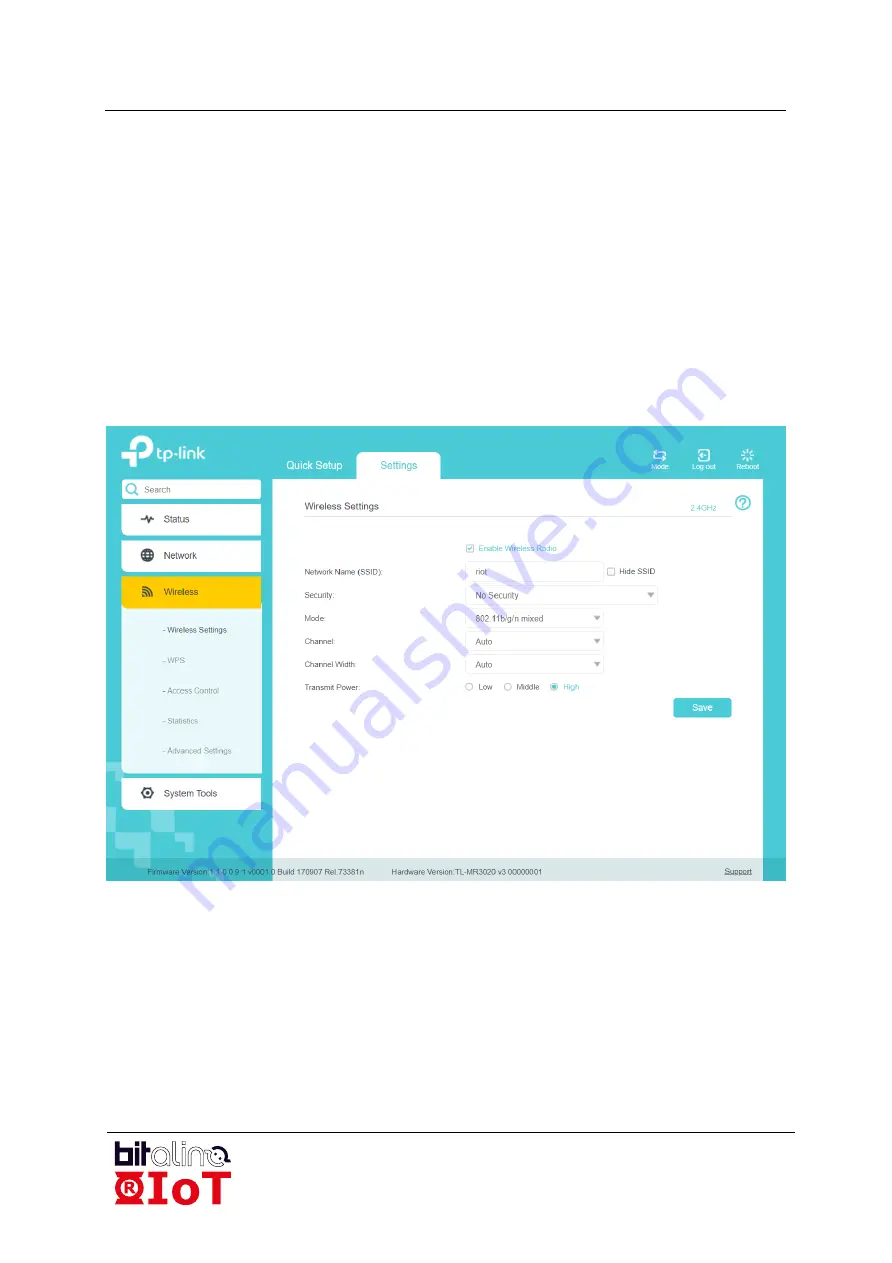
Finally, go to the Wireless settings and change the SSID of your network. If you are using
the R-IoT defaults, use
riot
as the network name.
Select a Wi-Fi channel that is possibly different than your neighbour. Finally, go to the
security section and disable encryption (WPA-2 encryption is supported but not
recommended on first use).
Figure 4-11
–
AP router Configuration, SSID setup.
Once the router is configured with this 192.168.1.XXX address scheme and DHCP, the
computer IP address can be set to 192.168.1.100 (as explained above), the default
destination address the R-IoT module sends data to.
6.3
Local Network Conventions and Standards
This IP address configuration requires a few steps, but it is a onetime process. You've just
created what is possibly your first local network (congratulations!) and moving between
Internet and your sensors will soon become some easy gym!


