8
I
NSTALLING AND
S
ETTING UP THE
S
CANNER
Please follow the step-by-step procedures described below to install the Plustek
scanner.
Attention
Choose a Proper Site First!
Always place your scanner on a level,
smooth and strong surface before proceeding
the scanner setup or any scanning task.
Tilted or uneven surface may cause paper-
feeding errors, scanner damage or personal
injury.
Avoid using the scanner in a dusty
environment. Dust particles and other foreign
objects may damage the unit.
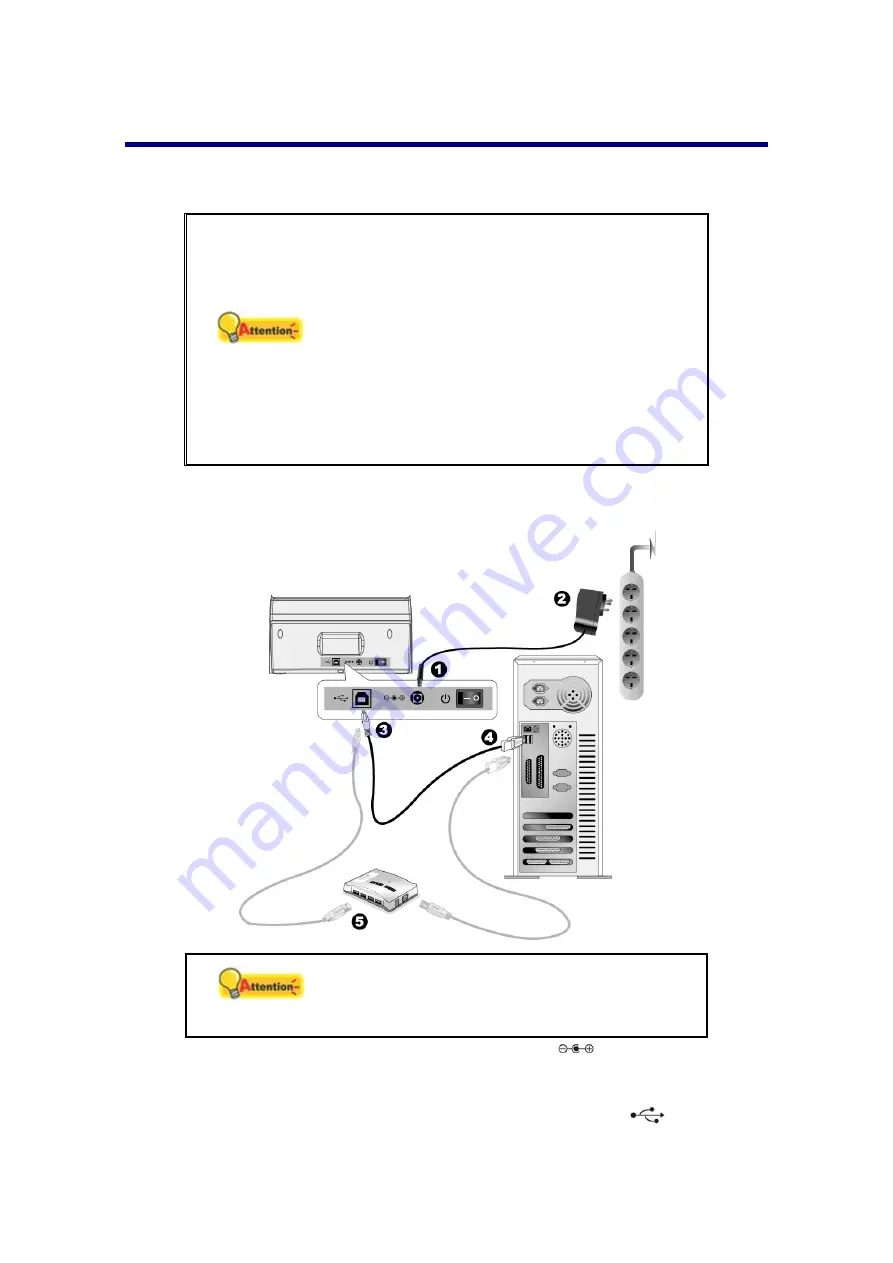
Step 1. Connecting the Scanner to Your Computer
Attention
Please make sure the scanner is turned OFF
before you plug or unplug the scanner power
adapter.
1. Plug the AC adapter into the scanner’s power receptor
.
2. Plug the other end of the AC adapter into a standard AC power outlet.
3. Plug the square end of the included USB cable to the USB port
at the rear of
the scanner.
Summary of Contents for P2-P42
Page 1: ...For Windows User P2 P42 For Mac User P43 P78 ...
Page 2: ...Installation Usage Maintenance ...
Page 39: ...35 Dimensions W x D x H 263 x 132 x 148 mm 10 36 x 5 19 x 5 83 Protocol ISIS TWAIN Compliant ...
Page 43: ...Installation Usage Maintenance ...
Page 55: ...10 ...
Page 73: ...28 ...
Page 75: ...30 Dimensions W x D x H 263 x 132 x 148 mm 10 36 x 5 19 x 5 83 Protocol TWAIN Compliant ...


