

Item code: 039169
2
3
4
5
Plug the power supply into the back of your router (socket marked
Power), then plug the other end of the power supply into the nearest
mains socket.
Plug one end of the grey broadband cable into the DSL socket on the back
of the router and plug the other end into the microfilter (attached to your
phone line in step 1). The microfilter socket is also marked DSL.
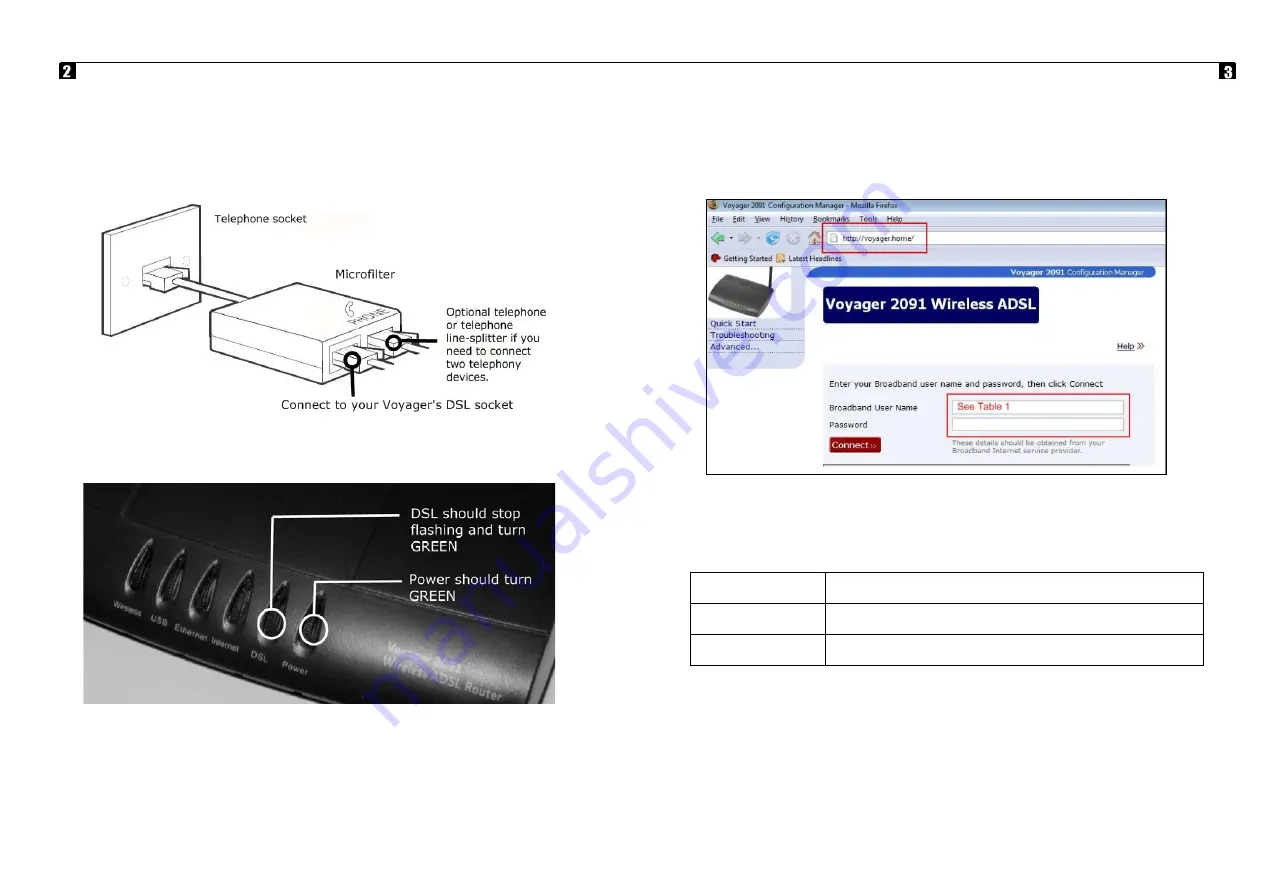
Switch on the router by pressing the Power button on the back of the router
to switch it on. The Power light on the front will turn green.
Wait until the DSL light stops flashing and goes green. This may take a
minute or more. Once the light is green, your Voyager router has been
successfully connected and is ready to be set up.
You can now plug computers into the router using either the USB (blue) or
Ethernet (yellow) cables. We recommend using the Ethernet (grey) cable
unless your computer does not have a network socket. For information about
using the USB connection see Step 5 of the foldout Quick Start Guide.
Start your Internet browser and type in the address http://voyager.home
or if that doesn’t work – http://192.168.1.1
Setting up your broadband connection
7
The Configuration Manager screen should open on the Quick Start page.
8
Enter your Broadband Username and Password. Your Broadband Username will
look like this:
Table 1 Broadband Username
Plusnet
(account username)@plusdsl.net
Force9
(account username)@f9.co.uk
Free-Online
(account username)@freeonline.net
9
(Account username) – this is the username you chose for your product when you
signed up.
Click Connect.
10
Congratulations, you are now connected to your broadband service. You will be
able to access the Internet from any computer that connects to your Voyager
2091 router.
You can continue to use the wired connection or read the next section to setup a
wireless network.
11
6