background image

UNB-4K Series

USER MANUAL

5

PREACUTION

Before operating this unit, please read this manual carefully.

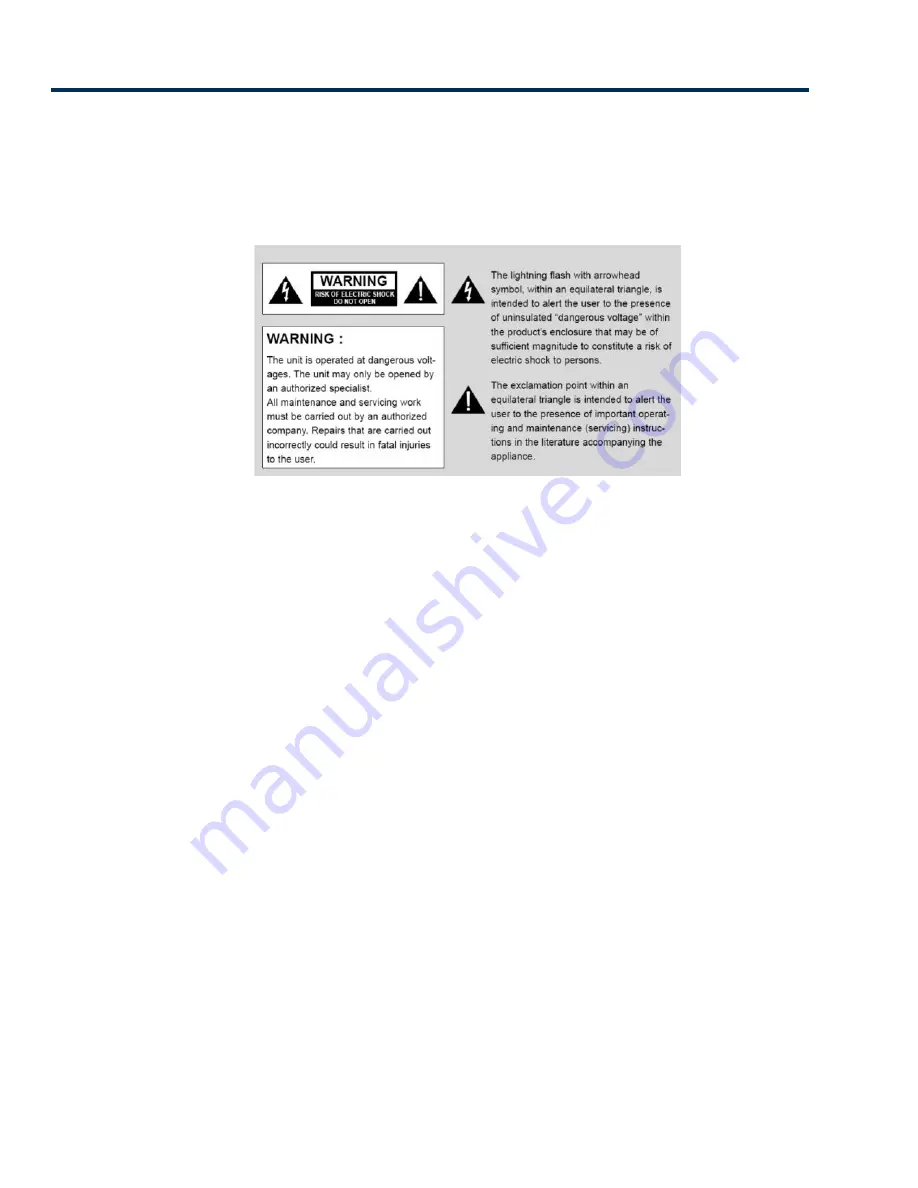
WARNING:

To reduce the risk of any electric shock, please do not remove the back cover. No user serviceable parts inside. Refer any service matters to
qualified service personnel. To prevent fire or shock hazard, do not expose the rear of the set to rain or moisture. Do not rub, clean or hit the Active
Matrix LCD with object that may scratch, mark, or damage the Active Matrix LCD permanently.

CAUTION:

Unauthorized tampering with the inside of the monitor invalidates the warranty.

The manufacturer shall not warrant for any damage caused by improper maintenance and/or repair or work by third parties.

Important safeguards for you and your new product:

Your product has been manufactured and tested with your safety in mind. However, improper use can result in potential electrical shock or fire
hazards. Please read and observe the following safety points when installing and using your new product and save them for future reference.

1.

Read Instructions

2.

Follow Instructions

All operating and use instructions should be followed.

3.

Retain Instructions

The safety and operating instructions should be retained for future reference.

4.

Notice Warnings

All warnings on the product and in the operating instructions should be adhered to.

5.

Cleaning

Disconnect the unit from the mains before cleaning the unit. Do not use abrasive cleaners. Use a damp cloth ONLY for cleaning.

6.

Water and Moisture

Do not use this product near water.

7.

Transporting Product

Summary of Contents for UNB-249-4K

Page 1: ...Operating Instructions UNB 4K Series UNB 249 4K UNB 255 4K ...

Page 2: ...ct Video Source using OSD 14 2 Picture Settings 14 a Contrast Brightness Sharpness Hue_Saturation 14 b Aspect Ratio 16 c Auto Dimming 16 d Dimming 17 e Max Ambient Min Ambient 18 3 Color Settings 19 a Color Temperature 19 b Red Green Blue Gain 19 c Gamma 20 d Input Color Format 21 e Color Range 21 4 Video Wall Settings 22 5 Audio 24 PREACUTION 5 OVERVIEW 7 ADVANCED FEATURES 7 PLURA S3 PLEDGE 8 SPE...

Page 3: ... Transparency 32 c OSD Timeout 32 d Power Save Mode 33 e Local Dimming 34 f Reset 34 g Software Update 35 h Version 36 SERIAL CONTROL PROTOCOL 37 1 Serial Setup 37 a Serial Cable between PC and AD BOARD simple null modem cable 37 2 Protocols 38 a Virtual Remote Control 38 b Setting Parameters to AD BOARD 38 c Data setting only Not adjust function for speed 38 d Read Parameters from AD BOARD 39 3 C...

Page 4: ...UNB 4K Series USER MANUAL 4 a Set Input Source to RGB Input 43 b Read Power State 43 MECHANICAL DRAWINGS 44 1 UNB 249 4K 44 2 UNB 255 4K 45 ...

Page 5: ...r or work by third parties Important safeguards for you and your new product Your product has been manufactured and tested with your safety in mind However improper use can result in potential electrical shock or fire hazards Please read and observe the following safety points when installing and using your new product and save them for future reference 1 Read Instructions 2 Follow Instructions Al...

Page 6: ...ons in the country of use If you are unsure of these regulations please consult a qualified electrician 15 Servicing Do not attempt to service this product by yourself as opening or removing covers may expose you to dangerous voltages or other hazards Refer all servicing to qualified service personnel 16 Damage Service Required Isolate this product from the mains and refer to qualified service per...

Page 7: ...pports SDI HDMI Display Port inputs capability up to UHD 3840 x 2160 resolution through the HDMI daisy chain capability to show one image across the entire video wall Therefore with 4 x 4 UNB 255 setup and one HDMI UHD input looped through the 4 x UNB 255 monitors can accomplish total screen size of 110 diagonal with TRUE UHD resolution and displaying TRUE UHD image This is significant and notewor...

Page 8: ...flexibility and reliability required for 24 7 operation capability Our new UNB 4K series allow you to display monitor and control your digital and other media sources immediately and in real time UNB 4K solution offers color accuracy and reliable display solution to your management engineering monitoring team without any compromise We take each display monitor and control room project seriously an...

Page 9: ...UNB 4K Series USER MANUAL 9 SPECIFICATIONS ...

Page 10: ...link DPMS Red Blink Download Green Fast Blink 2 7 Key Descriptions Button Name Operation Power Power On Off Menu Activates main OSD menu Navigates higher menu in main OSD menu Stops auto frequency searching Exits OSD menu Select Activates OSD menu of input source selecting Changes input source by selecting Executes functions by OSD help commands in main OSD menu ...

Page 11: ...nction by OSD help commands in main OSD menu Increases values of user menu in main OSD menu 3 IR Remote controller Descriptions Button Name Description Power Power On Off Menu Same as Menu key on keypad Up Same as Up key on keypad Down Same as Down key on keypad Right Same as Right key on keypad Left Same as Left key on keypad Enter Same as Select key on keypad EXIT Exit OSD menu Info Displays inp...

Page 12: ...HDMI O P High Definition Multimedia Loop Output DP I P DISPLAYPORT Input up to 3840x2160 60Hz v1 2a RS 232 I P Monitor control via RS232 RS 232 O P RS 232 Loop Output to control series of monitors HD SDI I P Serial Digital Interface Input 1920x1080 HDMI O P Serial Digital Interface Loop Output 1920x1080 USB Download Software Update Port Ethernet Control Via Ethernet ...

Page 13: ... level can be accessed by pressing OK button 1 To display hide the Menu Press the MENU button on the Remote Control to display A second press of the MENU button or a pressing the EXIT button will hide the menu 2 To go to the next level Press OK or Right arrow button on the Remote Control 3 To go back to the previous level Press MENU or Left arrow button on the Remote Control 4 To go to the next me...

Page 14: ...ideo Source using OSD Default available sources Display Port HDMI HD SDI 1 Press the SOURCE button and then button to select each video source 2 Press the OK button to go to desired video source 2 Picture Settings a Contrast Brightness Sharpness Hue_Saturation Contrast ...

Page 15: ...RE mode 2 Press the OK button or RIGHT button to select Contrast menu Press the UP DOWN buttons to navigate through the menu 3 Press the OK button or RIGHT button to select Adjustment menu 4 Press the UP DOWN buttons to make appropriate adjustments 5 Press MENU button or LEFT button to return to the previous menu Or press the EXIT button Hue Saturation Only available in YCbCr input ...

Page 16: ...ct Aspect Ratio menu 3 Press the OK button or RIGHT button to select Adjustment menu 4 Press the UP DOWN buttons to select desired option Full Screen Auto 4 3 5 4 16 9 1 1 5 Press MENU button or LEFT button to return to the previous menu Or press the EXIT button c Auto Dimming Automatic dimming controls by light sensor in Dimming menu 1 Press the MENU button to select the PICTURE mode ...

Page 17: ...Adjust the dimming level of 50 5 Press MENU button or LEFT button to return to the previous menu Or press the EXIT button d Dimming Manually adjust the brightness of the screen Auto Dimming Mode Off The ability to adjust the Backlight of Panel 1 Press the MENU button to select the PICTURE mode 2 Press the OK button or RIGHT button and then DOWN button to select Dimming menu 3 Press the OK button o...

Page 18: ...lect Max Min Dim Ambient menu 3 Press the OK button or RIGHT button to select Adjustment menu 4 Press the UP or DOWN button to select desired option Max Ambient The maximum dimming set to 100 units Min Ambient The minimum dimming set to 10 units 5 Press MENU button or LEFT button to return to the previous menu Or press the EXIT button Ambient Displays the ambient brightness data If the light senso...

Page 19: ...button or RIGHT button and then DOWN button to select Color Temperature menu 3 Press the OK button or RIGHT button to select Adjustment menu 4 Press the UP or DOWN button to select desired option 3200K 5600K 6500K 7800K 9300K User 5 Press MENU button or LEFT button to return to the previous menu Or press the EXIT button If you change the GAIN value the user mode will be activated b Red Green Blue ...

Page 20: ...U button or LEFT button to return to the previous menu Or press the EXIT button c Gamma Adjust the Gamma values 1 Press the MENU button and then DOWN button to select the Color 2 Press the MENU button and then DOWN button to select the Gamma 3 Press the OK button or RIGHT button to select Adjustment menu 4 Press the UP DOWN button to select desired option 2 0 2 2 2 35 2 4 2 6 We recommend the Plur...

Page 21: ...nt menu 4 Press the UP or DOWN button to select desired option RGB YPbPr Auto Select 5 Press MENU button or LEFT button to return to the previous menu Or press the EXIT button e Color Range Check the color space of the input signal to adjust the screen 0 255 16 235 The change to this function is not recommended 1 Press the MENU button and then DOWN button to select the Color 2 Press the OK button ...

Page 22: ...ALL Stack Application 1 Press the MENU button and then DOWN button to select the Video Wall Settings 2 Press the OK button or RIGHT button and then DOWN button to select Second Settings 3 Press the OK button or RIGHT button to select Adjustment menu 4 Press the UP or DOWN button to select desired option 5 Press MENU button or LEFT button to return to the previous menu Or In order to come out at a ...

Page 23: ...age Support up to 11step X position Coordinate of video image s column position Y position Coordinate of video image s row position Setting the Bezel Corrections for Natural Tiled Image Panel X X Gap Proportional Value of Vertical Bezel to Panel size by Per mil unit Y Gap Proportional Value of Horizontal Bezel to Panel size by Per mil unit Set ID Active Set ID ...

Page 24: ...hen use 0 9 button to select the Active SET ID 2 If Press the RED button delete ID number 5 Audio 1 Press the MENU button and then DOWN button to select the Audio Settings 2 Press the OK button or RIGHT button and then DOWN button to select Second Settings 3 Press the OK button or RIGHT button to select Adjustment menu 4 Press the UP or DOWN button to select desired option 5 Press MENU button or L...

Page 25: ... OK button or RIGHT button to select Adjustment menu 4 Press the UP or DOWN button to select desired option 5 Press MENU button or LEFT button to return to the previous menu Or press the EXIT button Off Set the fan is always off regardless of the value of the temperature sensor On Set the fan is always on regardless of the value of the temperature sensor Auto Fan is automatically driven according ...

Page 26: ...ption 5 Press MENU button or LEFT button to return to the previous menu Or press the EXIT button Fan Active Temperature Adjusts fan temperature in Celsius degree Available only when the Fan Control setting is set to Auto Hysteresis Variable range of Fan on off interval Shutdown Adjust shutdown mode temperature by Celsius degree When and if the current temperature reaches the shutdown temp the moni...

Page 27: ...ect Network 3 Press the OK button or RIGHT button to select Adjustment menu 4 Press the UP or DOWN button to select desired option 5 Press MENU button or LEFT button to return to the previous menu Or press the EXIT button Disable Communication will ONLY be available VIA RS 232 Enable Communication will be available using NETWORK b Load Network Setting 1 Press the MENU button and then DOWN button t...

Page 28: ...ion which is stored in the LAN sub board c DHCP 1 Press the MENU button and then DOWN button to select the Network 2 Press the OK button or RIGHT button and then DOWN button to select DHCP 3 Press the OK button or RIGHT button to select Adjustment menu 4 Press the UP or DOWN button to select desired option 5 Press MENU button or LEFT button to return to the previous menu Or press the EXIT button O...

Page 29: ...OK button or RIGHT button and then DOWN button to select Save Current Setting 3 Press the OK button or RIGHT button to select Adjustment menu 4 Press the UP or DOWN button to select desired option 5 Press MENU button or LEFT button to return to the previous menu Or press the EXIT button To save the current settings to LAN sub board ...

Page 30: ... button to select the Timer Settings 2 Press the OK button or RIGHT button and then DOWN button to select Second Settings 3 Press the OK button or RIGHT button to select Adjustment menu 4 Press the UP or DOWN button to select desired option 5 Press MENU button or LEFT button to return to the previous menu Or press the EXIT button b Timer Settings 1 Press the MENU button and then DOWN button to sel...

Page 31: ...for the monitor to start automatically Off Time Set the time for the monitor to power off automatically 9 Other Settings a Language Menu Language can be altered or changed based on the user preference 1 Press the MENU button and then DOWN button to select the Other Settings 2 Press the OK button or RIGHT button to select Language menu 3 Press the OK button or RIGHT button to select Adjustment menu...

Page 32: ...ttings 2 Press the OK button or RIGHT button and then DOWN button to select Menu Transparency menu 3 Press the OK button or RIGHT button to select Adjustment menu 4 Press the UP or DOWN button to select desired option 5 Press MENU button or LEFT button to return to the previous menu Or press the EXIT button c OSD Timeout Set the OSD duration ...

Page 33: ...EFT button to return to the previous menu Or press the EXIT button d Power Save Mode Shut down the monitor if the input source is not present at period of time 1 Press the MENU button and then DOWN button to select the Other Settings 2 Press the OK button or RIGHT button and then DOWN button to select Power Save Mode menu 3 Press the OK button or RIGHT button to select Adjustment menu 4 Press the ...

Page 34: ...her Settings 2 Press the OK button or RIGHT button and then DOWN button to select Local Dimming menu 3 Press the OK button or RIGHT button to select Adjustment menu 4 Press the UP or DOWN button to select desired option 5 Press MENU button or LEFT button to return to the previous menu Or press the EXIT button f Reset Restore factory Settings ...

Page 35: ...are Update Software update function using the USB MEMORY 1 Save the update file to a USB memory stick ex mergy_151223 bin 2 Insert the USB stick into the socket for download 1 Press the MENU button and then RIGHT button to select the Other Settings 2 Press the OK button or RIGHT button and then DOWN button to select Software Update menu 3 Press the OK button to select Enter 4 Normal Progress USB s...

Page 36: ...USB stick Please check download file 5 When the update is successfully completed the monitor will restart automatically h Version Check the information of the current Firmware 1 Press the MENU button and then DOWN button to select the Other Settings Version Date ...

Page 37: ...Item Settings Baud rate 19200bps Data Bit 8bit Stop Bit 1bit Parity Bit None Stream Control None a Serial Cable between PC and AD BOARD simple null modem cable CONNCTOR1 CONNCTOR2 FUNCTION 2 3 RX TX 3 2 TX RX 5 5 SIGNAL GROUND 9 9 IR BYPASS SIGNAL CONNECTOR1 CONNECTOR2 ...

Page 38: ...mple 0xF4 Start Sending 4 Bytes of Packet Data 0xF5 0x88 ID 0 0xFE FE PARAM VALUE PC CMD Packet 5Bytes Command Format 0xFX F Command Send Start X No of Byte to Send Current Example 0xF5 Start Send 5 Byte of Packet Data PARAM xor VALUE 0xF1 AD BOARD Response CMD Check Sum ACK PARAM xor VALUE xor 0xAA 0xF1 NACK 0xF5 0x88 ID 0 0xFE FE PARAM VALUE PC CMD Packet 5Bytes Command Format 0xFX F Command Sen...

Page 39: ...E 0xFC Set Get Param 0x00 0x00 0xFF By Min Max Not Send in Get Mode LANGUAGE 0 English 1 TBD 2 TBD 3 TBD 4 TBD 5 TBD 0x01 SOURCE Linker spec DP HDMI 1 0 VGA 1 DP 2 HDMI1 3 HDMI2 4 HDMI3 5 DVI 0x03 COLORTEMP 0 5700K 1 6500K 2 9300K 3 User 0xF4 0x89 ID 0 0xFE 0XFC PARAM VALUE 0xF1 PC CMD Packet 4Bytes AD BOARD Response CMD Packet 1Byte Command Format 0xFX F Command Start Sending X No of Byte to Send...

Page 40: ...4 100 0x0F Aspect Ratio 0 Full Screen 1 Auto 2 4 3 3 5 4 4 16 9 5 1 1 0x10 Red Gain 0 0 FF 255 0x11 Green Gain 0 0 FF 255 0x12 Blue Gain 0 0 FF 255 0x17 Mute 0 MUTE ON 1 MUTE OFF 0x1B VOLUME 0 0 64 100 0x23 ON HOUR 0 0 17 23 0x24 ONMINUTE 0 0 3B 59 0x25 ON TIME ONOFF 0 Off 1 On 0x27 OFF HOUR 0 0 17 23 ...

Page 41: ...3 CURRENT MINUTE 0 59 0x36 REMOTE LOCK 0 Off 1 On 0x37 ILLUMINANCE 7 8 0x38 MAX_ILLUMINANCE 2 2 200 FF 25000 0x39 MIN_ILLUMINANCE 3 1 10 FF 2550 0x3A AUTO_DIM 0 Off 1 On 0x3B DIM_LEVEL 4 0 0 64 100 0x3C CURTEMP_MAIN 5 8 0x3E FAN ACTIVE TEMP 5 3C 0 B4 60 0x40 FAN_CONTROL 0 Off 1 On 2 Auto 0x42 X POSITION 1 1 0B 11 0x43 Y POSITION 1 1 ...

Page 42: ...O ADJUST 1 0x6A MFC 0 OFF 1 LOW 2 MIDDLE 3 HIGH 0x6B POWER SAVE MODE TBD TBD 0x68 RESET 1 0xFE POWER 0 Off 1 On Notice 1 CURSOURCE Setting Value AV1 1 AV2 2 SVIDEO 4 COMP1 7 HDIM 11 DVI12 DSUB 10 MMP 15 2 MAX_ILLUMINANCE Settings Setting Value Ambient Level by LUX 100 Ex Desired Ambient is 10000 Lux Setting is 100 10000 100 3 MIN_ILLUMINACE Settings Setting Value Ambient Level by LUX 10 ...

Page 43: ...esis by Celsius x 2 Ex Desired Hysteresis is 2 Setting is 4 2 x 2 Active Gap 7 ILLUMINACE Current lux 10 If Cur_lux 2550 then Value 255 8 Read only Command 9 Gap Settings Setting Value int 1000 Gap Active 4 Control Command Example a Set Input Source to RGB Input b Read Power State 0xF4 Start Send 0x89 Target 0 ID 0xFE Set Param CMD 0xFE POWER STS 1 on or 0 0ff Value 0xF1 StartSend PC CMD Packet 4B...

Page 44: ...UNB 4K Series USER MANUAL 44 MECHANICAL DRAWINGS 1 UNB 249 4K ...

Page 45: ...UNB 4K Series USER MANUAL 45 2 UNB 255 4K ...

Page 46: ...www plurabroadcast com Phoenix New York Germany Dubai Seoul Mexico City ...

Reviews: