

FIGURE 3
FIGURE 4
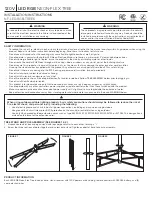
FIGURE 5
ATTACHING RECEIVER/POWER SUPPLY AND CONTROLLING (SEE FIGURE 5):
NOTE: Do not operate with any other controllers, power supplies or remote controls other than
those furnished with the product.
1. Attach receiver/power supply to 120V power cord and plug by aligning mating connections
and turning tightly to secure. Plug into a 120V outlet. For outdoor installations, make sure to
use a GFCI protected circuit or a cord and plug GFCI receptacle with this level of protection.
2. Remove clear protective plastic from battery-operated remote control.
3. Use the center button to control 7 static colors and 3 multi-color patterns (red, blue, green,
purple, light green, light blue, lavendar-white, RGB multi, pastel multi, combination multi).
4. Use the left and right arrows to advance through various fade and chase functions.
5. Use the rabbit or tortoise buttons for faster or slower speeds.
6. Use the up arrow to increase brightness; and the down arrow to decrease brightness.
7. Use the buttons in the lower row to activate dynamic sequence of end to middle chasing,
spiral chasing and pulsing effects.
NOTE: Since the control uses Infrared (IR) technology to signal the receiver, the remote and the
‘eye’ on the receiver must be used where they are in line of sight with each other.
LED RGB
NEON-FLEX TREE
120V
INSTALLATION INSTRUCTIONS
NF-LED-RGB-TREE6
INSTALLING SPIRAL TREE ONTO STAND (SEE FIGURES 3 & 4):
1. Insert star frame center pole into hole in plastic plate and hold together.
2. Holding as flat as possible in other hand, lift spiral tree up onto top of the pole and place star frame into pole.
3. Depress pole pin, aligning it with hole in pole so it locks in place.
4. Loop clear bands over the metal hooks on outer ends of the stand’s frame. Optionally, use ground stakes, ties and nylon lines to anchor
to the ground.
W


