


60
4
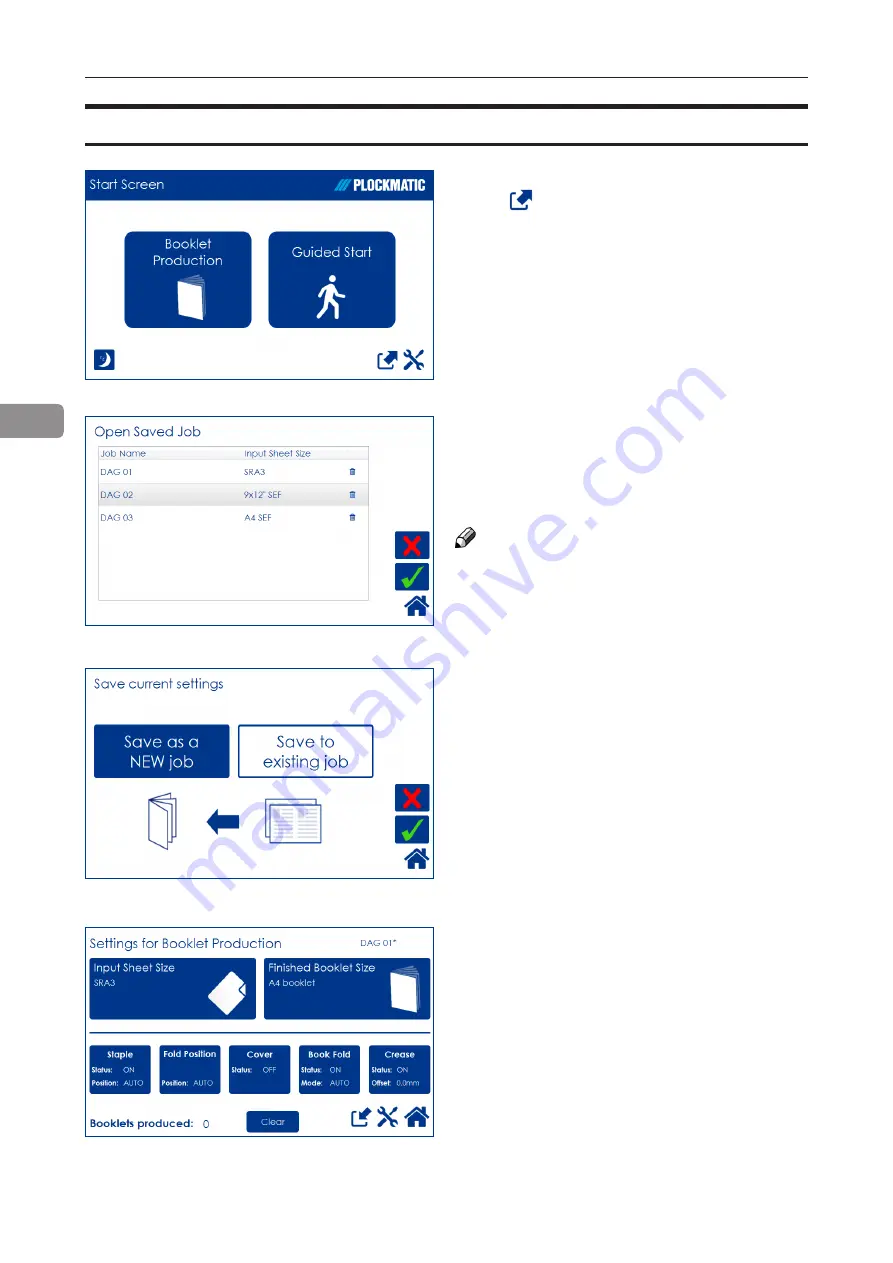
Opening and handling stored Jobs
The name of the currently loaded job is shown
in the upper right corner. An asterisk next to the
name shows that changes to the job have been
made and that the changes have not yet been
saved.
Open (load) any stored job by pressing the job
and confirm by pressing the green [check] mark.
Delete any stored job by pressing the job but-
ton, the waste bin symbol and then confirm by
pressing the [Yes] button.
NOTE:
The currently loaded job cannot be deleted.
To access already stored jobs,
press from the
Start Screen
.
The button [Save to existing job] is only avail-
able if a saved job is currently loaded. Press
the [Save to existing job] button to overwrite the
currently loaded job.
Press the green [check] button to confirm.
Summary of Contents for BLM 35
Page 6: ...Page intentionally blank ...
Page 10: ...10 Page intentionally blank ...
Page 19: ...19 Options Rotate Crease Trim Module 1 Top cover 2 Side door 1 2 ...
Page 32: ...Page intentionally blank ...
Page 54: ...Page intentionally blank ...
Page 72: ...Page intentionally blank ...
Page 89: ...89 7 Cleaning the paper path sensors 5x continued Rotator sensor Registration sensor ...
Page 108: ......


